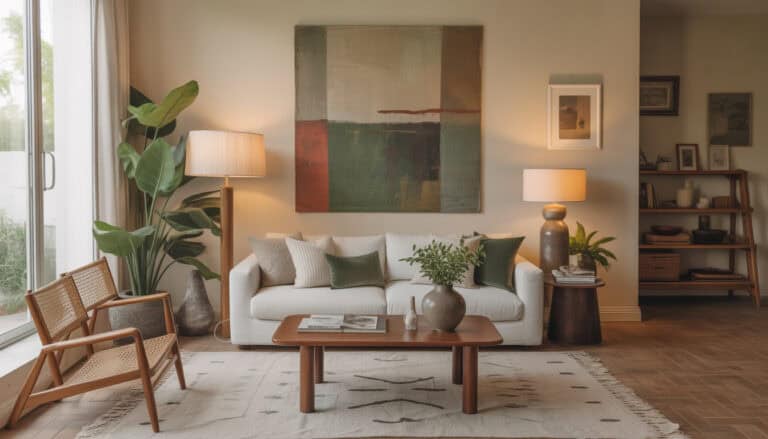
How To Create A Whimsical Living Room With Playful Style
I’ll never forget the moment I realized our living room had become a beige wasteland of “adult” furniture that my boys tiptoed around like it was a museum.
That’s when I decided enough was enough – if this space was going to be lived in (and let’s be honest, destroyed daily), it might as well be magical! What happened next transformed not just our room, but how our whole family experiences home.
Embrace the Chaos with a Playful Color Palette
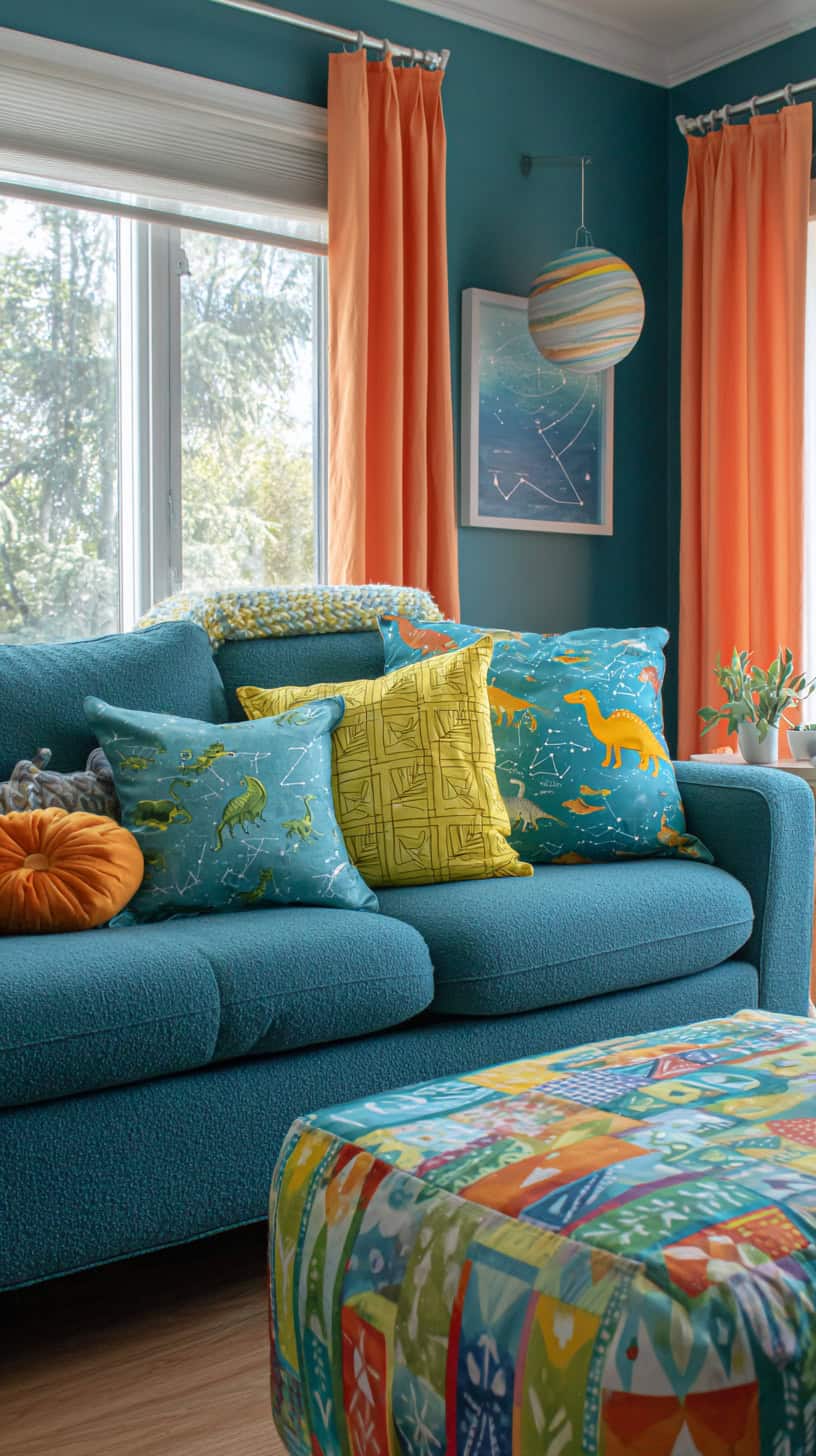
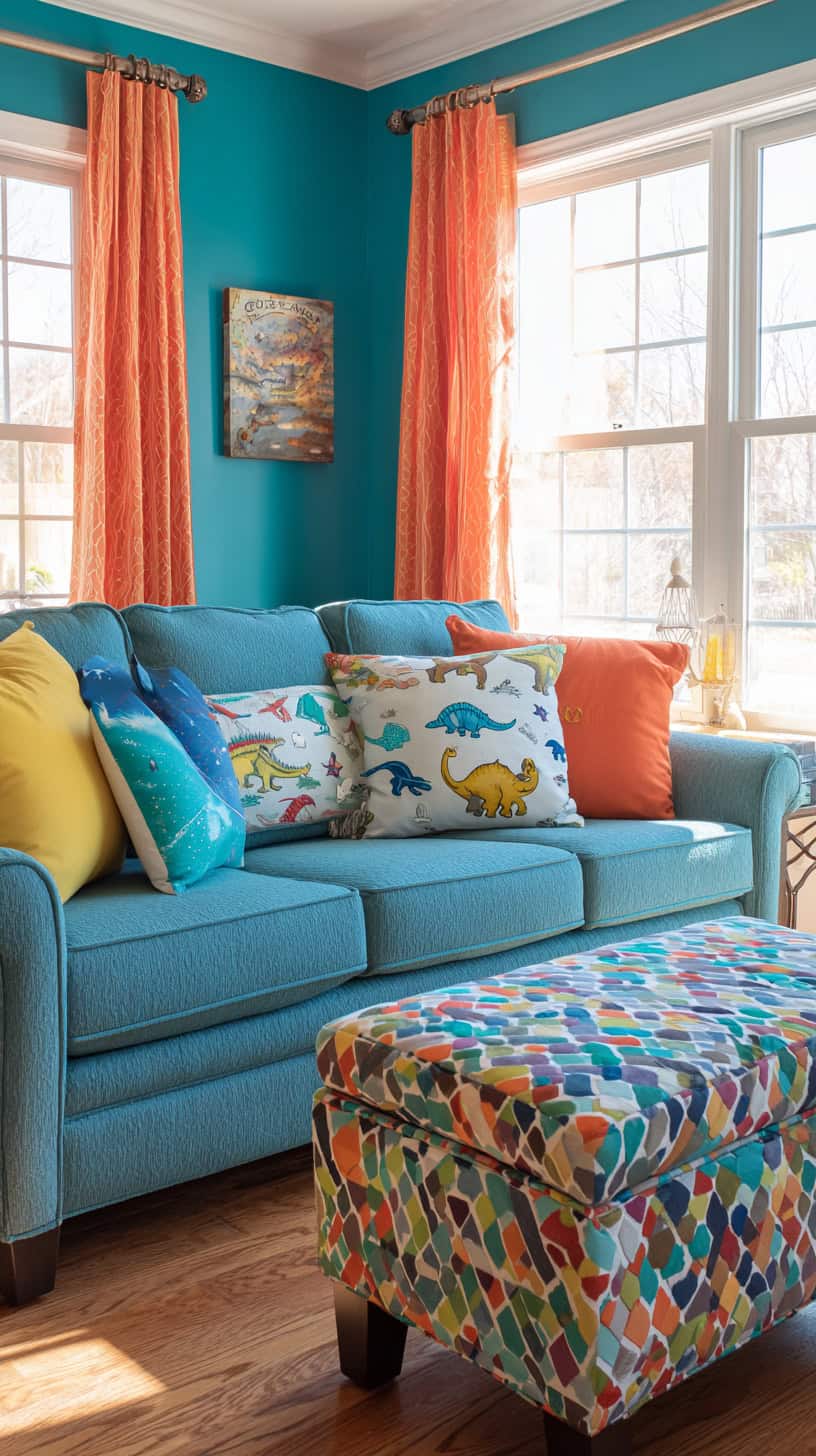
Let me tell you, ditching the neutral color scheme was the most liberating decision I’ve made as a mom-decorator. I started by identifying one bold color that made my heart happy – for us, it was a vibrant teal that reminded me of adventure and ocean waves. Then I layered in pops of sunshine yellow and coral orange through pillows, curtains, and even a statement wall.
The secret weapon? Custom printed fabrics from online print shops where you can upload your own designs or choose from thousands of patterns. I found dinosaur prints, constellation maps, and abstract geometric shapes that felt playful without screaming “preschool classroom.” These fabrics became throw pillow covers (I bought the cheap inserts at a big box store), a simple valance for our main window, and even a slipcover for our tired ottoman.
Here’s my budget breakdown: Instead of buying designer pillows at $40-60 each, I ordered two yards of custom fabric for $35 and made four pillow covers in an afternoon using my basic sewing skills (seriously, if you can sew a straight line, you can do this). The boyish energy that used to bounce off those boring beige walls now feels channeled into something intentional and joyful. My middle son told me our living room feels like “the inside of a treasure map,” and honestly, I’ll take that as the highest compliment!
Don’t be afraid to mix patterns either. I combined stripes with polka dots and florals with geometric prints – the trick is keeping your color palette consistent. When everything shares two or three main colors, even wildly different patterns create a cohesive, wonderland vibe rather than visual chaos.
DIY Wall Wonders That Spark Imagination
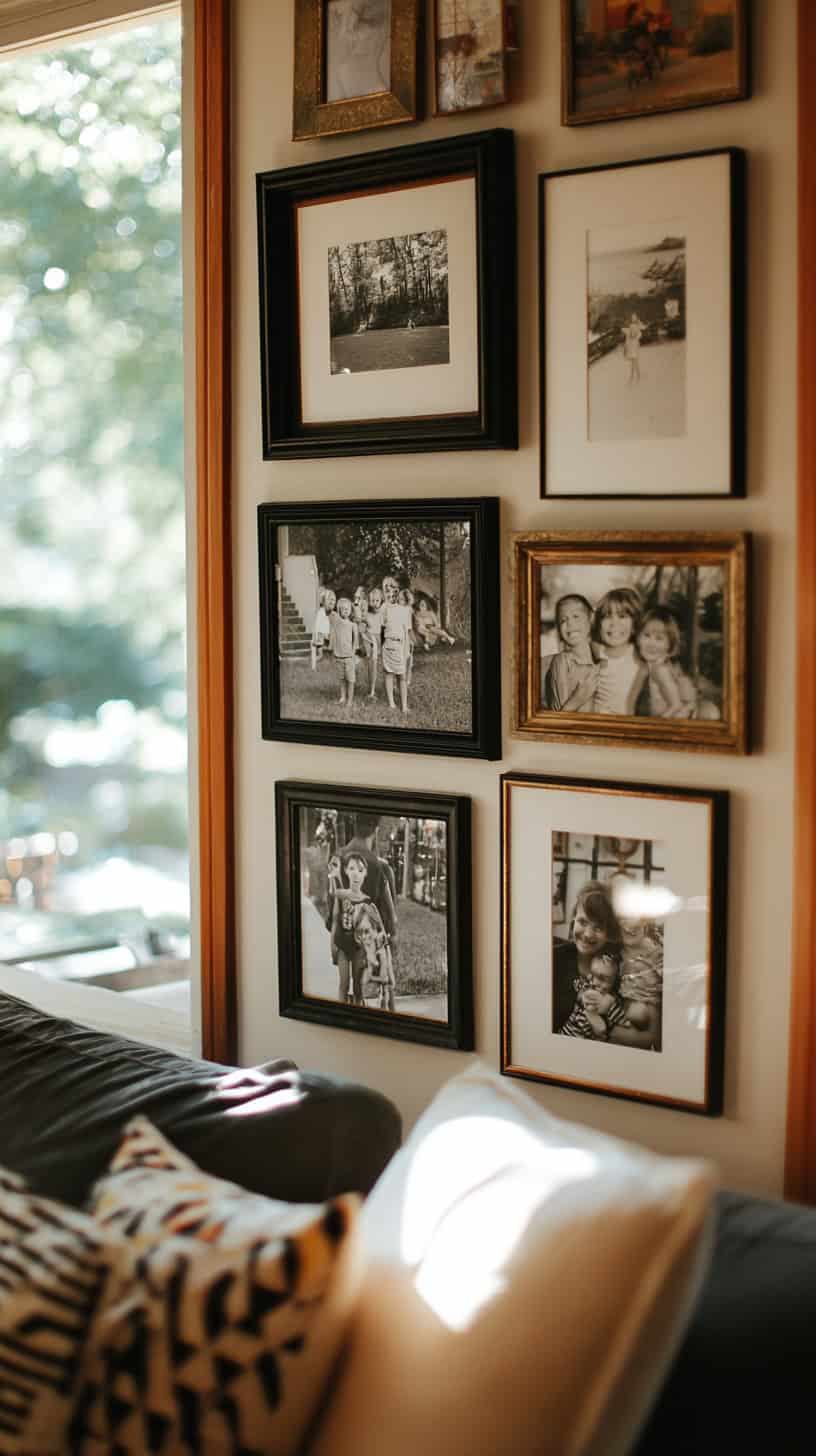
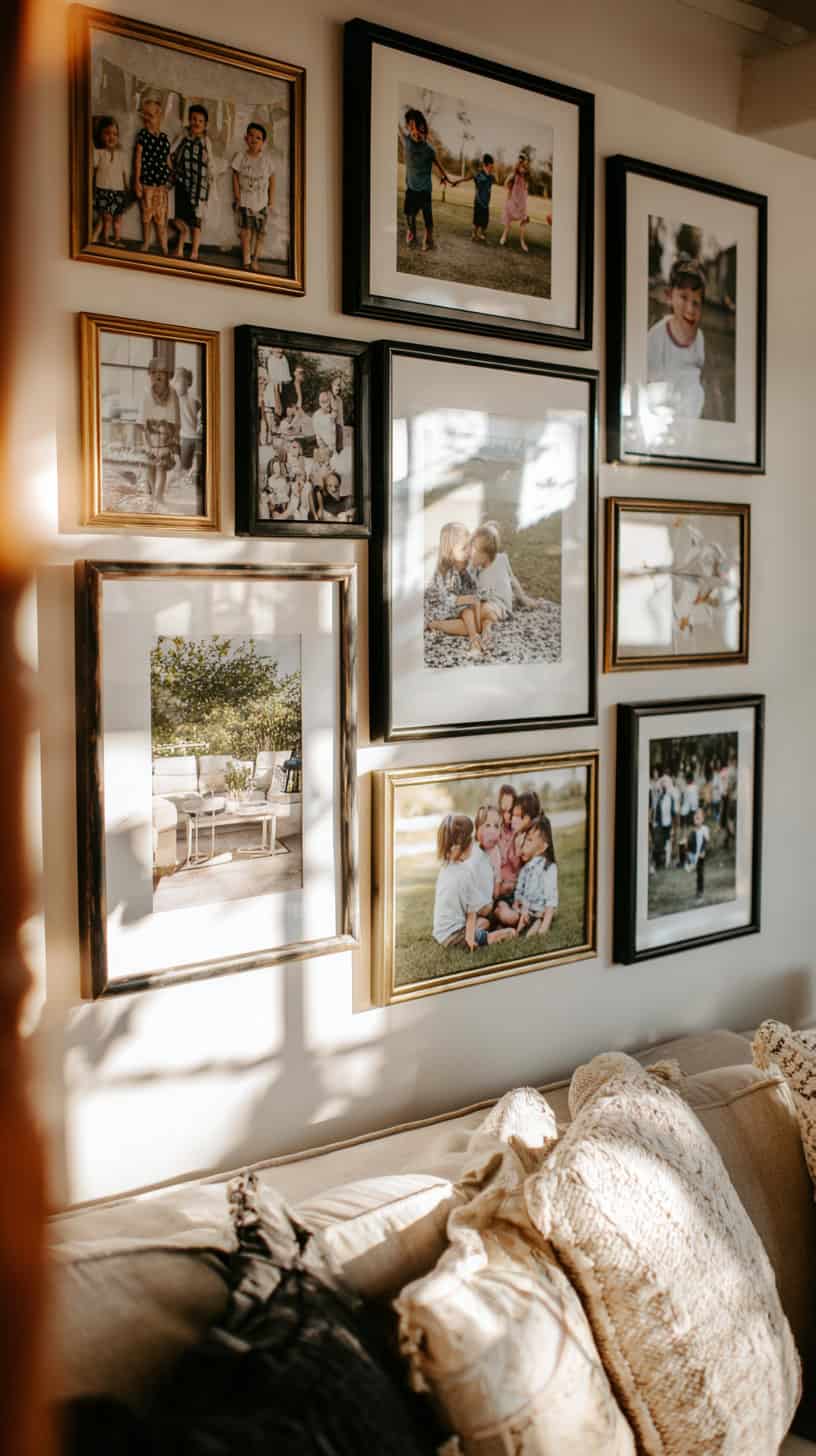
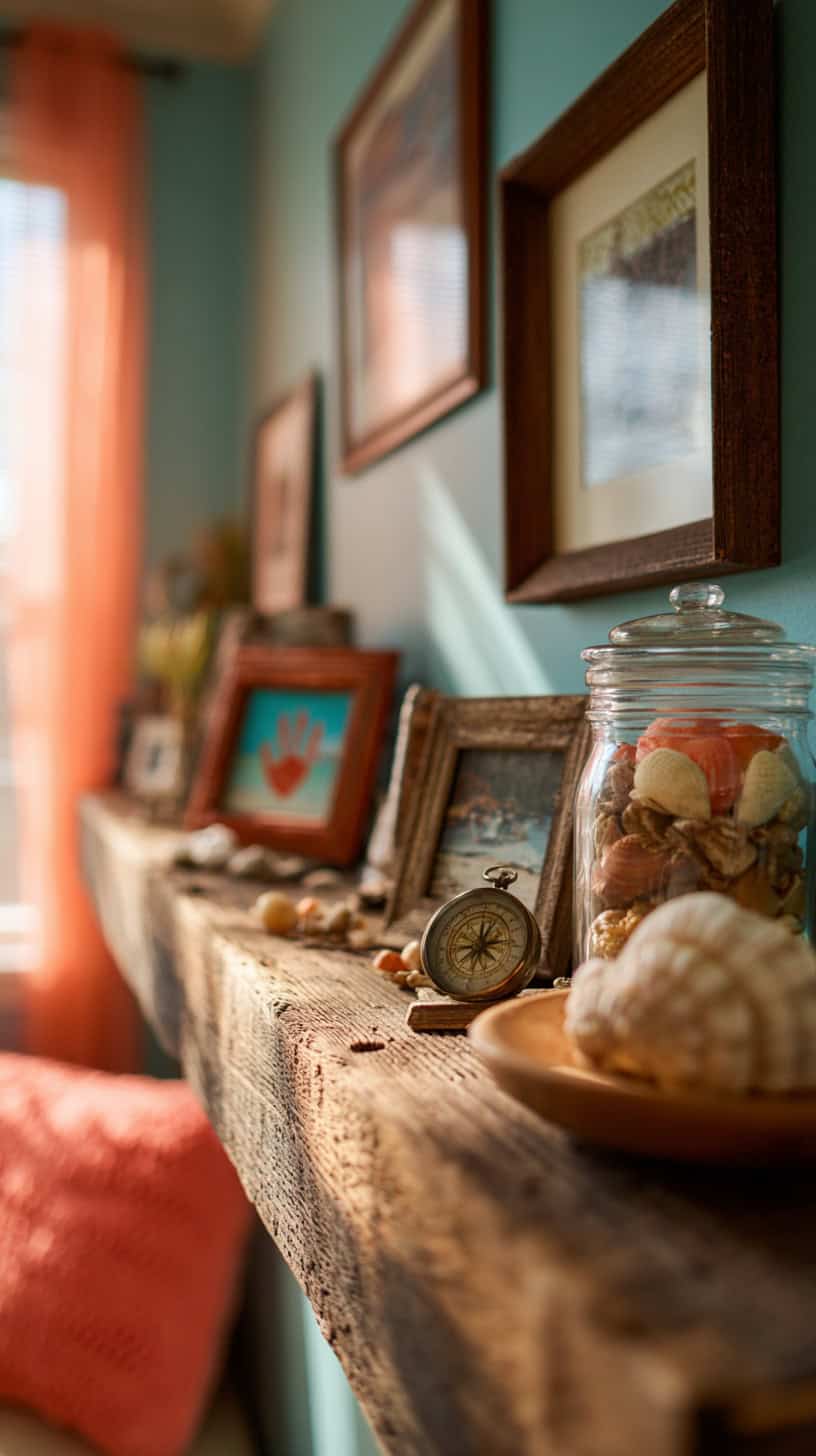
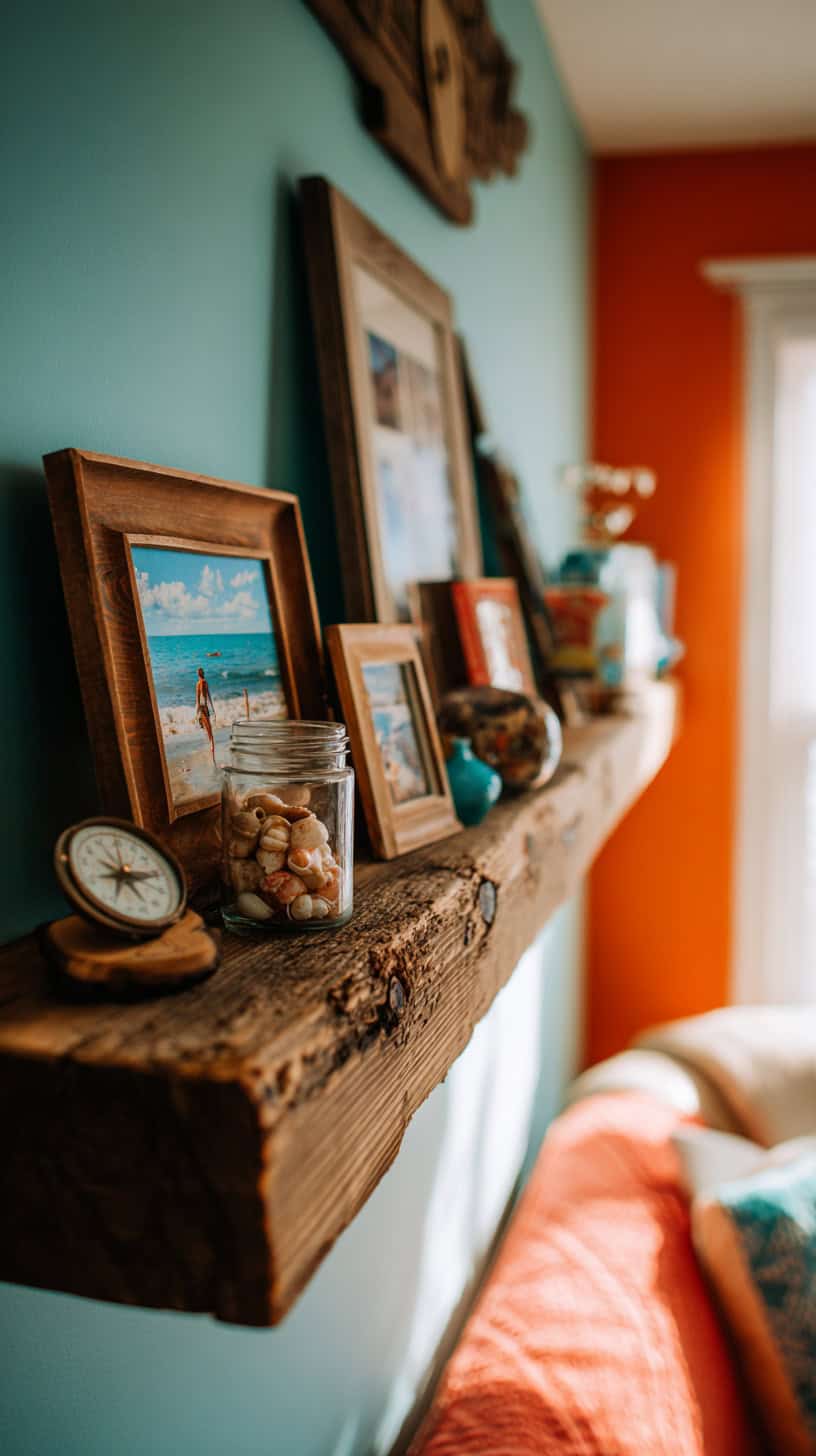
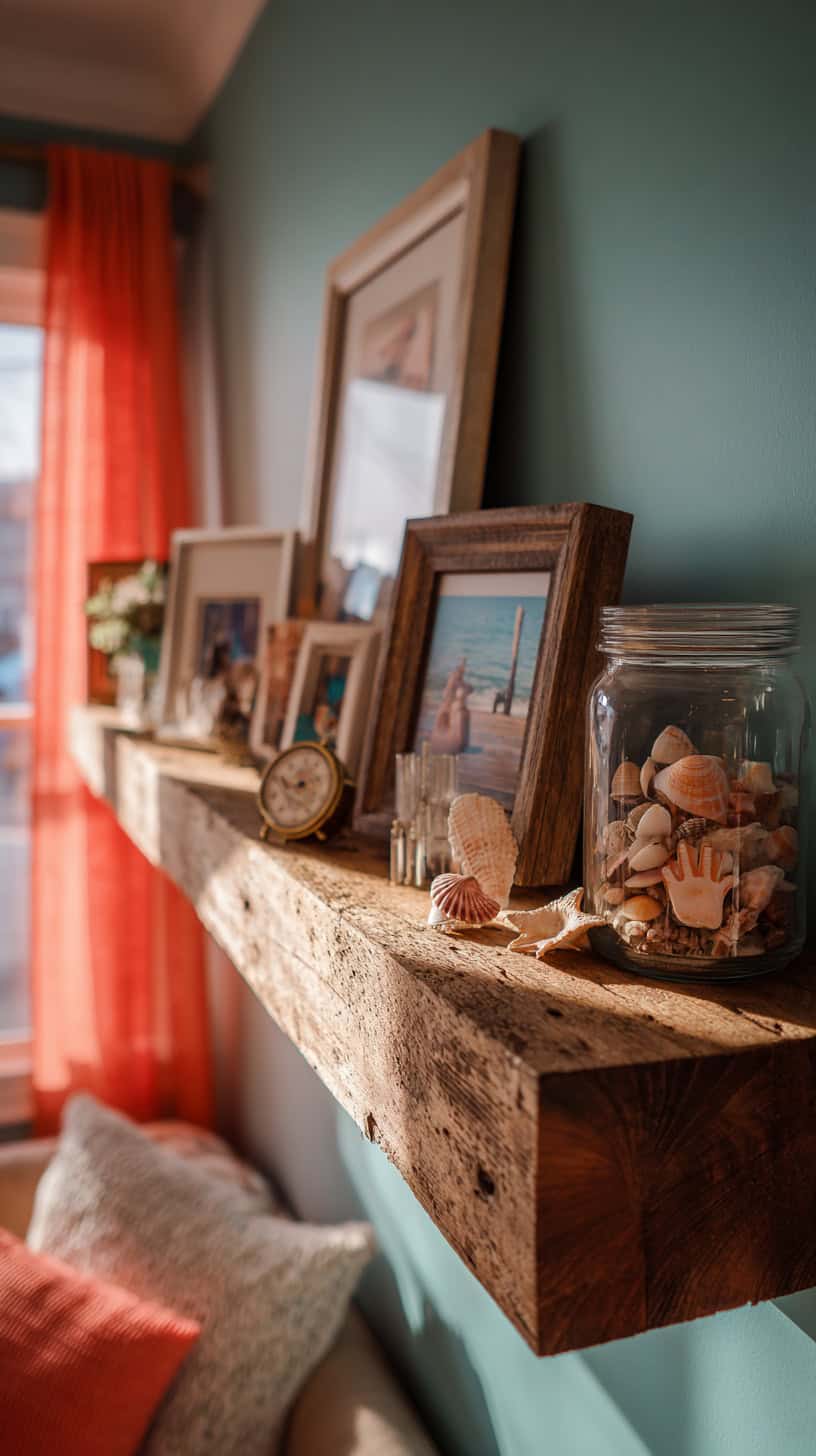
Blank walls were my biggest missed opportunity, and transforming them changed everything. I started with a gallery wall, but not the Pinterest-perfect kind – this one tells our family’s actual story. I printed our favorite adventure photos (trips to the park, backyard camping, messy baking days) in black and white at our local print shop for about $2 each, then found mismatched frames at thrift stores for $1-3 apiece.
The game-changer was painting all those random frames in the same color – I chose white, but a bold navy or even metallic gold would be stunning. Suddenly, twenty-five dollars worth of thrift store frames looked like an intentional, expensive collection. I arranged them salon-style on our largest wall, mixing photo sizes and frame shapes to create visual interest.
But here’s where it gets really fun: I left several frames empty with chalkboard paint inserts. My boys rotate their artwork through these spots, and they’re so proud to see their creations “gallery mounted” alongside family photos. You can make your own chalkboard inserts by cutting foam board to size and coating it with chalkboard paint – total cost per frame insert is under two dollars.
On the opposite wall, we created an interactive mural using removable wall decals of a forest scene. I found a set on sale for $25, and we added to it over time with animal decals, clouds, and even glow-in-the-dark stars. The removable aspect means no landlord panic and the freedom to change our scenery when we get bored. My youngest likes to rearrange the animals into different “stories,” and I’ve caught him reading books to the mural bears more than once. It truly makes our space feel like we’re living inside a storybook adventure, which was exactly the vibe I craved.
Furniture Hacks for Fun and Function
I used to think kid-friendly meant ugly, plastic, and primary-colored. Then I discovered the magic of slipcovers and suddenly our worn-out couch got three different personalities. I invested in one really good neutral slipcover in a durable, washable fabric (gray microfiber that hides everything) as our everyday option, then found two playful patterned covers on clearance that we rotate for special occasions or when I need a refresh.
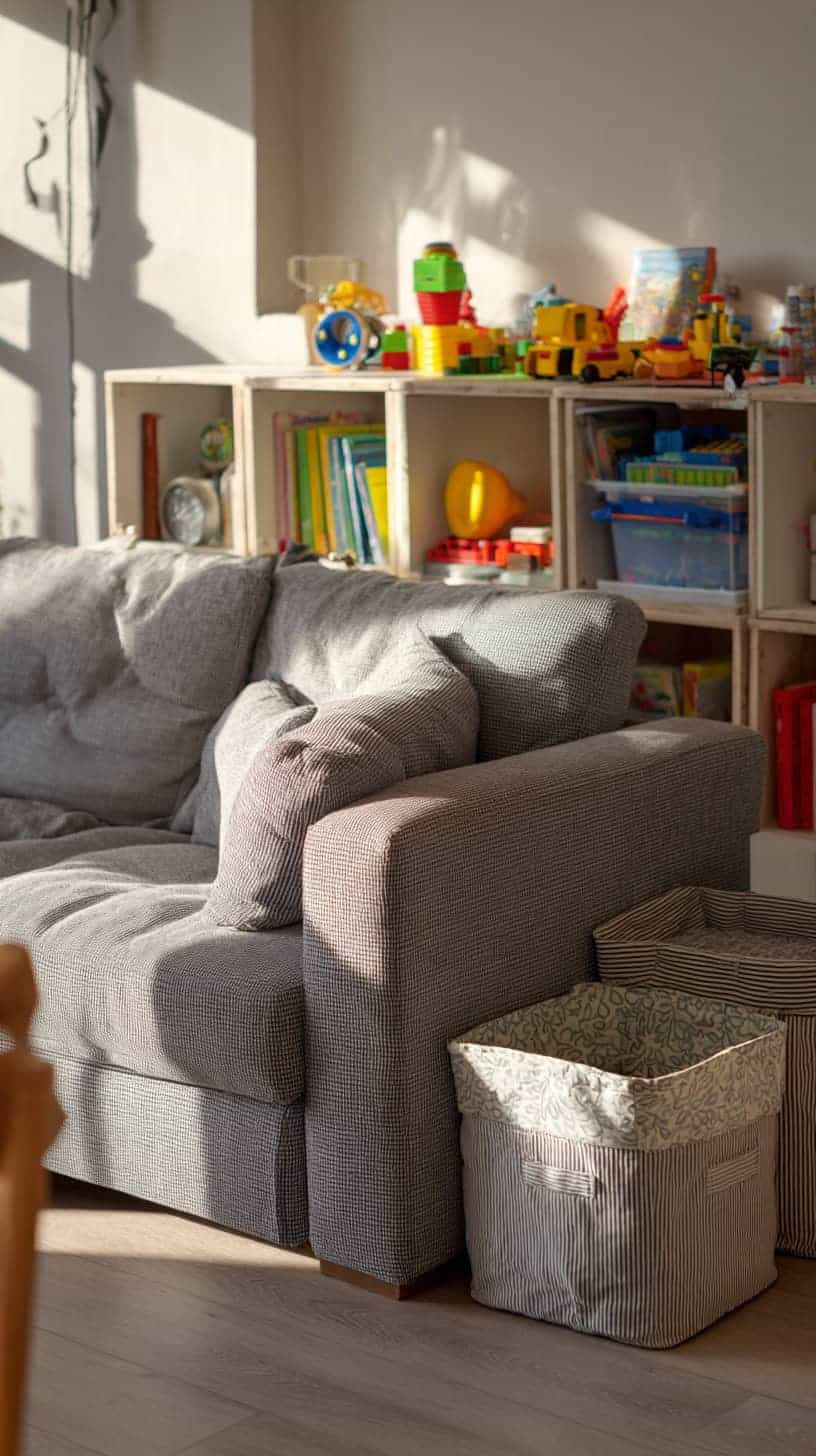
The real MVP? Modular storage cubes that we arranged into an L-shape in the corner, creating both a reading nook on top and hidden toy storage below. I bought twelve cube organizers for about sixty dollars during a back-to-school sale, and fabric bins in coordinating colors for another thirty. But here’s the clever part – not all the cubes have bins. Some are open to display special toys, books with beautiful covers, or small plants (we’ll get to those later!).
This modular system is popular right now for good reason: it grows with your kids. When my boys were toddlers, the cubes stayed low and accessible. Now that they’re older, we’ve stacked some configurations higher and created a small workspace zone with a cube tower and a board laid across the top. When they’re teens (I can barely imagine!), we can reconfigure it again into media storage or whatever they need.
Our coffee table got a similar transformation. I found a beat-up wooden trunk at a yard sale for fifteen dollars, cleaned it up, and now it serves as both a coffee table and toy containment system. The lid lifts up for storage, and I threw a colorful runner across the top to protect it from inevitable spills and scratches. Inside, we keep the toys that rotate in and out of favor – right now it’s filled with building blocks, but last month it was dinosaurs, and next month who knows?
The best part about these furniture hacks is that they invite endless play while maintaining some semblance of order. My boys know where things belong, and cleanup is actually manageable because everything has a home. Plus, when their friends come over, I’m not embarrassed by our living room – I’m actually proud to show off our functional, fun space.
Whimsical Decor on a Mom’s Budget
Here’s where you can really let your personality shine without breaking the bank. I became obsessed with finding small, impactful accents that could withstand my boys’ roughhousing while adding that enchanting touch that makes our living room special. My strategy? Shop with purpose but patience, waiting for sales and scouring discount stores.
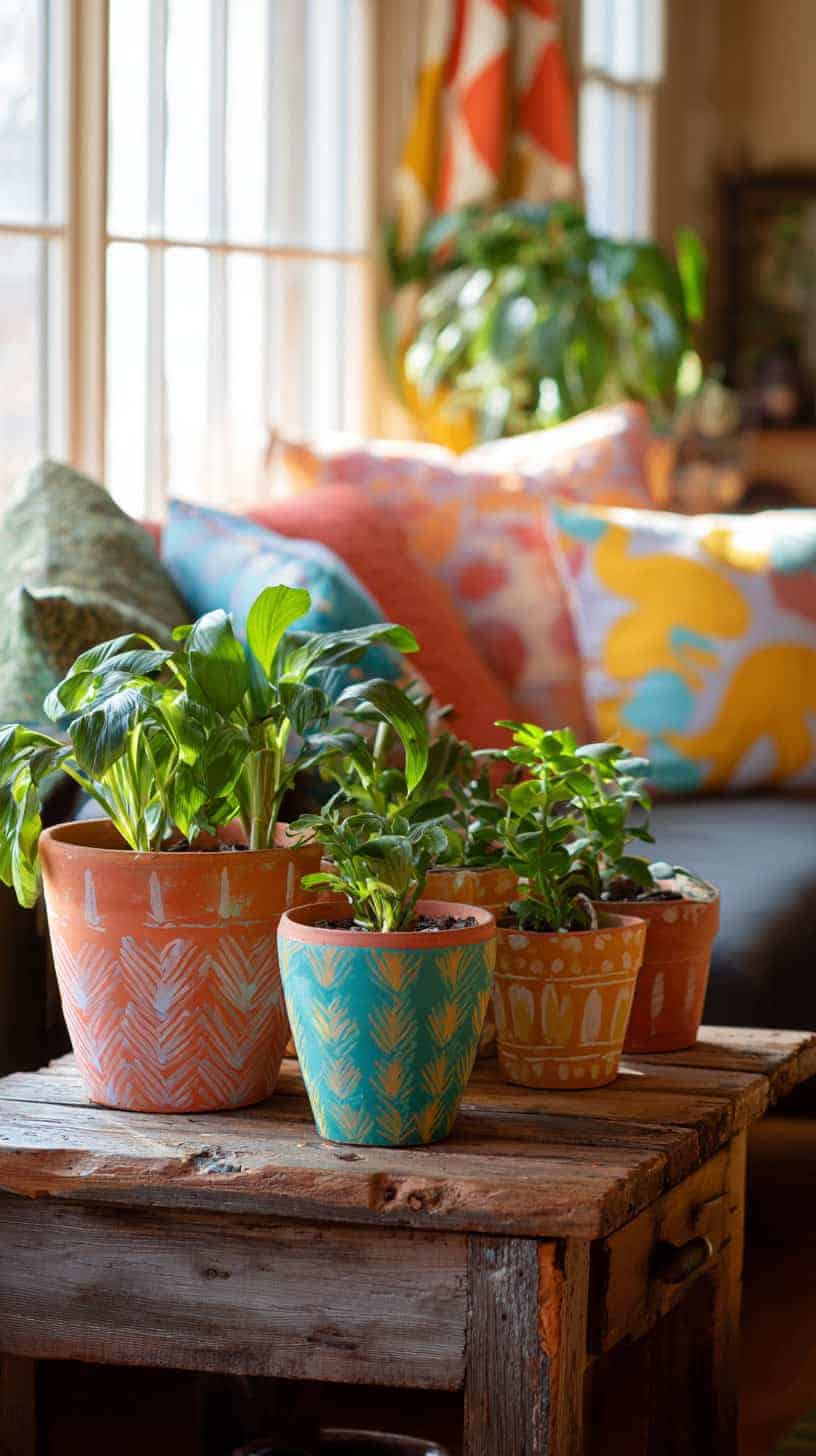
Custom plant pots became my unexpected obsession. I bought plain terracotta pots at the dollar store and either painted them with acrylic craft paints (my boys helped with this – messy but worth it) or wrapped them with scrap fabric and decoupage medium. We created a whole collection of mismatched-but-coordinated planters that now house easy-care pothos and snake plants around the room. The greenery adds life and whimsy, and honestly, taking care of the plants has become a nice responsibility for my oldest. Total investment: maybe twenty dollars for all the pots and plants.
Cozy throws were my next conquest. Instead of buying expensive boutique blankets, I haunted the clearance sections at home goods stores and found chunky knit throws, fuzzy faux fur blankets, and textured weaves for 50-70% off. I collected them in our color palette – teals, corals, yellows, and creams – and now they’re draped over every seating surface. They’re actually used daily for fort building, superhero capes, and yes, occasionally their intended purpose of keeping us warm.
For shatterproof accents, I got creative. Glass vases? Nope. Ceramic sculptures? No way. Instead, I found wooden bowls, woven baskets, fabric wall hangings, and metal lanterns at thrift stores and discount shops. These add visual interest and texture without the panic of wondering when (not if) someone will knock them over during an indoor wrestling match. I filled wooden bowls with fake succulents, pinecones, and smooth river rocks – things that look pretty but won’t cause injury or tears when inevitably scattered across the floor.
My favorite budget hack is using books as decor. I collected hardcover children’s books with gorgeous covers from library sales (usually 50 cents to a dollar each) and stacked them on our coffee table trunk and in open cube shelves. They’re functional, beautiful, and add that personalized, lived-in touch that makes a house feel like a home. Plus, my boys actually grab them and read them, which was always the goal anyway.
Lighting Magic for Cozy Evenings
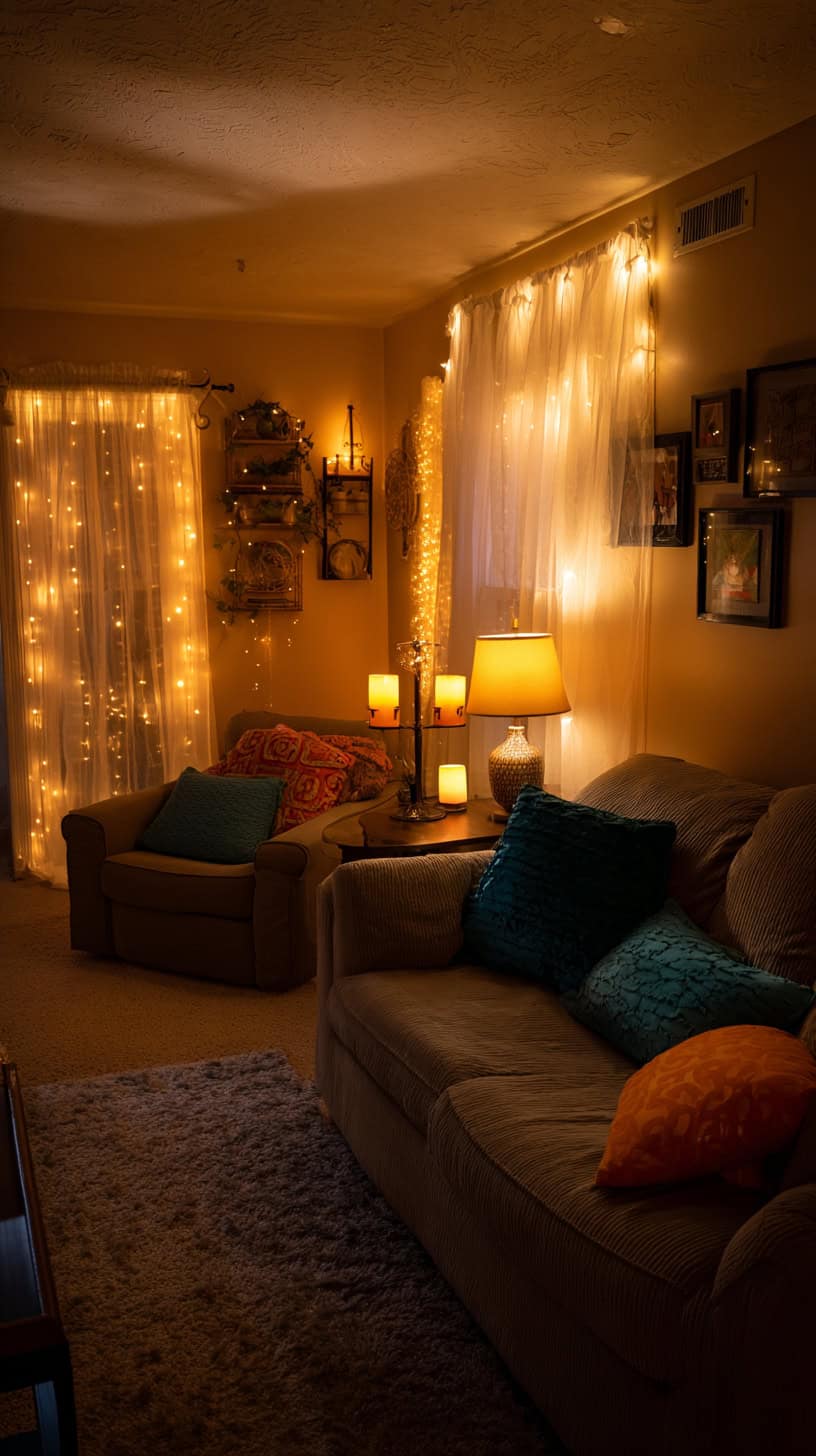
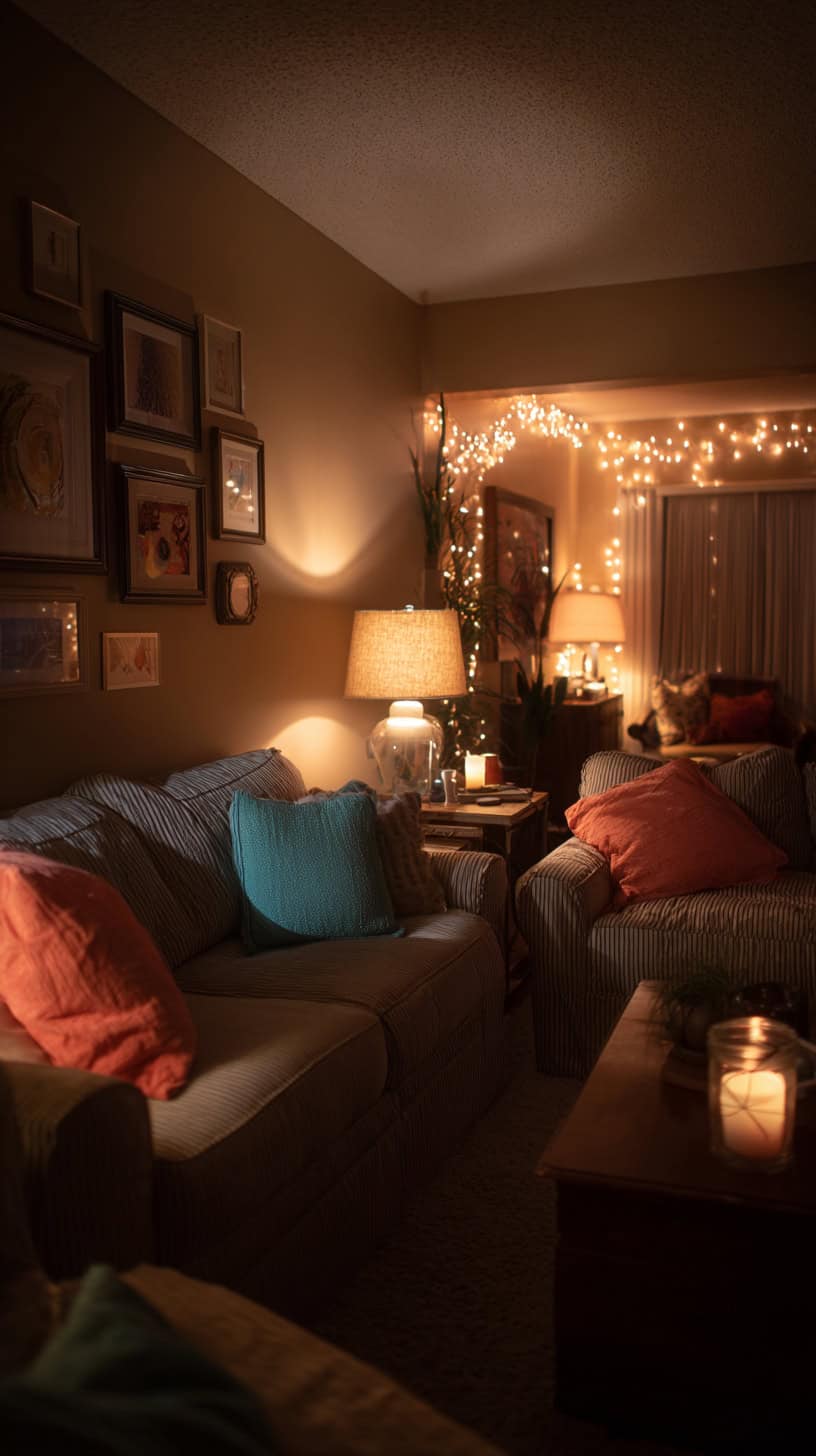
Lighting transformed our living room from a space we occupied during the day to a cozy haven we actually wanted to spend evenings in. The harsh overhead light was the first thing to go – well, not literally, but we stopped using it. Instead, I layered different light sources throughout the room to create warmth and magic.
String lights were my easiest win. I hung battery-operated fairy lights behind our gallery wall, creating a subtle glow that makes the photos look ethereal at night. Then I draped more string lights across the top of our bookshelf and inside the reading nook cube structure. Total cost for all the string lights: about thirty dollars. The impact on our room’s ambiance: priceless. My boys request “fairy light mode” every evening now, and our family wind-down time has become something everyone genuinely looks forward to.
I also found the most whimsical floor lamp at a discount home store – it has a fabric shade with star cutouts that projects little stars around the room when lit. It was on clearance for eighteen dollars, and it’s become the centerpiece of our reading corner. We have a matching table lamp (also on clearance, fifteen dollars) on a small side table near the couch.
Here’s my weirdest-but-it-works tip: I took an old warming wrap (the kind you microwave for muscle aches) that had stopped heating properly, wrapped it around a jar filled with battery-operated tea lights, and created a unique light diffuser. The textured fabric creates interesting shadows and warm light, and it cost literally zero dollars since I was repurposing something headed for the trash. You could do this with any interesting fabric wrapped around glass jars or vases – just make sure you’re using LED lights that don’t generate heat.
For bedtime transitions, I added a dimmer switch to our one remaining overhead light fixture. This twenty-dollar hardware store purchase (my partner installed it in about fifteen minutes) means we can gradually dim the lights during story time, helping everyone’s bodies recognize it’s time to wind down. Those magical family evening moments everyone raves about? They’re not mythical – they just require the right lighting!
Play Zones That Grow With Your Kids
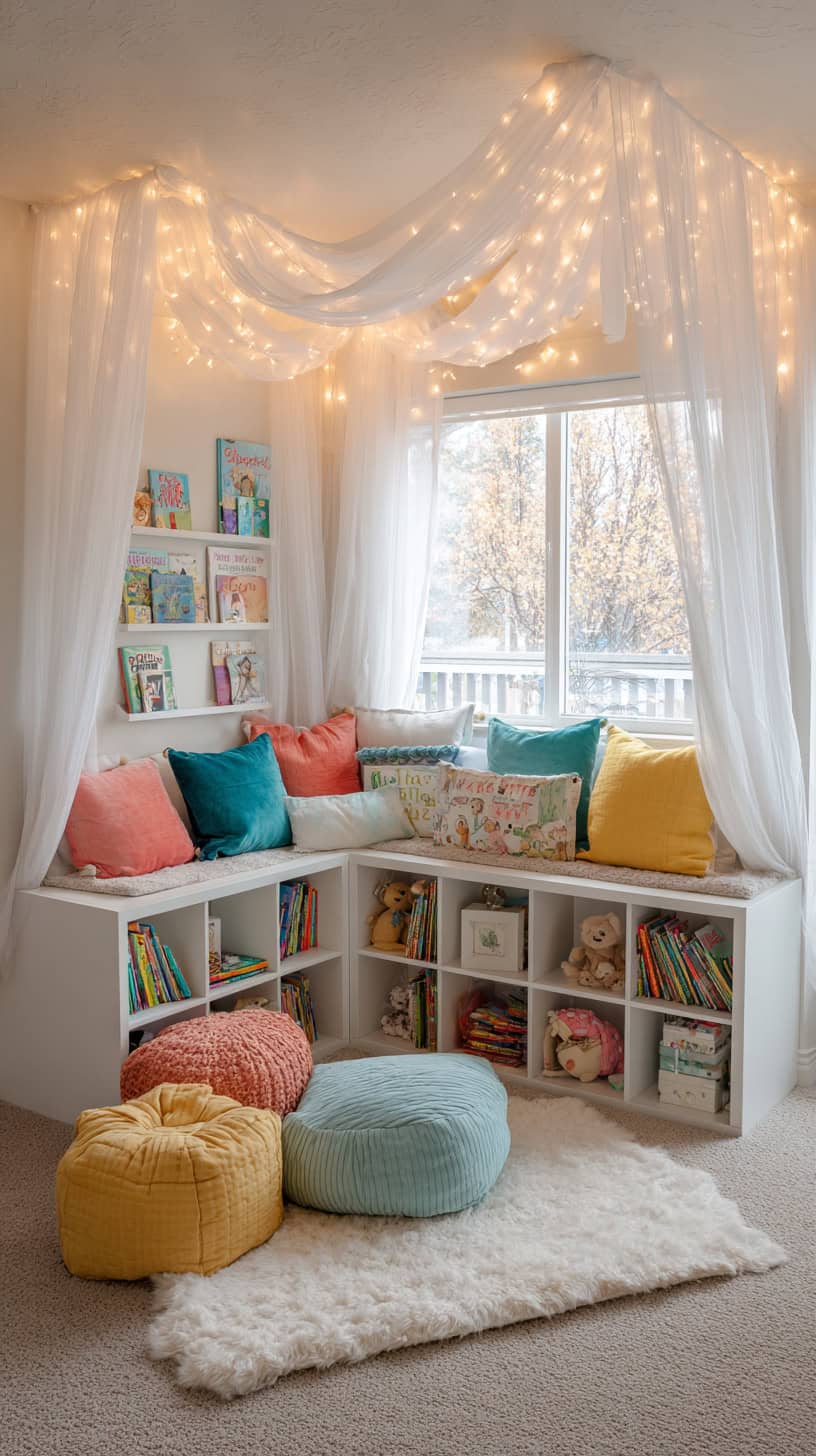
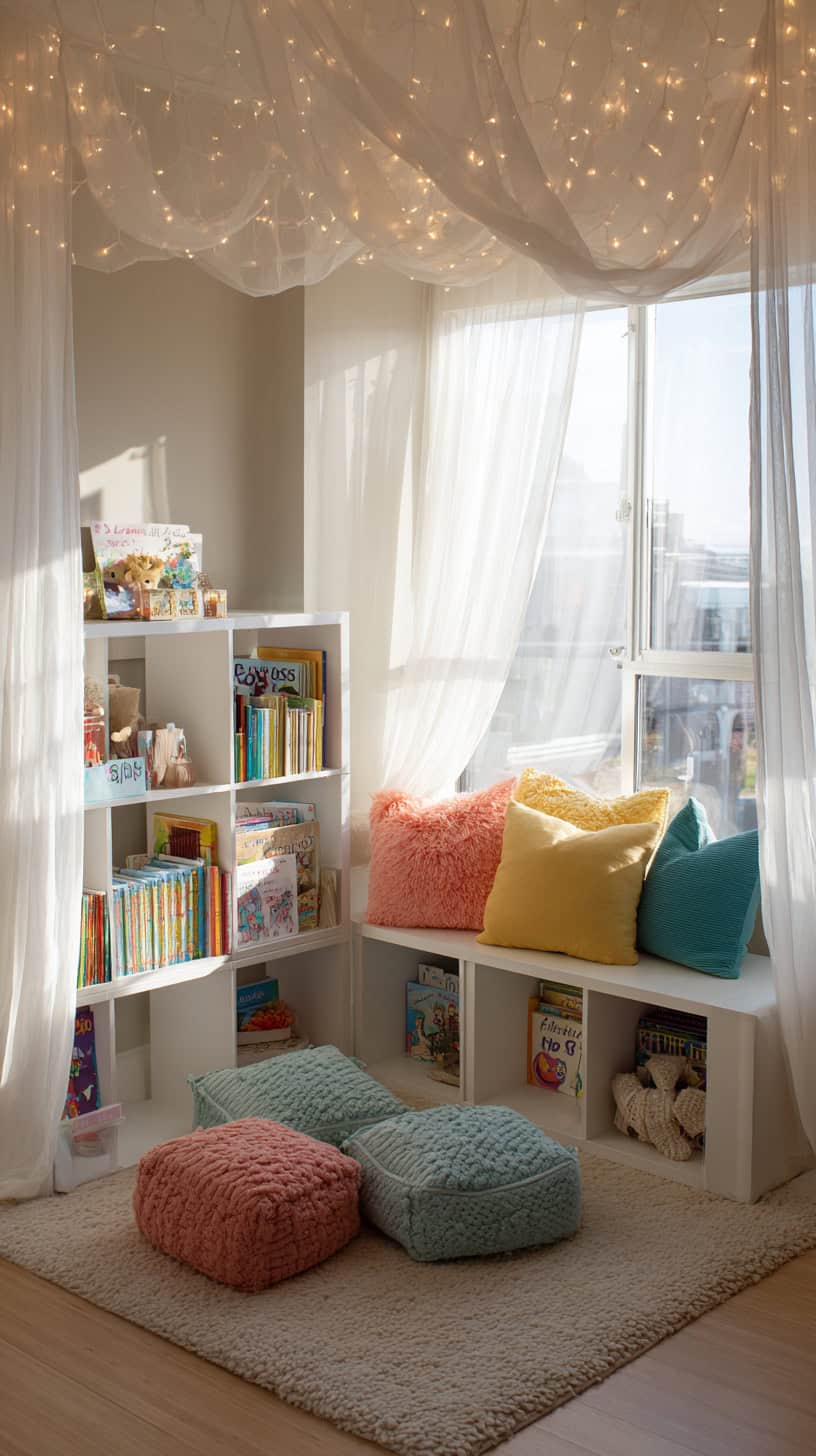
Instead of segregating “kid stuff” to another room, I decided to embrace integrated play zones right in our living room. This was scary at first – wouldn’t it look messy? Would we ever have a grown-up space again? Turns out, thoughtfully designed play areas are both functional and stylish, and they mean my boys actually play where I can see them instead of destroying bedrooms upstairs.
Our reading nook started with that modular cube arrangement I mentioned earlier, but I added magic with a waterproof picnic blanket draped over the top to create a cave-like feeling. I clipped it with clothespins (which also act as hanging spots for artwork) and threw every pillow we own inside. String lights woven through the cubes make it glow at night. Cost: just the picnic blanket at twelve dollars, since we already had the other elements. This space works for reading, quiet play, or when someone needs a sensory break from the chaos. My middle son, who gets overwhelmed easily, retreats here with books or his tablet, and it’s become his safe space.
I also created a sensory bin station in one corner using a large, shallow storage bin filled with kinetic sand. I put it on top of a waterproof mat and keep it contained to that specific spot. The bin has a lid for when we’re not using it, and the whole setup tucks behind our couch. We rotate what’s in the bin – sometimes it’s sand, sometimes it’s dried beans with scoops and funnels, sometimes it’s water beads (supervised only!). This gives my youngest especially a hands-on activity that’s contained but accessible.
Workshop-inspired shelving along one wall displays building projects, Lego creations, and craft work. I used simple wooden shelves with brackets (thirty dollars for the materials) and painted them our accent color. This serves double duty: it’s decor that shows off impressive builds, and it’s motivation to actually finish projects since they’ll be displayed. We rotate items every few weeks, photographing old displays before dismantling them so we have memories but not permanent clutter.
The genius of these flexible nooks is that I can join the fun. There’s a floor cushion by the sensory bin where I sit and chat while my son plays. The reading nook fits me and two kids for story time. The craft shelf displays my occasional projects alongside theirs. This living room isn’t just a space we share – it’s a space we live in together, and designing it this way means I’m not stuck supervising from the sidelines. We’re all in it together, and keeping it stylish was just about being intentional with storage and boundaries.
Personal Touches to Make It Yours
The final layer that turned our living room from “decorated” to “ours” was adding deeply personal touches that celebrate our family’s unique story. These are the elements guests always ask about, the things that make our space impossible to replicate because they’re so specific to us.
I started with an engraved wooden sign above our couch that says “The [Last Name] Adventure Club – Established [Year We Moved In].” I found it on a small business website during a sale for thirty-five dollars, and it’s the anchor piece of our gallery wall. Every time I see it, I’m reminded that this room, this home, this chaotic beautiful life – it’s all our adventure together.
Our family “reasons jar” sits on the shelf where everyone can reach it. It’s a large mason jar I decorated with paint pens (cost: three dollars at the craft store), filled with colorful paper strips and a pen attached with twine. When something great happens – someone learns to tie their shoes, we have an epic family game night, Dad makes his famous pancakes – we write it down and drop it in the jar. On hard days, we read a few reasons to remember why our family is awesome. This silly, simple project has become one of our most treasured items.
I also hung a few cheeky signs that celebrate mom life without apologizing for it. My favorite says “This house runs on love, laughter, and really strong coffee” – I found it at a home goods store for eight dollars, and it makes me smile every single day. Another one near the play zones says “Please excuse the mess, we’re making memories,” which is both true and a gentle reminder to myself that perfection isn’t the goal here.
We created a family art project that’s become the centerpiece of one wall: a large canvas (bought blank for fifteen dollars) that we all painted together one rainy Saturday. Everyone got a section to fill with their favorite colors and shapes, and my partner added our family initials in the center. It’s chaotic and colorful and absolutely perfect. It’s not “good” art by any objective standard, but it’s ours, and that makes it priceless.
Finally, I started displaying the handmade gifts my boys have given me over the years. The wonky clay bowl my oldest made in first grade holds our TV remotes. The painted rock from my middle son sits on the bookshelf. The construction paper card from my youngest is framed near the family photos. These items invite my crew to see themselves reflected in our space, to understand that their contributions matter and make our home beautiful.
Creating a whimsical living room with playful style isn’t about spending thousands of dollars or having perfect design skills. It’s about being brave enough to let go of the “adult” living room you thought you needed and embracing the season of life you’re actually in. It’s about finding creative solutions on a budget, involving your kids in the process, and building a space that works for your real, messy, beautiful life. Our living room now tells our story, holds our chaos, and invites everyone who enters to relax and be themselves. And honestly? That’s the most magical thing I could have created.
This post may contain affiliate links. Read the full disclosure here.