Farmhouse Accent Walls in Living Room Ideas for a Cozy Focal Point
Y’all, let me tell you something: between juggling three boys, endless laundry mountains, and the constant chaos of toys everywhere, I needed ONE thing in my house that felt like mine—something that screamed “cozy sanctuary” instead of “tornado aftermath.” That’s when I discovered the magic of farmhouse accent walls, and honestly? Best decision I’ve made since buying that industrial-sized coffee maker. Let me show you how one gorgeous wall can transform your living room into the warm, inviting space you’ve been dreaming about!
Why Farmhouse Accent Walls Are My Go-To for Instant Cozy Vibes
Here’s the real talk, mama: when you’re living in the beautiful mess of raising kids, your living room takes a beating. Between the sticky fingers, the toy explosions, and the constant “Mom, watch this!” moments, you need a space that’s both functional AND feels like a warm hug at the end of a crazy day. That’s where farmhouse accent walls come in like a superhero in overalls.
A single accent wall completely changes the energy of your living room without requiring you to repaint every surface or break the bank. I’m talking about creating that Pinterest-worthy focal point that makes you actually WANT to flop on the couch after bedtime instead of hiding in the pantry eating goldfish crackers. The farmhouse style brings in those warm, natural textures and neutral tones that feel inviting without being fussy—because let’s be honest, “high maintenance” doesn’t work when you’re wiping juice spills off surfaces seventeen times a day.
What I love most is how an accent wall anchors the room. Before I added mine, our living room felt scattered and chaotic (kind of like my brain most days). But once that wall went up? Suddenly everything had a place to gather around. It became the backdrop for family movie nights, the spot where we pile blankets for fort-building marathons, and honestly, the one corner of my house that makes me feel like I’ve got my life together—even when I’m still in yesterday’s yoga pants.
Trending Shiplap Dreams: The Timeless Farmhouse Essential

Okay, can we talk about shiplap for a second? I know, I know—everyone and their grandmother is doing shiplap right now. But there’s a reason it’s having a moment that refuses to end: it’s absolutely gorgeous, surprisingly affordable, and gives you that modern farmhouse look that works with literally everything. Plus, Joanna Gaines made it cool, so we’re all just following her lead here.
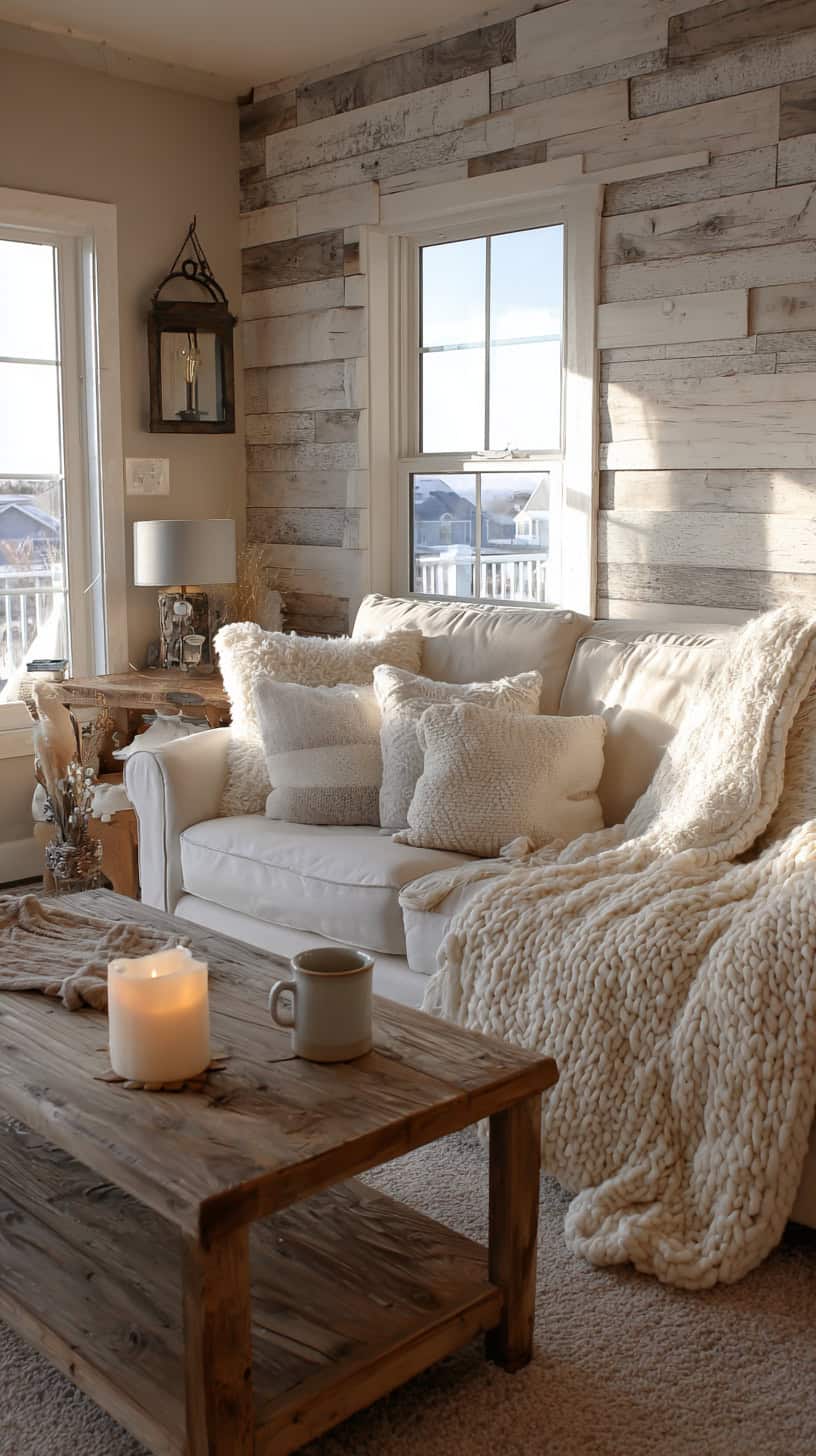
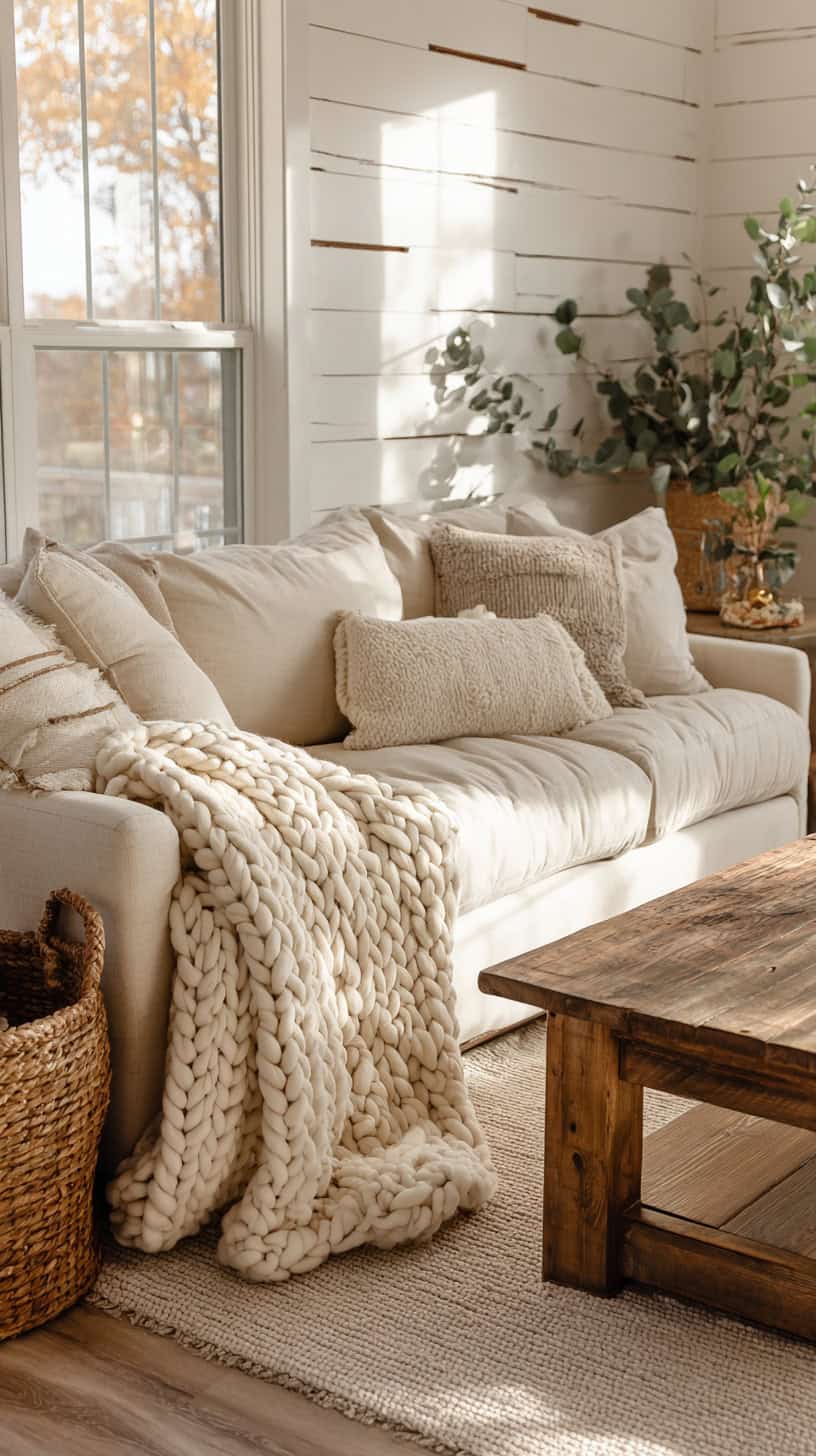
The classic whitewashed shiplap is still the reigning champion for good reason. That clean, horizontal line pattern adds visual interest without overwhelming the space, and the white keeps everything bright and airy—crucial when you’re dealing with the general clutter that comes with kid life. I went with a soft white shiplap behind our TV, and it instantly made the whole room feel bigger and more put-together.
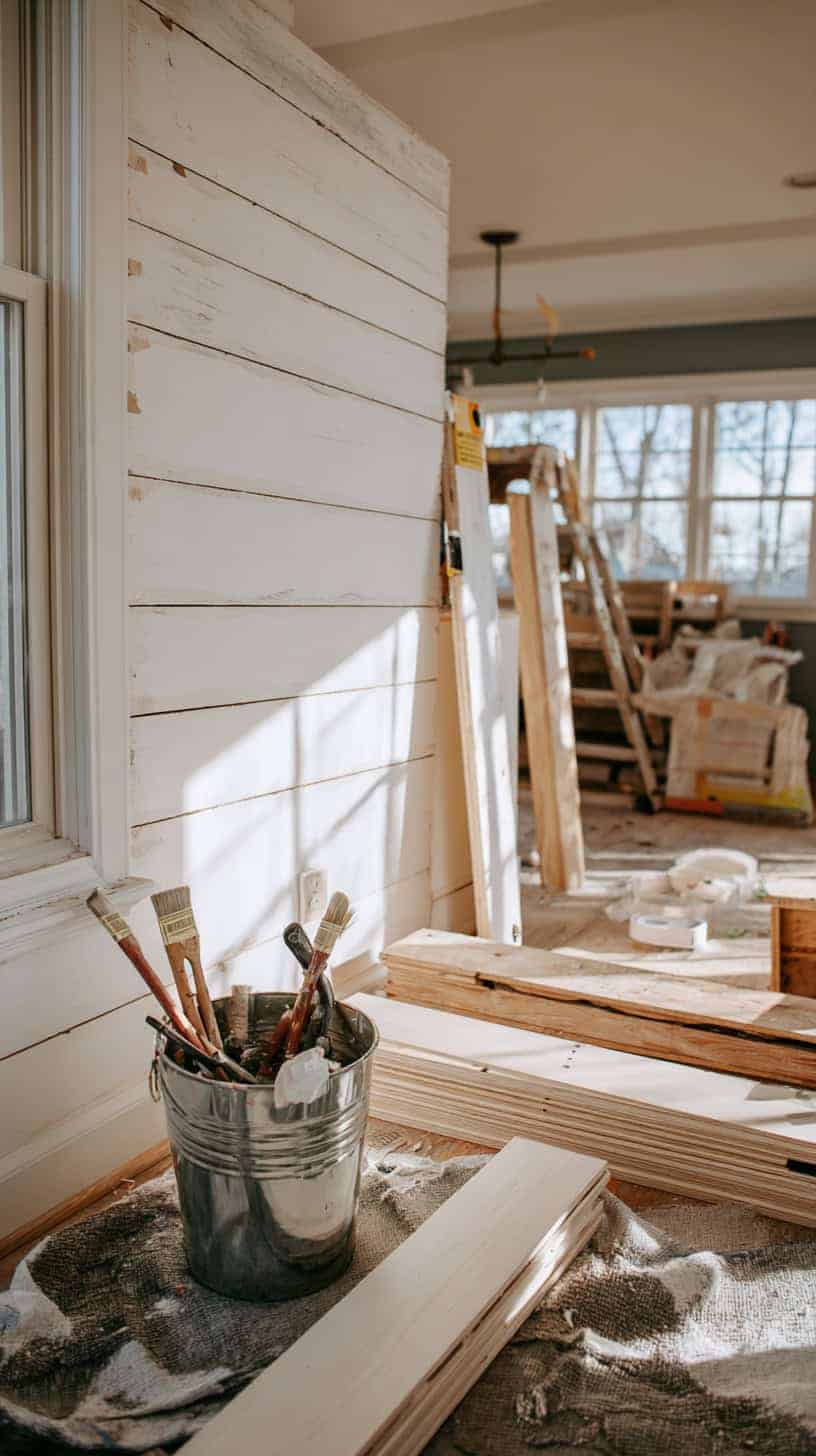
Here’s my budget hack that saved me hundreds: instead of buying pre-made shiplap panels, I grabbed some basic plywood from the hardware store and had them rip it into 6-inch strips. Total game-changer! You can use nickels as spacers between boards to get that authentic gap, and a coat of white paint later, you’ve got yourself a professional-looking shiplap wall for a fraction of the price. My husband and I knocked it out in one weekend—well, two weekends if you count the one where we got distracted and just ordered pizza instead.
If you’re worried about the installation, don’t be! Shiplap is actually super forgiving. A little wood glue, some finishing nails, and a nail gun (which you can rent for like $20), and you’re golden. The horizontal lines are visually slimming for the room and hide imperfections like nobody’s business—trust me, my walls are far from perfect, and you’d never know it.
Want to switch it up from pure white? Gray-washed shiplap is trending hard right now and gives you that rustic vibe while still keeping things light. Or go bold with a dark charcoal shiplap for drama—it’s stunning with warm lighting and makes your family photos really pop!
Reclaimed Wood Wonders for Rustic Charm

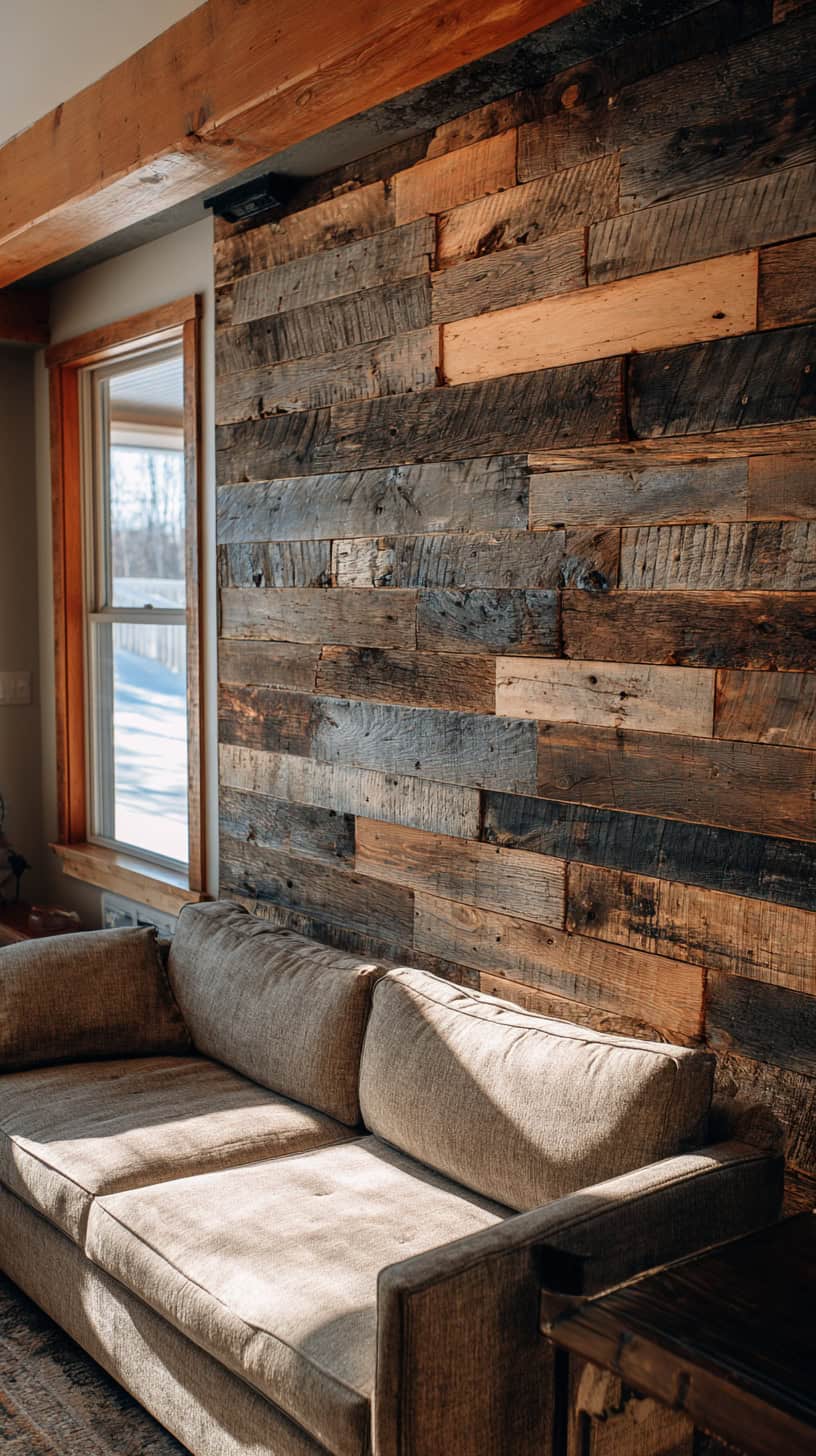
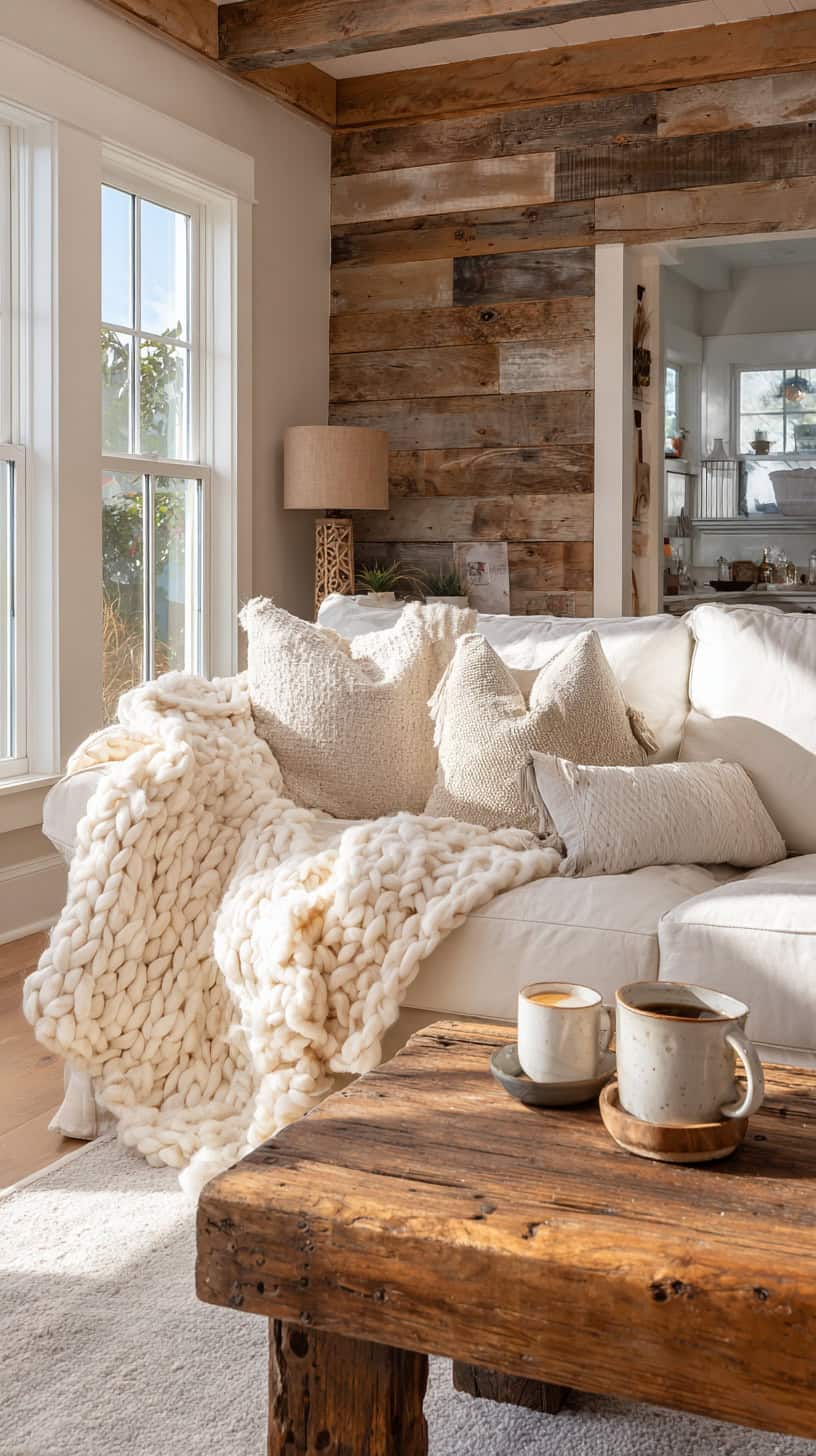
Listen, if you want to add some serious character and warmth to your living room, reclaimed wood is where it’s at. There’s something about those weathered planks with their natural knots, varied tones, and authentic patina that just screams “cozy farmhouse vibes.” Every piece tells a story, and when you put them together on a wall, you’re creating this amazing textured focal point that you literally cannot stop staring at.
I’m obsessed with the mixed-width reclaimed wood look that’s blowing up Pinterest right now. You take boards of different widths—some 3 inches, some 6 inches, some 8 inches—and arrange them in a random pattern. The variety creates this organic, collected-over-time feel that’s peak farmhouse aesthetic. And here’s the kicker: nobody expects perfection with reclaimed wood. Those gaps, cracks, and imperfections? They’re FEATURES, not flaws!
Now, before you panic about the cost, let me share the secret weapon of budget-savvy moms everywhere: pallets. Yes, those wooden pallets you see behind stores and warehouses. Many businesses will literally give them away for free or sell them super cheap. You’ll need to do some work—removing nails, sanding off rough spots, maybe treating them for bugs—but the end result is authentic reclaimed wood for basically nothing. I found mine on Facebook Marketplace, and the guy was just happy someone would haul them away.
If the whole pallet-deconstructing thing sounds like too much (and I get it—three kids means time is precious), there are also amazing peel-and-stick reclaimed wood panels available now. They’re pricier than DIY, but they go up SO fast, and some of them look incredibly realistic. Perfect for when you want the look but need it done during naptime.
For installation, you can go horizontal, vertical, or even diagonal herringbone if you’re feeling fancy. I did a horizontal mixed-width wall behind our couch, and it’s become the star of every family photo. The warm brown tones add such a cozy feeling, especially when paired with cream-colored furniture and those chunky knit throws we’re all obsessed with.
Beadboard Bliss: Budget-Friendly and Kid-Proof
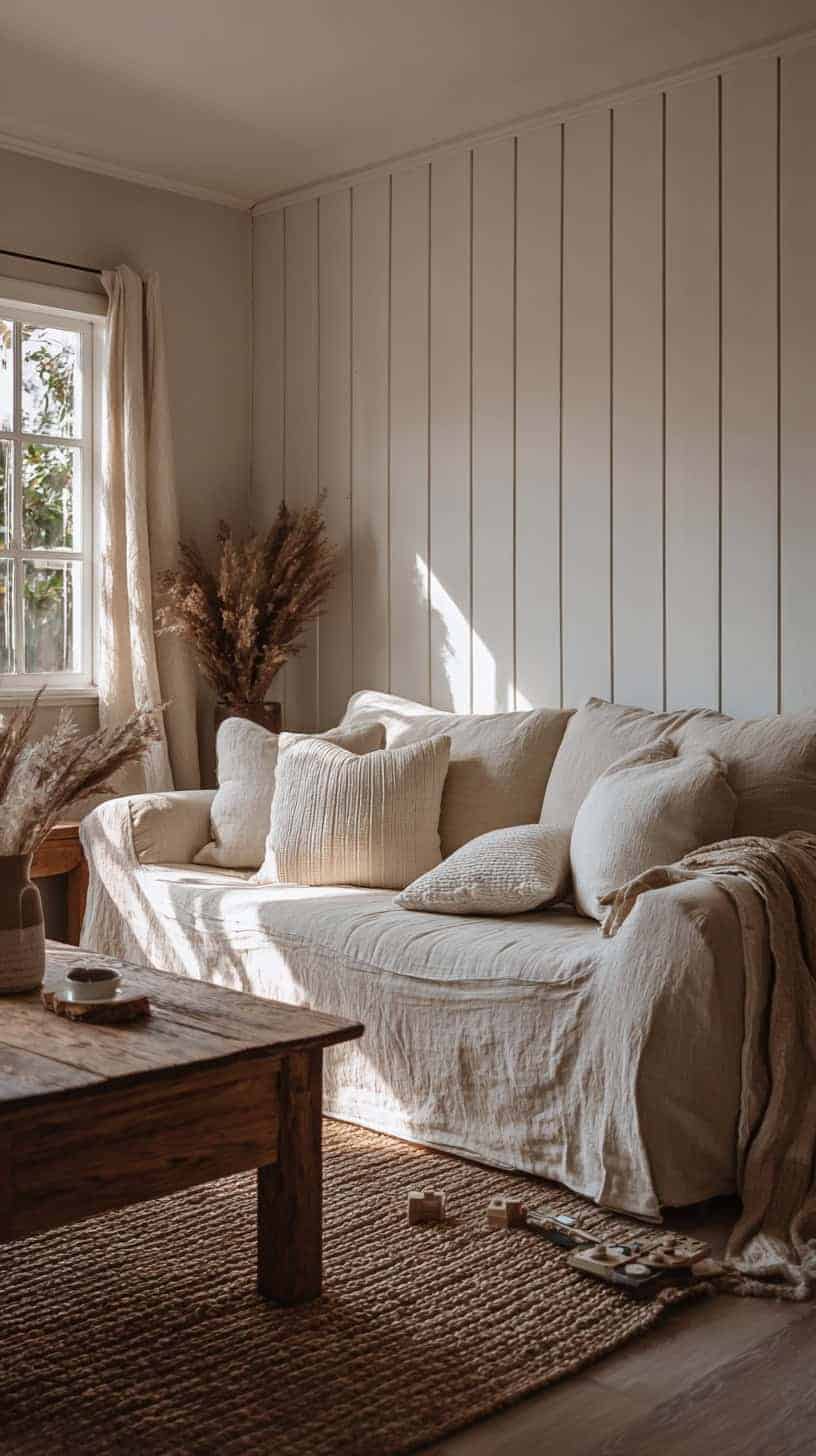
Can we take a moment to appreciate beadboard? Because this unsung hero of farmhouse walls deserves way more love than it gets! While everyone’s going crazy over shiplap, beadboard is over here being the practical, pretty, and ridiculously affordable option that actually stands up to the chaos of family life.
Beadboard is that paneling with the vertical grooves—you’ve probably seen it in cute cottage bathrooms or as wainscoting in dining rooms. But let me tell you, it’s PERFECT for living room accent walls, especially if you have kids. Why? Because it’s incredibly durable and easy to wipe down. When my middle son decided to “decorate” the wall with his markers, those grooves actually helped hide the evidence until I could clean it. Not that I’m advocating for wall art by toddlers, but we’re living in reality here.
The subtle texture of beadboard adds that farmhouse charm without being too bold or busy. It’s elegant in an understated way—like the mom who shows up to school pickup looking effortlessly put-together while the rest of us are rocking messy buns and coffee stains. You can paint it crisp white for that classic cottage feel, or go with a soft sage green or navy blue for something more contemporary.
Installation is honestly a breeze. You can buy beadboard in 4×8 sheets at any home improvement store for around $20-30 per sheet. Cut them to size, attach them to the wall with construction adhesive and some nails, add trim pieces at the top and bottom, caulk the seams, and paint. Boom—instant farmhouse elegance! I did a full wall in our living room in one Saturday afternoon while the kids were at grandma’s.
One trending look I’m seeing everywhere is painted beadboard just on the bottom half of the wall (classic wainscoting style) with a contrasting paint color on top. Think white beadboard on the bottom with a warm greige or soft blue on top, separated by a chair rail. It’s such a classic farmhouse look, and it adds architectural interest without overwhelming the space.
Cozy Brick & Stone Looks That Wow
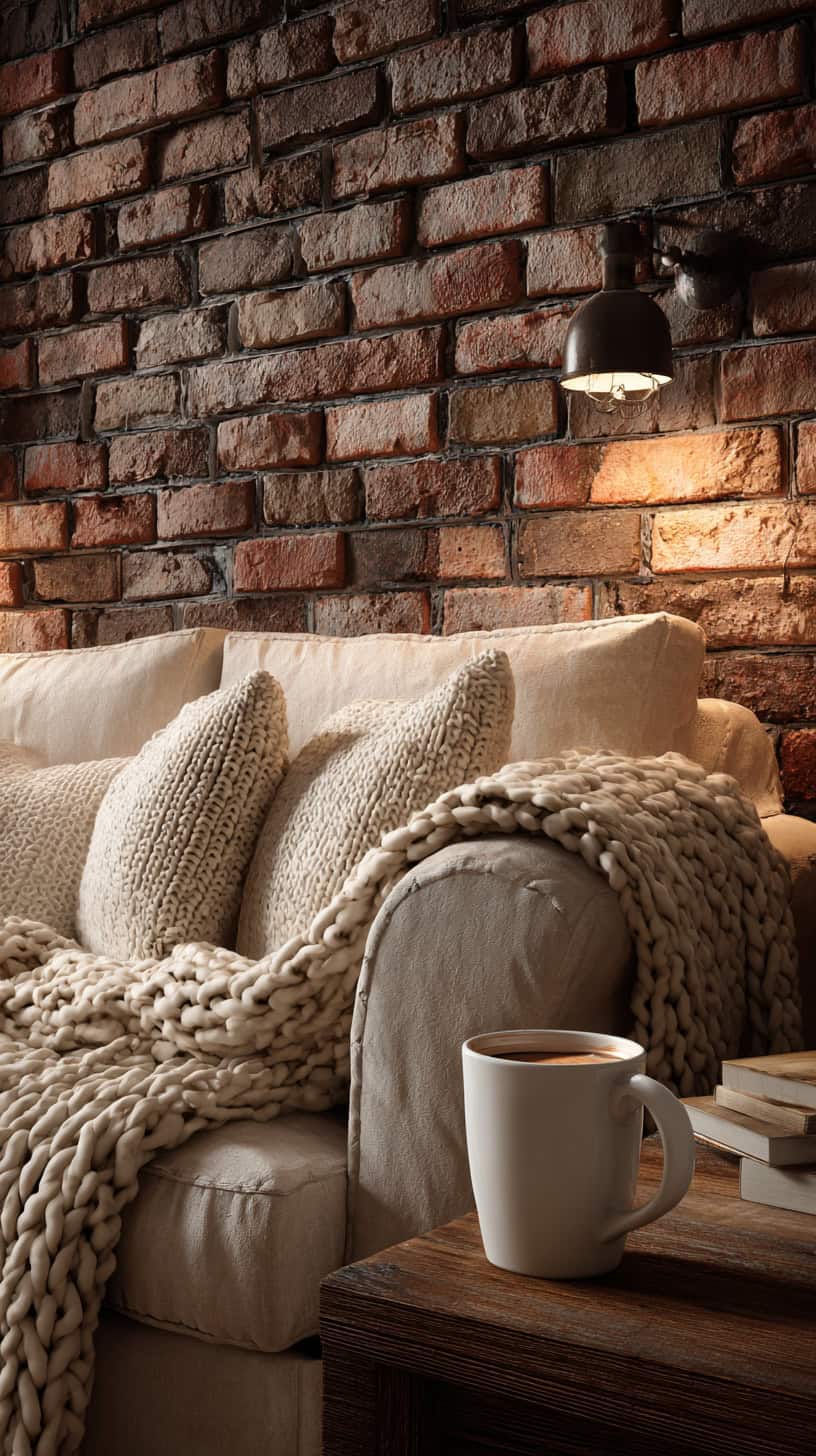
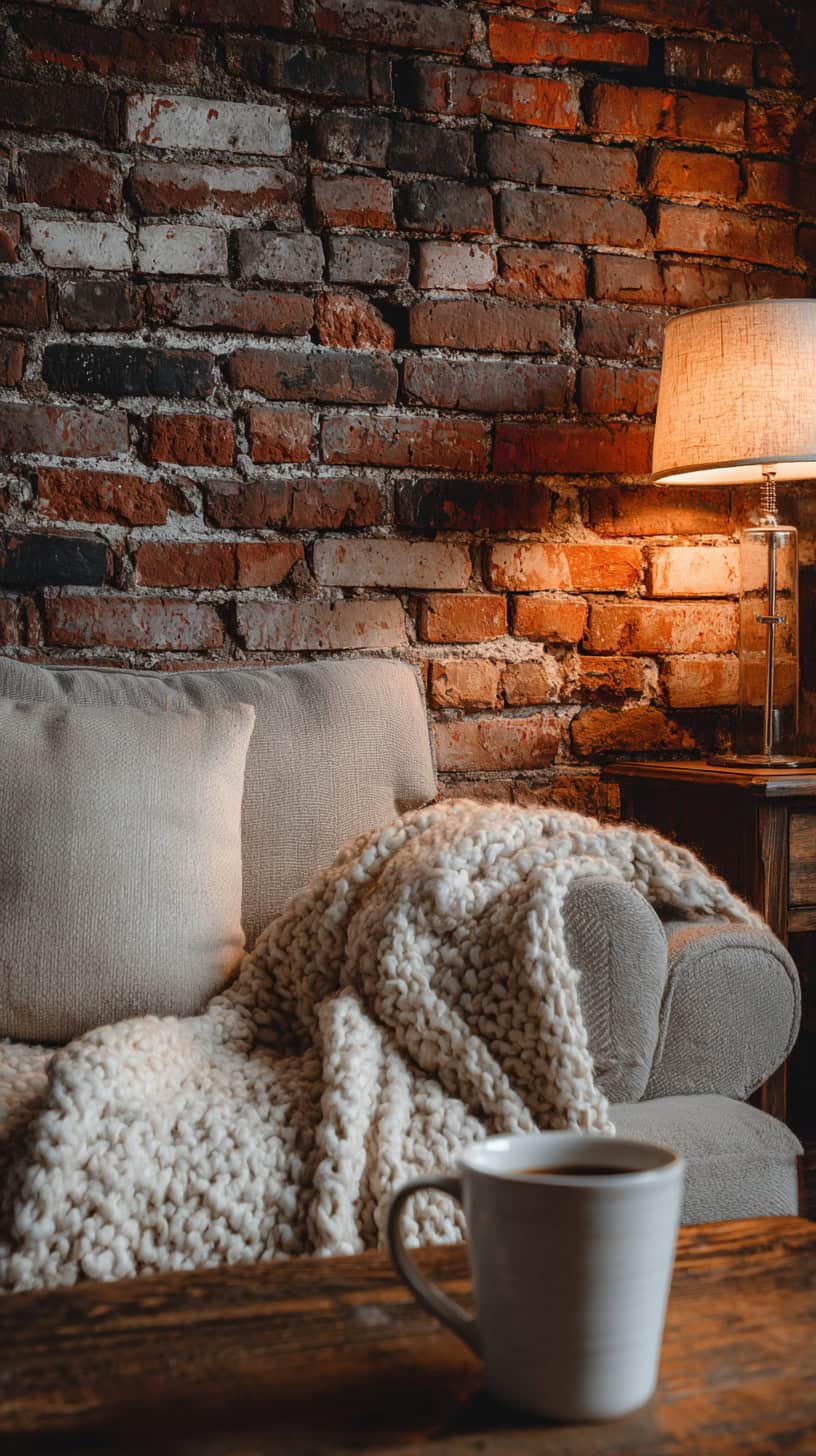
Nothing says “curl up with hot cocoa and a good book” quite like exposed brick or stone, right? That rustic, old-world charm just radiates coziness. But here’s the thing: most of us don’t have actual brick walls hiding under our drywall (I checked—trust me, I was hopeful). The good news? The faux options available now are SO good that you’ll have guests running their hands over your wall trying to figure out if it’s real.
Faux brick panels and peel-and-stick brick wallpaper have absolutely exploded in popularity, and I am here for it! These products have come such a long way from the obviously fake stuff of years past. The dimensional panels especially—they have texture, realistic color variation, and even that slightly irregular look that makes them feel authentic. I added a white-painted brick accent wall behind our TV console, and it’s become the cozy backdrop for literally everything: Christmas stockings, family photo displays, you name it.
The whitewashed brick look is still trending hard, giving you that shabby-chic farmhouse vibe that feels both rustic and refined. But don’t sleep on the natural red brick either—it adds warmth and character that’s perfect if your living room needs some richness and depth. I’ve also seen gorgeous gray brick that feels more modern farmhouse, which is a beautiful compromise if your partner thinks regular brick is “too rustic.”
For stone lovers, stacked stone accent walls are creating major focal points in living rooms everywhere. The varied textures and natural tones bring the outdoors in and create this organic, earthy feeling. Faux stone panels come in everything from smooth river rock to rugged ledgestone, and they install pretty much the same way as the brick options.
Here’s the best part for busy moms: peel-and-stick versions exist for both brick AND stone! Yes, you read that right. They’re basically heavy-duty textured wallpaper with adhesive backing. You literally just peel off the backing and stick them to the wall. No mortar, no mess, no contractor needed. I’m talking a total transformation during naptime. Are they as durable as real brick? No. But are they perfect for renters or commitment-phobes who might want to change things up in a few years? Absolutely!
One pro tip: if you’re going with faux brick or stone, keep the rest of your decor on the simpler side. These walls have SO much texture and visual interest on their own that you don’t need to go crazy with other patterns and busy elements. Let the wall be the star and layer in cozy neutrals around it.
DIY Hacks Every Busy Mom Can Nail This Weekend
Okay, real talk time: the idea of tackling a DIY accent wall can feel overwhelming when you’re already juggling a million things. But I promise you, if I can do this with three boys running around “helping” (read: making everything take three times longer), you absolutely can too! Let me break down the process so it feels totally doable.
First things first: Prep is your best friend. I know, I know—you want to jump right in. But spending 30 minutes prepping will save you hours of frustration. Clear the wall completely, fill any holes with spackle, and wipe everything down. If you’re painting, use painter’s tape around trim and edges. Set up a kids’ movie or call in backup childcare if possible, because uninterrupted time makes SUCH a difference.
My favorite quick-win method: Peel-and-stick options. Whether it’s shiplap panels, brick wallpaper, or wood planks, peel-and-stick products are legitimately game-changing for DIY newbies. Start from the bottom corner, peel back a few inches of backing, stick it to the wall, then slowly peel and smooth as you go. Use a level frequently—learned that one the hard way when my first row was crooked! Most rooms need 4-6 boxes of material depending on your wall size.
For traditional wood installations: Measure your wall and calculate how many boards you’ll need (pro tip: buy 10% extra for mistakes—they WILL happen). Use a stud finder to locate studs and mark them with painter’s tape. Start at the bottom with your first board perfectly level—this is crucial because everything builds from here. Apply construction adhesive to the back, press it to the wall, and secure with a nail gun into the studs. Continue upward, using spacers between boards if you want that shiplap gap.
The weekend game plan that actually works: Friday evening, clear the room and do your shopping/supply run. Saturday morning, prep your wall and start installation (aim to get at least 75% done). Sunday, finish installation, do touch-up paint or caulking, and style it with decor. By Sunday evening, you’re posting before-and-after photos and feeling like a home improvement rockstar!
Budget breakdown for different options:
- DIY Shiplap from plywood: $80-150 for materials, $20 for tool rental
- Peel-and-stick panels: $150-300 depending on wall size
- Reclaimed pallet wood: $0-50 plus time and elbow grease
- Beadboard sheets: $60-120 for an average wall
- Faux brick panels: $120-250 for materials
Don’t forget to share your progress! Take those before-and-after shots, because trust me, you’ll want to remember how far you’ve come. And please, PLEASE tag me or drop your photos in the comments—I live for seeing your transformations and cheering you on! There’s something so satisfying about doing this yourself and creating something beautiful for your family. Plus, bragging rights forever when guests ask, “Who did this?” and you get to say, “Um, I did!”
Styling Secrets to Make It a Family Focal Point
So you’ve got your gorgeous accent wall up—now what? Here’s where the real magic happens, mama! The wall is just the backdrop; now we’re going to layer in all those cozy, personal touches that make it the heart of your living room and the spot where all the family memories happen.
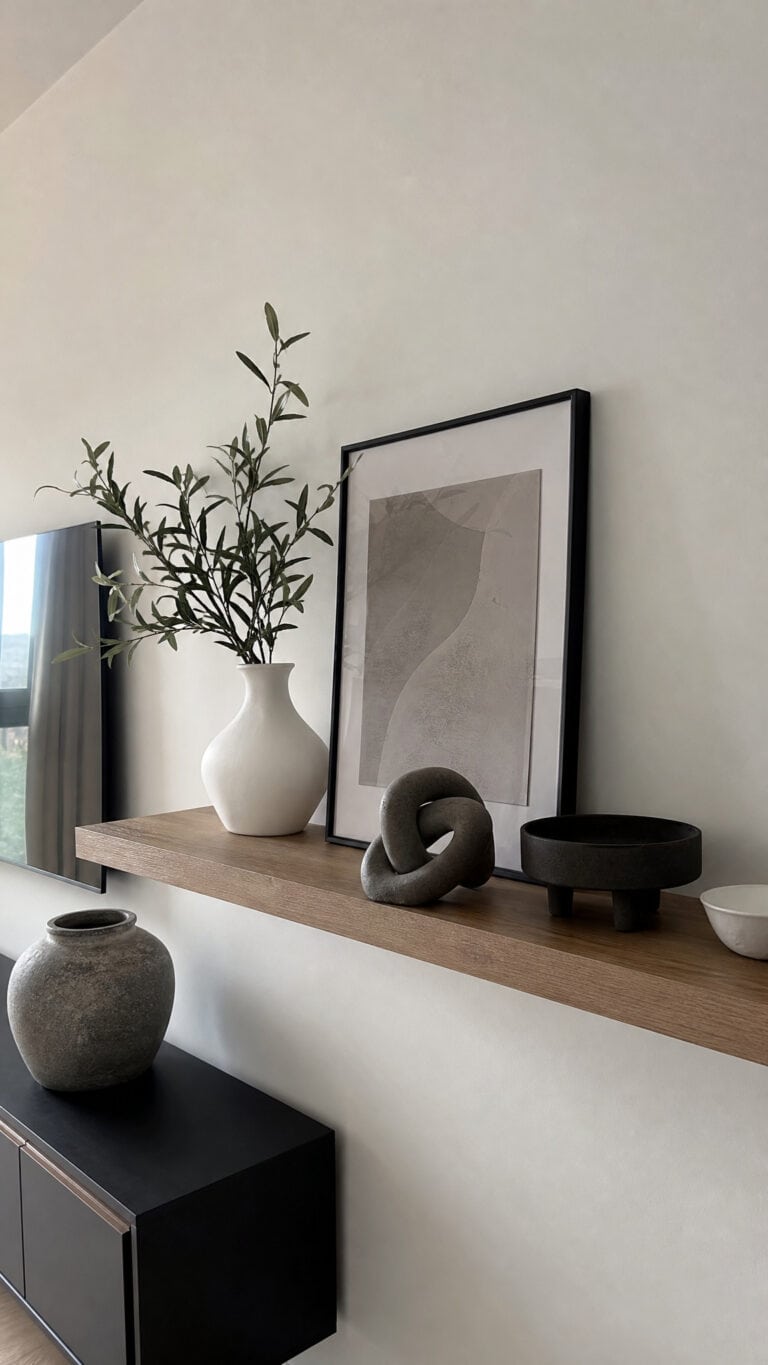
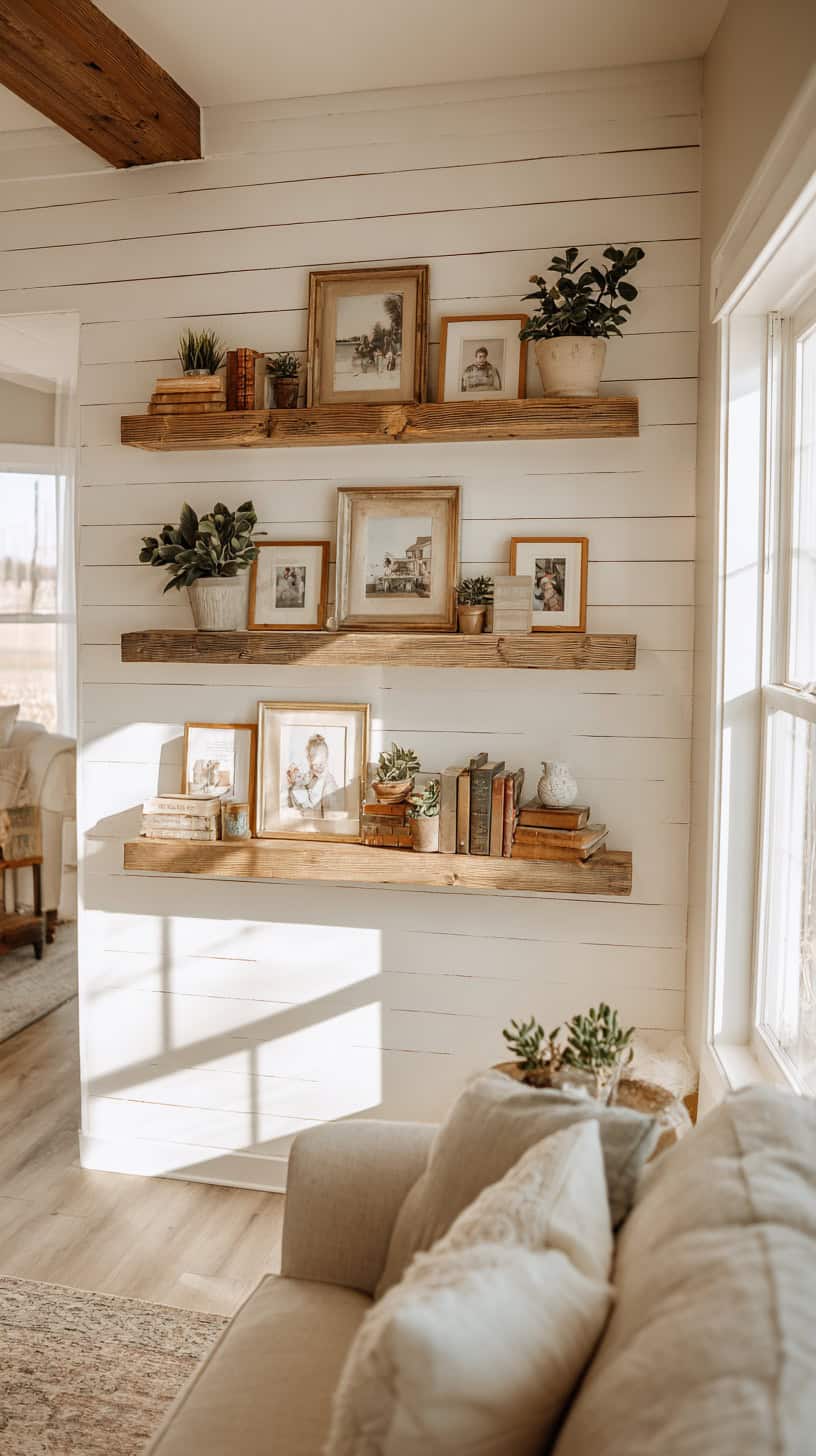
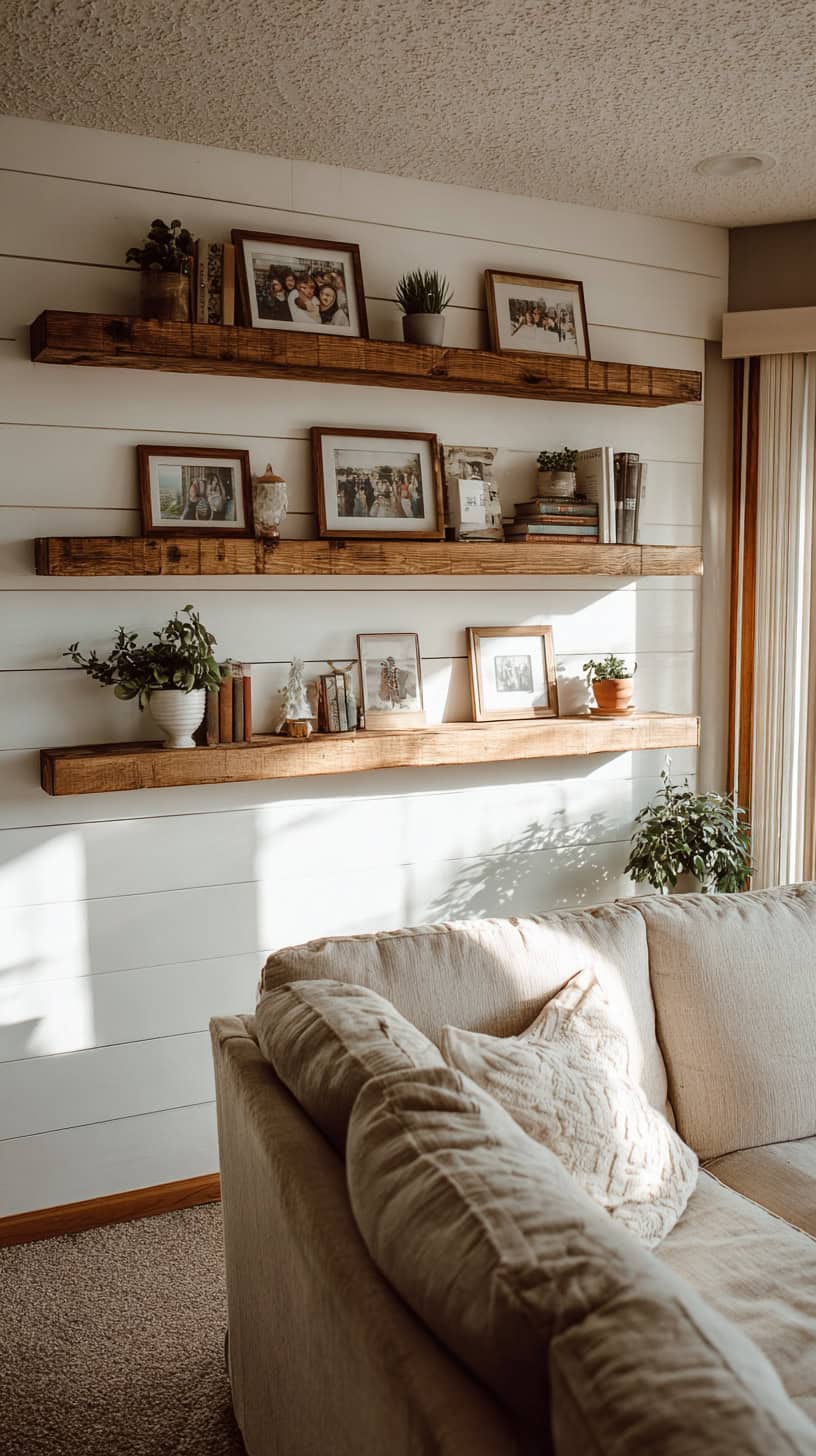
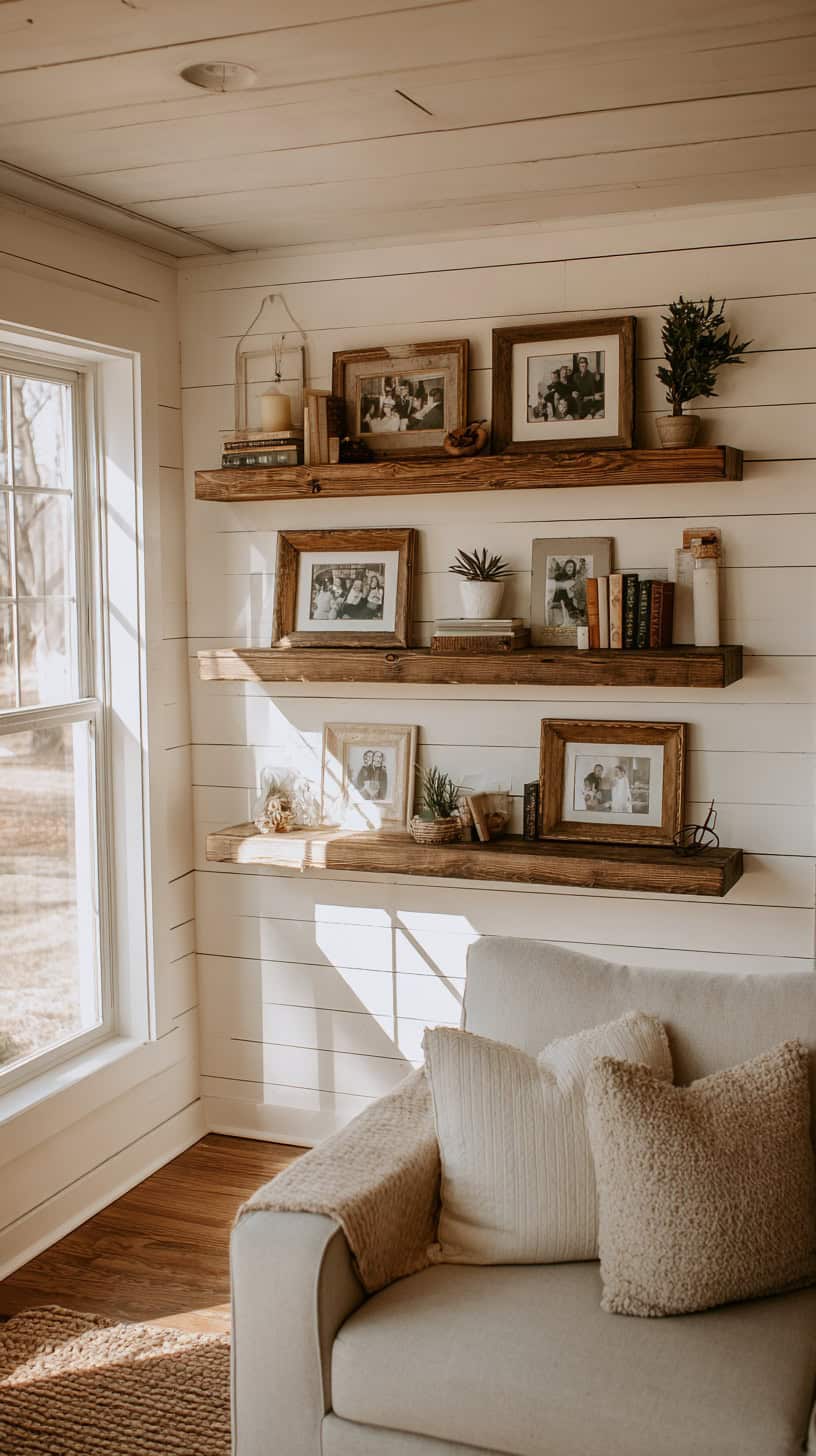
Start with functional shelving. Floating shelves against your accent wall are both practical and beautiful. I added three staggered shelves on my shiplap wall, and they’re perfect for displaying family photos, my collection of vintage books (that nobody actually reads but they look cute), and corralling some of the boys’ art projects. Mix in some greenery—faux plants are totally acceptable if you’re like me and forget to water things—and a few decorative objects. The key is to keep it balanced but not too matchy-matchy.
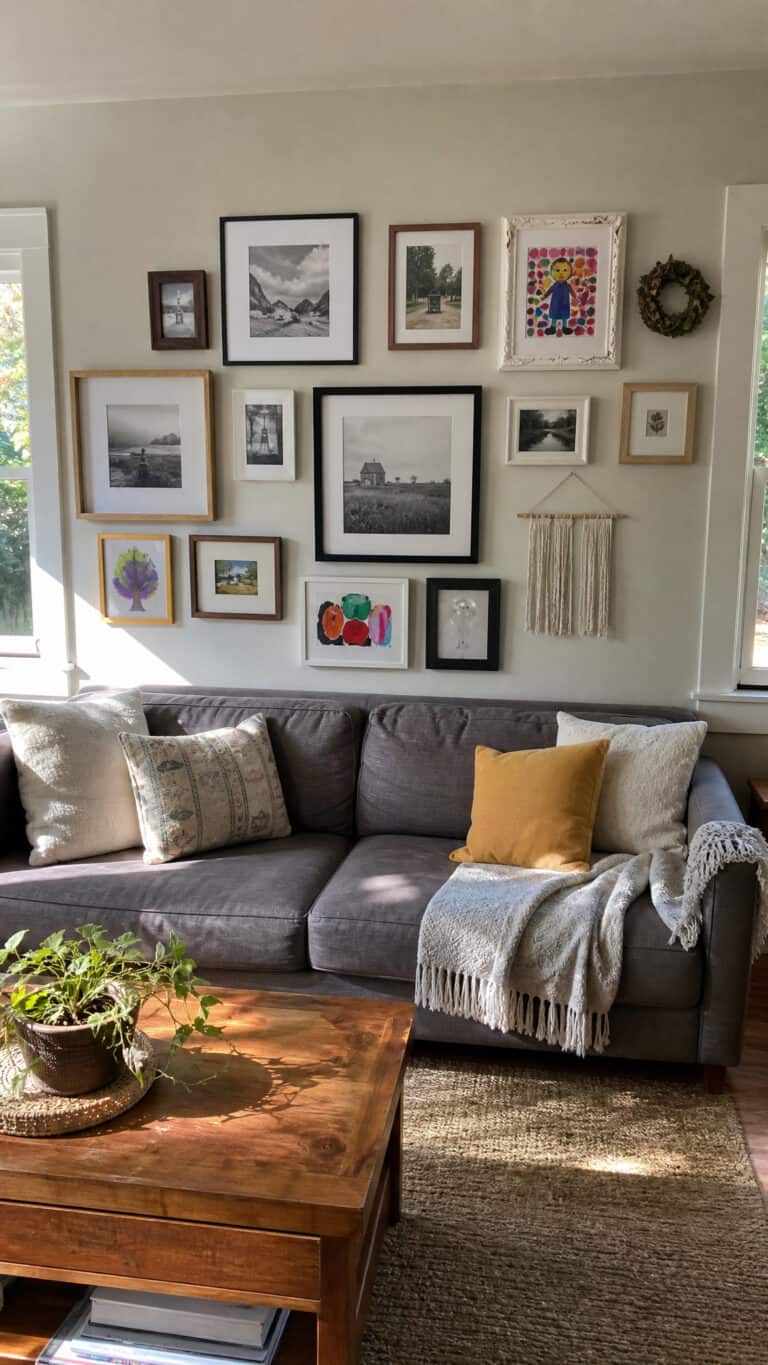
Gallery walls are your secret weapon. Against a textured accent wall, a collection of frames creates this amazing layered look. Go for black frames against white walls for contrast, or mix wood tones with reclaimed wood or brick backgrounds. Include family photos, meaningful quotes, kids’ artwork (framed to make it look intentional!), and maybe a mirror or two to bounce light around. Don’t stress about perfect spacing—slightly imperfect gallery walls feel more organic and farmhouse-y anyway.
Anchor it with furniture placement. Your accent wall should be the star, so position your main furniture piece—usually your couch—facing it or against it. This creates that focal point arrangement where everything flows naturally. Add a cozy area rug to define the space, and suddenly your living room has purpose and direction instead of just being “where the furniture landed.”
Layer in the cozy textiles. This is where you really bring the “family snuggle spot” energy! Chunky knit throw blankets draped over the couch, a mix of pillows in complementary textures and patterns, maybe a cozy pouf or ottoman for extra seating during game night. Think soft, touchable, inviting—the kind of setup where kids automatically want to pile in for movie marathons.
Lighting makes everything better. String lights or a statement light fixture draw the eye to your accent wall and create ambiance. I added a simple black industrial-style sconce on either side of my wall, and the warm glow makes everything feel so intimate and cozy in the evenings. Table lamps on side tables add more layers of light and make the whole space feel welcoming.
Make it personal and changeable. The beauty of styling your accent wall is that it can evolve with your family and the seasons. Swap out photos as kids grow, add holiday decor hooks, hang seasonal garlands, switch up your shelf styling. This keeps your space feeling fresh without requiring another renovation. Right now I’ve got fall leaves and little pumpkins scattered on my shelves, but come Christmas, those same shelves will hold mini trees and stockings.
Don’t forget the practical stuff. Because this is real life with kids, think about function too. Cable management boxes hide all those TV cords. Baskets on lower shelves corral toys and remotes. A small ledge or shelf below the TV is perfect for the gaming console. Your beautiful accent wall can absolutely coexist with the reality of family life—it just takes a little strategic planning.
The goal here is to create a space that feels like the heart of your home—where homework happens at the coffee table, where weekend pancake breakfasts turn into living room picnics, where the whole family crashes after dinner to watch whatever show everyone can agree on (good luck with that). Your accent wall becomes the backdrop for all those everyday moments that turn into the memories your kids will talk about someday.
So there you have it, friend—everything you need to create that cozy farmhouse accent wall you’ve been dreaming about! Whether you’re team shiplap, obsessed with reclaimed wood, or falling hard for faux brick, there’s an option that fits your style, budget, and skill level. And remember, it doesn’t have to be perfect. Some of the best farmhouse style is a little rough around the edges, a little lived-in, a little “we did our best and it turned out amazing anyway.” Now go create that cozy focal point, take those before-and-after pics, and enjoy having the living room you actually want to spend time in. You’ve got this, mama! ❤️
This post may contain affiliate links. Read the full disclosure here.