Gallery Wall Living Room Inspiration Full Of Personality
Creating a gallery wall living room has been one of my favorite home projects since becoming a mom of three energetic boys! There’s something so special about walking into our main living space and seeing all those memories, artwork, and meaningful pieces displayed together. It instantly makes our house feel like a home, and honestly, it’s become such a conversation starter whenever friends come over!
The best part about gallery walls is that they’re completely flexible and can grow with your family. I’ve changed ours at least a dozen times over the years, swapping out the boys’ artwork, adding new family photos, and mixing in fun prints that catch my eye. Whether you’re starting from scratch or looking to refresh an existing wall, I’m so excited to share all the inspiration and tips I’ve learned along the way!
Why a Gallery Wall Living Room Is Perfect for Families
Let me tell you, before I created our gallery wall living room, I had this massive blank wall that just stared at me every single day! It felt so cold and empty, especially in a room where we spend most of our time. Once I finally took the plunge and started planning our gallery wall, everything changed. The room instantly felt warmer, more inviting, and so much more ‘us’!
Gallery walls are absolutely perfect for families because they tell your story in such a visual way. I love that I can include my boys’ handprint art from preschool right next to a beautiful print I found at a local art fair. It’s this amazing mix of high and low, professional and homemade, and it all works together beautifully! Plus, when the kids see their artwork displayed so prominently, their little faces just light up with pride.
Another huge benefit is the flexibility factor. With three boys constantly creating new masterpieces and our family growing and changing, I need decor that can evolve too! Adding or swapping out frames is so much easier than repainting or buying new furniture. I can refresh our entire living room vibe in an afternoon without spending a fortune, which is perfect for my mom budget!
The practical side of me also loves that gallery walls can hide imperfections in your walls. We have a few dings and marks from various toy incidents over the years, and strategically placed frames cover those right up! It’s like magic, and way easier than patching and painting with three little ones running around.
Planning Your Gallery Wall Layout Like a Pro
Okay, so here’s where I learned some lessons the hard way! My first attempt at a gallery wall involved way too many nail holes and a lot of frustrated sighs. But I’ve got you covered with the tricks I wish I’d known from the start. The absolute best tip is to lay everything out on the floor first! I clear a space in our living room, arrange all the frames exactly how I want them, and then take a photo with my phone. This becomes my reference guide when I’m actually hanging everything.
Another game-changer has been using kraft paper or newspaper to create templates. I trace each frame onto paper, cut them out, and tape them to the wall with painter’s tape. This lets me visualize the entire gallery wall living room arrangement without making a single hole! I can move things around until it feels just right, and the boys think it’s hilarious to see paper rectangles all over the wall.
When it comes to spacing, I’ve found that keeping about 2-3 inches between frames looks most cohesive. Too close and it feels cramped, too far apart and it loses that gallery feel. I actually use a small piece of cardboard cut to size as my spacing guide when hanging! It keeps everything consistent without requiring any complicated measuring.
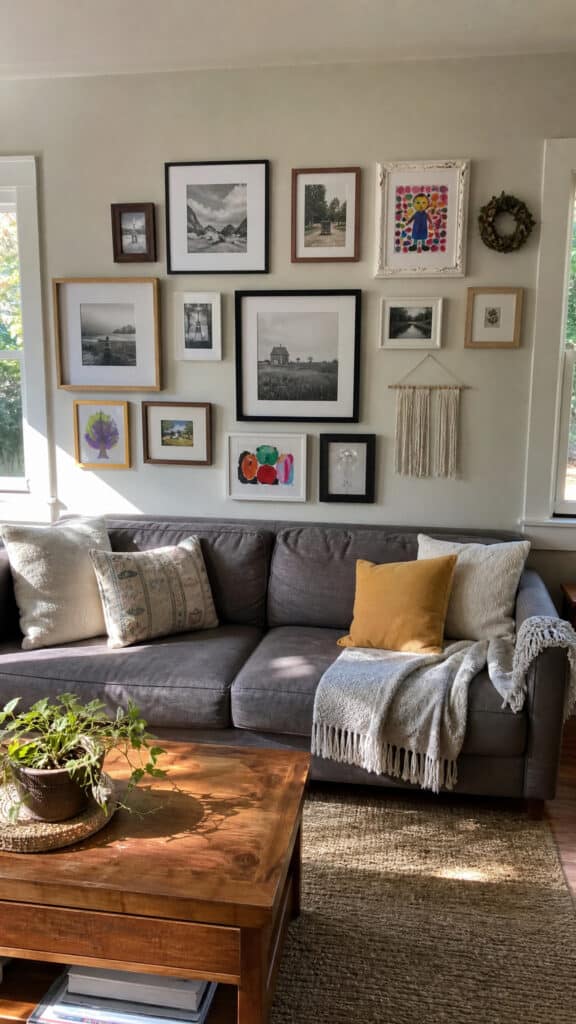
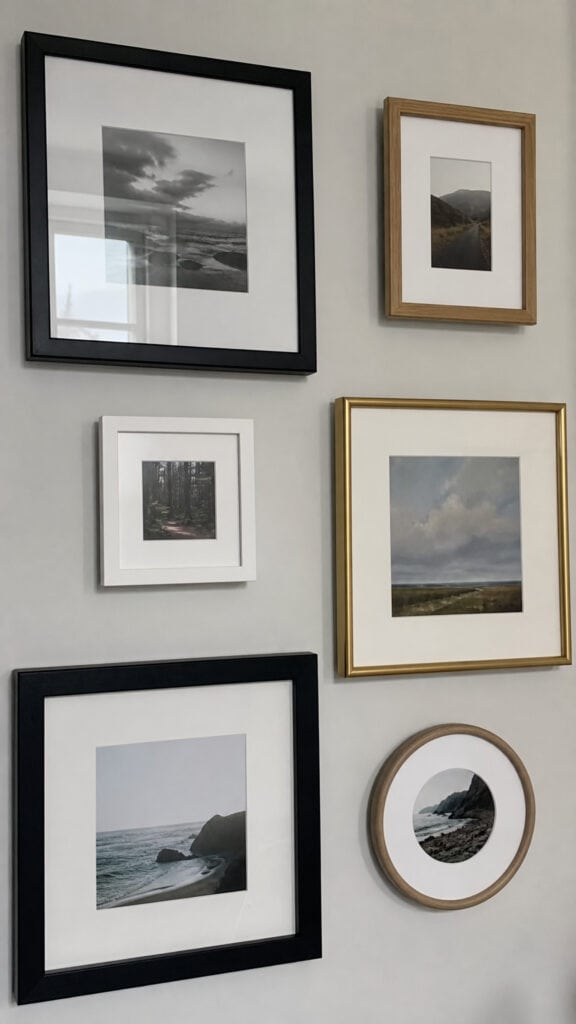
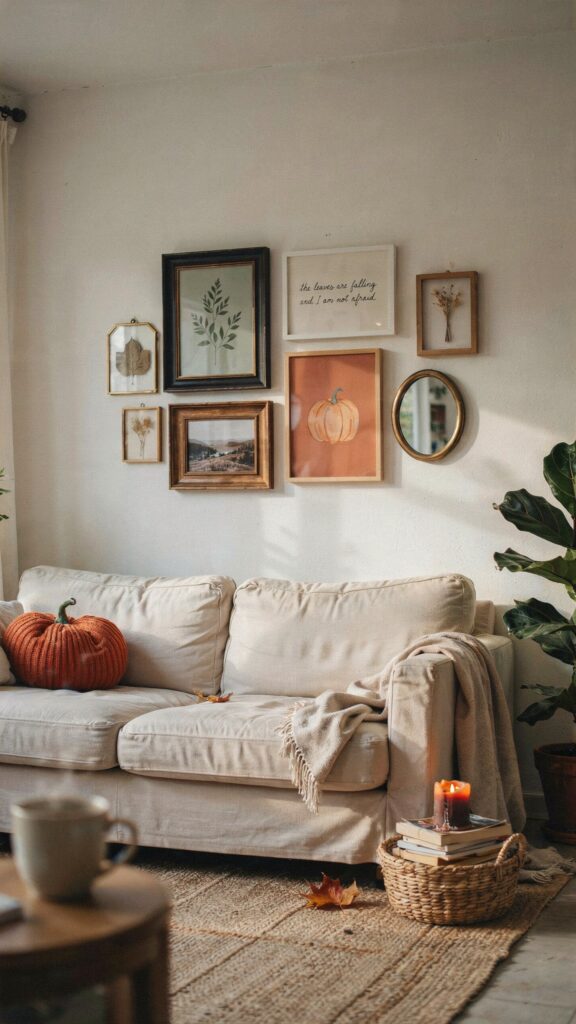
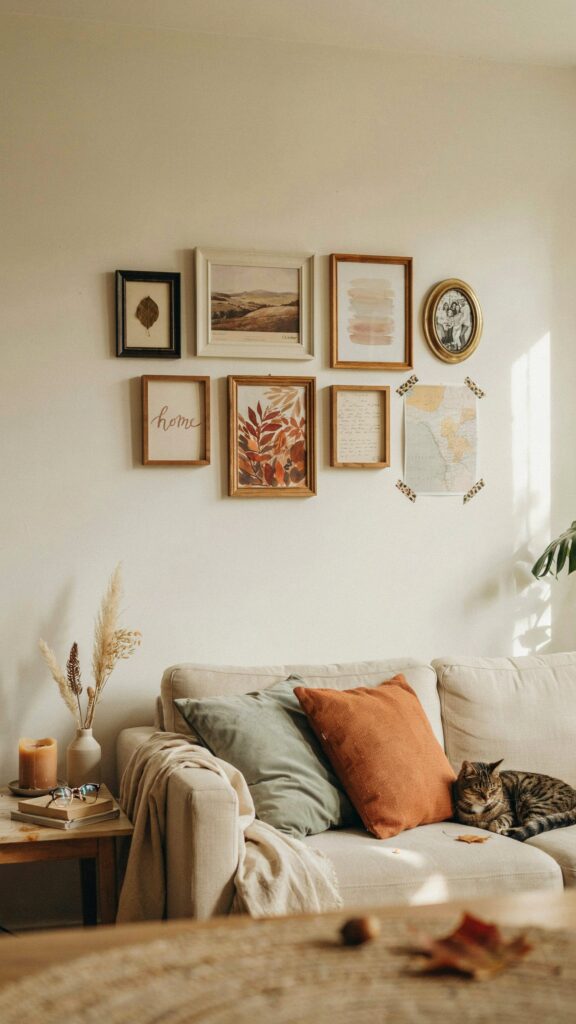
There are several layout styles you can choose from, and each creates a different vibe! The grid layout is super clean and modern, perfect if you like symmetry. The salon-style (my personal favorite!) is more eclectic and organic, with frames of all different sizes clustered together. Then there’s the linear approach, where you keep frames aligned along a central horizontal line, which works beautifully above a sofa!
Mixing Frame Styles and Sizes for Maximum Impact
This is where you can really let your personality shine through! I used to think everything needed to match perfectly, but honestly, the magic happens when you mix things up. Our gallery wall living room features black frames, white frames, natural wood frames, and even a few gold ones! The variety adds so much visual interest and keeps it from looking too matchy-matchy or boring.
My general rule of thumb is to stick to 2-3 main frame colors and then maybe add one accent color. For us, that’s mostly black and white frames with natural wood accents and occasional gold pieces. This creates cohesion without being too rigid. I’ve also learned that mixing frame thicknesses adds depth – some chunky frames mixed with thinner, more delicate ones creates a really dynamic look!
Size variation is equally important! I always include at least one large statement piece (usually 16×20 or bigger) as an anchor, then surround it with medium and smaller frames. The large pieces give your eye somewhere to rest, while the smaller frames fill in the gaps and add detail. Think of it like puzzle pieces that all fit together to create one beautiful picture!
Don’t be afraid to include different types of frames either! We have traditional rectangular frames, a few square ones, and I even incorporated a circular mirror into our arrangement. The round shape breaks up all those straight lines and adds an unexpected element that I absolutely love. Mixing in three-dimensional objects like small shelves or shadow boxes can also add incredible depth to your gallery wall!
What to Include in Your Gallery Wall Living Room
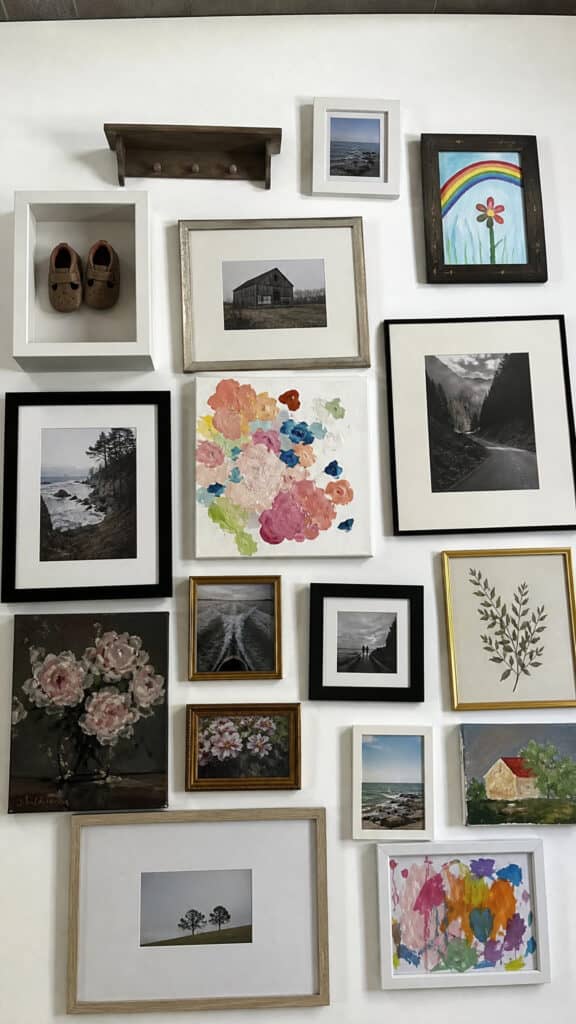
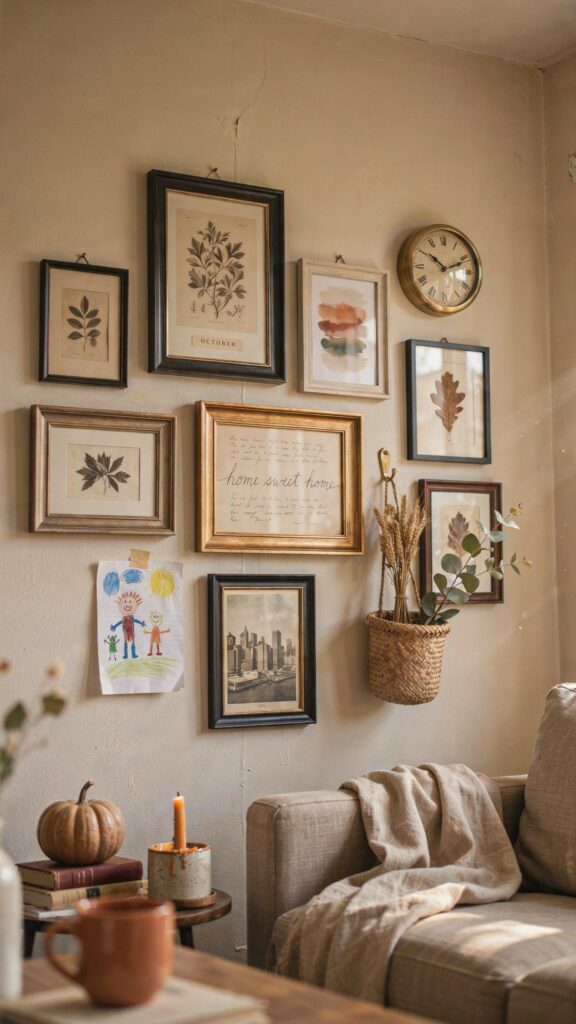
This is the fun part where you get to be really creative! Family photos are obviously a must for me – I love having snapshots of the boys at different ages all displayed together. But I’ve learned that mixing in other types of art and objects makes the whole display so much more interesting. Our wall includes the kids’ artwork, inspirational quotes, botanical prints, and even a vintage map of our hometown!
Children’s artwork deserves a special mention because it’s absolutely precious and adds such personality! I rotate pieces seasonally, which keeps things fresh and gives all three boys a chance to see their creations displayed. I use simple frames with removable backs so I can easily swap artwork in and out. Pro tip: take photos of all their art before displaying or storing it, because you definitely can’t keep everything forever (though my heart wants to!).
Personal photos should be a mix of professional shots and candid moments. I love including both our posed family portraits and silly everyday snapshots – like that time my middle son got into the flour or when all three boys fell asleep in a puppy pile on the couch. Those unplanned moments often end up being my favorites! Black and white photos mixed with color creates a sophisticated, timeless look that I’m completely obsessed with.
Don’t forget about adding text-based prints! Inspirational quotes, song lyrics, or meaningful phrases add variety to your gallery wall and can really reinforce the mood you want to create. I have a print that says ‘Home is where our story begins’ that makes me smile every single time I see it. You can find affordable prints on Etsy or even create your own using free design tools online!
Three-dimensional objects are another fantastic addition! We have a small floating shelf incorporated into our gallery wall where I display tiny treasures the boys have collected – seashells from our beach vacation, a special rock from Grandma’s garden, that sort of thing. Shadow boxes are perfect for displaying baby shoes, special cards, or other keepsakes that don’t fit in regular frames.
Color Coordination Without Being Too Matchy

Color coordination in a gallery wall living room can feel tricky, but I promise it’s easier than you think! The key is choosing a cohesive color palette without making everything look too uniform. I typically stick to 3-5 main colors that appear throughout our gallery wall, which ties everything together beautifully. In our current setup, we have lots of navy blue, warm wood tones, cream, black, and pops of coral!
One approach I love is pulling colors from your existing living room decor. Look at your sofa, throw pillows, rug, and other accessories, then echo those colors in your gallery wall. This creates a harmonious flow throughout the entire room! For example, the coral in some of our gallery wall prints matches the coral throw pillows on our couch, and it makes everything feel intentionally designed.
If you’re including children’s artwork like I do, you might worry about clashing colors since kids aren’t exactly known for their restraint with the crayon box! I’ve found that using white or black mats around colorful artwork helps tone things down and creates visual breathing room. The mat acts as a buffer and makes even the wildest rainbow painting look more sophisticated and gallery-worthy.
Another trick is to use black and white photos as your neutral base. I probably have 60% black and white images in our gallery wall, which creates a calm foundation. Then I layer in colorful pieces strategically throughout, making sure they’re distributed evenly rather than clustered in one area. This prevents any one section from feeling too overwhelming or out of balance with the rest!
Hanging Your Gallery Wall Without Losing Your Mind

Let me be real with you – hanging a gallery wall can be intimidating! But I’ve developed a system that works even when I’m doing it solo during naptime. First, always start with your anchor piece (the largest frame) and work outward from there. I usually center mine about 57-60 inches from the floor, which is standard gallery height and works perfectly above our sofa!
Invest in a good level – seriously, this tool is your best friend! I use a small torpedo level that cost maybe ten dollars, and it’s saved me from so many crooked frames. I also keep a pencil, measuring tape, hammer, and a variety of nails and picture hangers in a little caddy so everything’s ready to go. Being organized makes the whole process so much faster and less frustrating!
For hanging hardware, I swear by picture hanging strips for lighter frames! They’re amazing because they don’t require nails, they hold surprisingly well, and they’re damage-free if you need to move things around. For heavier frames, I use proper picture hangers rated for the weight. Always check the weight limit – I learned this lesson when a frame came crashing down in the middle of the night and scared us all half to death!
My biggest tip is to have someone help you with the initial placement, even if you’re doing the actual hanging yourself. My husband holds frames in position while I step back and decide if the placement looks right. This saves so many unnecessary holes in the wall! If you’re doing it alone, those kraft paper templates I mentioned earlier are absolute lifesavers. They let you perfect the arrangement before committing to any nail holes.
Don’t stress about perfection! Honestly, a few frames that are slightly off-level won’t be noticeable once everything’s up, especially with a salon-style arrangement. I’ve adjusted frames months after hanging them and realized no one had noticed they were slightly crooked. We’re our own worst critics, and most people will just see a beautiful, cohesive gallery wall living room display!
Keeping Your Gallery Wall Fresh and Updated

One of my favorite things about our gallery wall living room is how easy it is to keep it current! I try to refresh at least a few pieces every season, which keeps our space feeling new without requiring a complete overhaul. Sometimes it’s as simple as swapping in new photos from our latest family adventures or rotating in different artwork from the boys’ ever-growing collection!
I keep a storage box specifically for gallery wall pieces that aren’t currently displayed. This includes extra frames, prints I love but don’t have room for right now, and special artwork from the kids. When I’m ready to refresh things, I just pull from this box and swap pieces out! It’s like shopping my own collection, and it costs absolutely nothing. Plus, it’s fun to rediscover pieces I’d forgotten about!
Seasonal updates are another great way to keep things interesting! For fall, I might add some warm-toned prints or photos from our apple picking adventures. During the holidays, I’ll incorporate festive colors or winter scenes. Spring brings in brighter, fresher pieces. These small changes make such a big impact and help our living room feel current with the seasons!
Don’t forget to update as your family grows and changes! I love looking back at how our gallery wall has evolved over the years. Early versions featured lots of baby photos and nursery art, and now we have elementary school projects and sports team pictures. It’s a visual timeline of our family’s journey, and I absolutely treasure that aspect of it!
If you’re feeling like your gallery wall needs a refresh but can’t quite put your finger on what’s wrong, try removing a few pieces rather than adding more. Sometimes less really is more! I’ve found that when things start feeling cluttered or overwhelming, editing down to my absolute favorites creates more impact and lets each piece shine.
Bringing It All Together
Creating a gallery wall living room has honestly been one of the most rewarding decorating projects I’ve tackled as a mom! It’s given our main living space so much personality and warmth, and I love that it tells our family’s unique story. Every time I walk through the room, I’m reminded of special moments, proud of my boys’ creativity, and grateful for this cozy home we’ve built together!
Remember, there’s no wrong way to create a gallery wall – the best one is the one that makes you happy and reflects your family’s personality! Don’t be afraid to experiment, make changes, and let it evolve over time. Start with what you have, add pieces gradually, and most importantly, have fun with the process. Your gallery wall living room will be a beautiful, ever-changing reflection of your life, and that’s something truly special!


This post may contain affiliate links. Read the full disclosure here.