DIY Thanksgiving Decorations Table Ideas for a Handmade Holiday Look
There’s something magical about gathering around the Thanksgiving table with family, and this year I’m determined to make ours extra special with handmade touches! As a mom of three energetic boys, I know how crazy the holiday season can get, but creating DIY Thanksgiving decorations table settings doesn’t have to be complicated or time-consuming. In fact, some of my favorite decorations are the ones we’ve made together as a family!
Whether you’re hosting Thanksgiving dinner for the first time or you’re a seasoned pro looking for fresh ideas, these DIY table decoration projects will help you create a warm, inviting atmosphere without breaking the bank. Plus, many of these ideas are kid-friendly, which means you can get those little hands involved and create precious memories while you craft. Let’s dive into some beautiful, achievable projects that’ll make your Thanksgiving table the star of the show!
Natural Elements Centerpiece with Pinecones and Branches
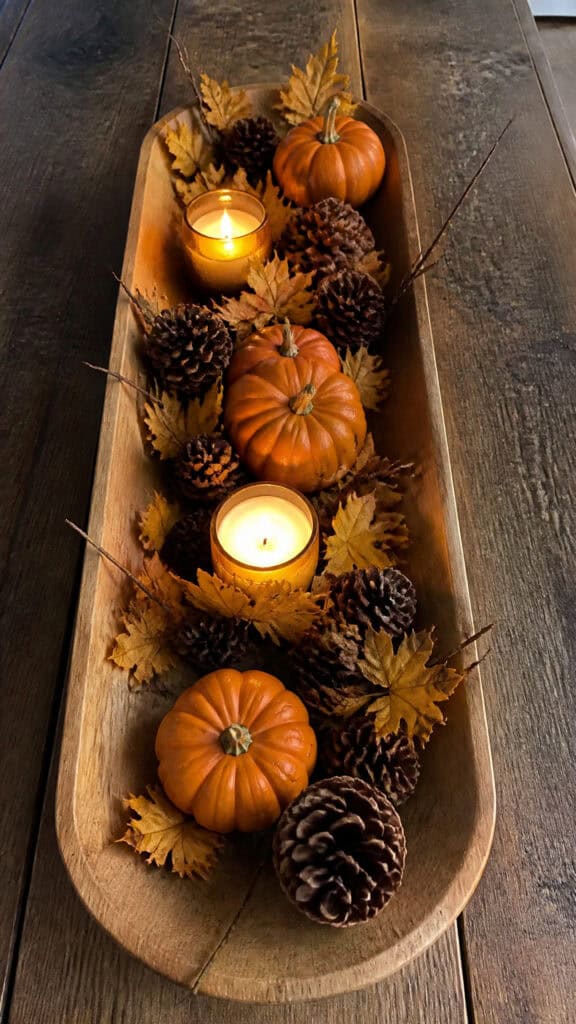
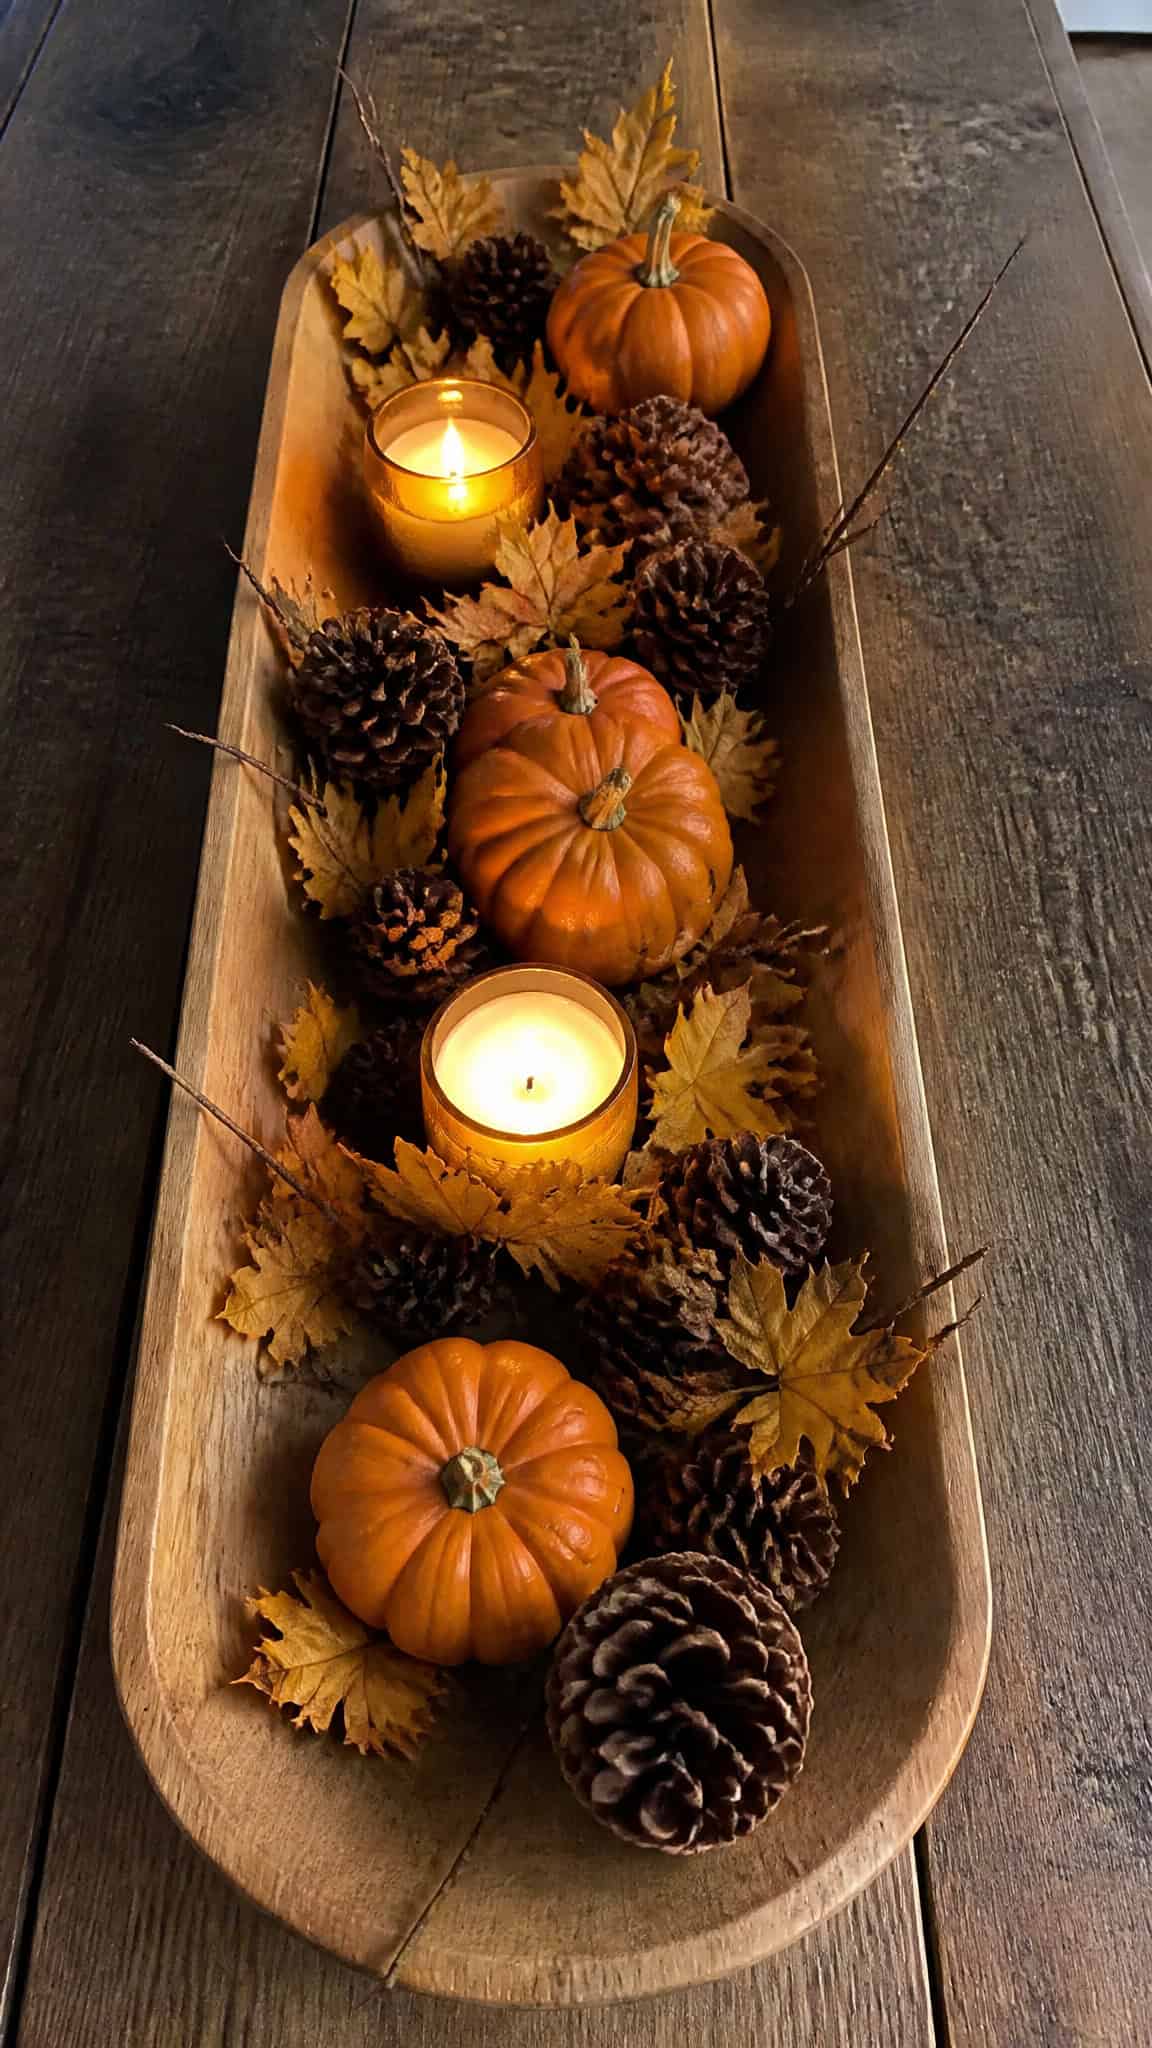
One of my absolute favorite ways to create a stunning DIY Thanksgiving decorations table is by bringing the outdoors in! We live near a park, so the boys and I love going on nature walks to collect pinecones, interesting branches, and colorful fall leaves. It’s become our little pre-Thanksgiving tradition, and honestly, it tires them out before the big cooking day!
To create this centerpiece, start with a long wooden tray or even a simple cutting board as your base. Arrange your collected branches down the center of your table, mixing in pinecones of various sizes. I like to spray paint some of the pinecones in metallic gold or copper for an elegant touch – just do this outside or in a well-ventilated garage while the kids are napping or at school!
Add in some small pumpkins, gourds, or acorns between the branches for color and texture. You can also tuck in some battery-operated fairy lights for a magical glow during dinner. The best part about this centerpiece is that it costs almost nothing and looks like you spent hours on it! My middle son loves being in charge of arranging the pinecones, and it keeps him busy for a good twenty minutes.
Pro tip: If you want your leaves to last longer and maintain their color, press them between heavy books for a few days before using them, or preserve them with a mixture of glycerin and water. This way, your beautiful DIY Thanksgiving decorations table will look fresh throughout the entire holiday!
Mason Jar Candle Holders with Fall Foliage
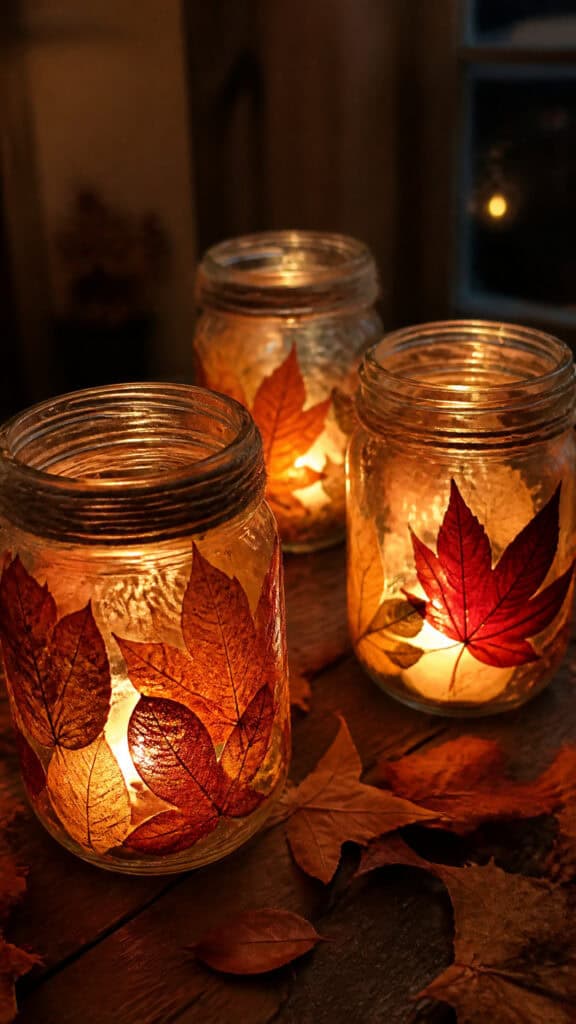
Mason jars are my go-to for everything, and they make the most adorable candle holders for your Thanksgiving table! I always have a stash of them in my pantry because let’s be honest, they’re perfect for storing everything from snacks to craft supplies. For this project, you’ll need a few mason jars in various sizes, some Mod Podge, fall leaves, and tea light candles.
Start by cleaning your mason jars thoroughly and letting them dry completely. Then, have your kids help you select the prettiest fall leaves – this is where those nature walks come in handy again! Brush a thin layer of Mod Podge on the outside of the jar, carefully place your leaves in a pretty pattern, and then seal them with another layer of Mod Podge on top.
Once they’re dry (usually takes about an hour), you can add a rustic touch by wrapping twine or burlap ribbon around the rim of the jar. Place a tea light or small pillar candle inside, and you’ve got yourself gorgeous DIY Thanksgiving decorations table accents! I usually make about five or seven of these – odd numbers always look better when arranging decorations.
The warm glow through the leaves creates such a cozy ambiance during dinner, and my boys are so proud when guests compliment “their” decorations. Just remember to use battery-operated tea lights if you have curious little ones running around – safety first, mama!
Burlap Table Runner with Personalized Name Tags
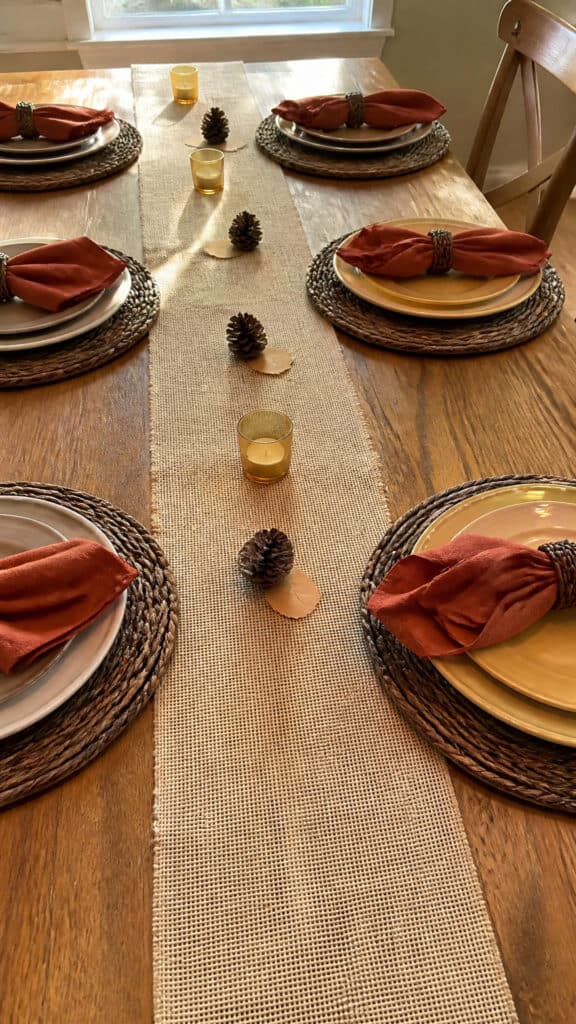
Creating a custom table runner is easier than you might think, and it adds such a personal touch to your DIY Thanksgiving decorations table! I discovered burlap fabric at my local craft store, and it’s become my secret weapon for rustic holiday decorating. You can buy it by the yard, and it’s super affordable – usually just a few dollars for enough to cover your entire table!
Simply measure your table length and add about 12-18 inches so the runner hangs nicely over the edges. Cut your burlap to the desired width (I like mine about 14-16 inches wide), and you can either leave the edges raw for a shabby-chic look or fold them under and use fabric glue to secure them. No sewing required, which is perfect for me because my sewing machine scares me!
Now here’s where it gets really fun – create personalized name tags for each guest! Cut small rectangles from cardstock or kraft paper, write each person’s name with a pretty calligraphy pen or marker, and attach them to small pinecones or mini pumpkins. Place these at each seat along your burlap runner. My oldest son has been practicing his handwriting, so I let him write some of the names, and it adds such a sweet, handmade quality!
You can also stencil words like “GIVE THANKS” or “GRATEFUL” along the runner using fabric paint if you’re feeling extra crafty. But honestly, the simple burlap look is beautiful on its own and lets your other decorations shine. This runner can be used year after year, and it gets softer and more beautiful with each wash!
Painted Pumpkin Place Card Holders
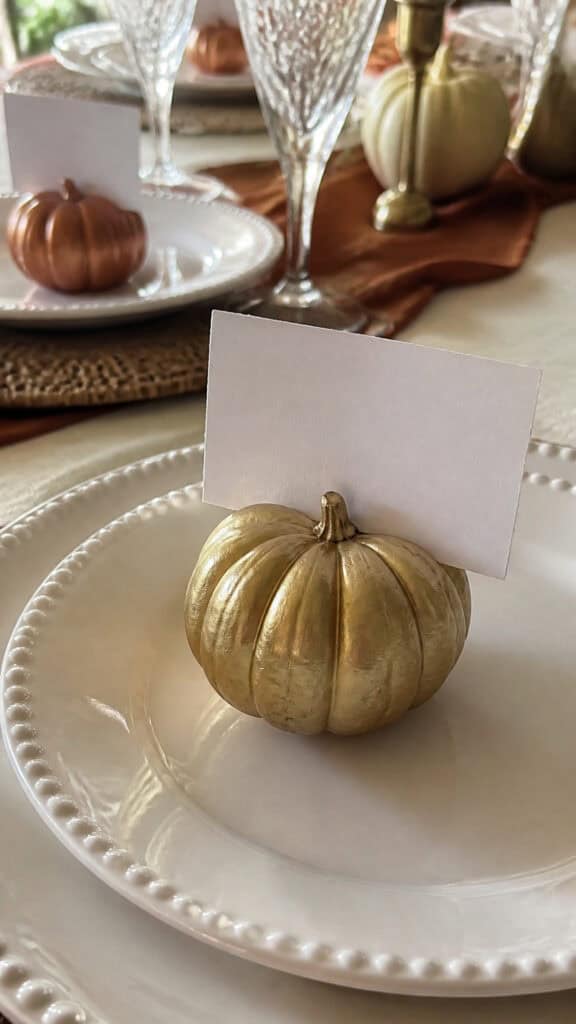
Mini pumpkins are everywhere this time of year, and they’re perfect for creating adorable place card holders that double as party favors! I grab a bunch of the small ones from the grocery store or pumpkin patch – they’re usually super cheap, especially if you buy them a few weeks before Thanksgiving. This is definitely one of my boys’ favorite projects because they love painting!
Set up a painting station outside or cover your kitchen table with newspaper (trust me on this one – I learned the hard way!). Let each child pick out paint colors and decorate the mini pumpkins however they want. You can go with traditional fall colors like gold, copper, and burgundy, or get creative with patterns like stripes, polka dots, or even metallic finishes. My youngest went wild with glitter paint last year, and honestly, they turned out adorable!
Once the paint is completely dry, cut a small slit in the top of each pumpkin using a sharp knife (this is a mom-only job!). Then create place cards by cutting small rectangles from cardstock and writing your guests’ names on them. Slip the cards into the slits, and arrange them at each place setting on your DIY Thanksgiving decorations table.
These little pumpkin holders are such a hit with guests, and they make great take-home gifts too! Kids especially love finding their special decorated pumpkin at the table. You can also tuck a small piece of candy or a handwritten note of gratitude inside each one for an extra special touch that shows your guests how much you appreciate them!
Wheat Bundle Napkin Rings with Ribbon Accents
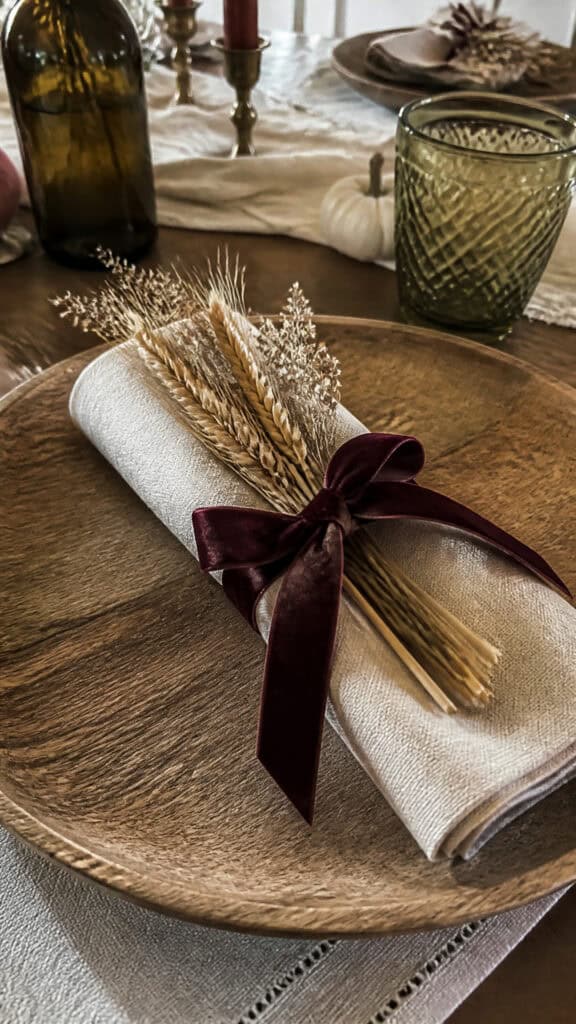
Napkin rings might seem like a small detail, but they really elevate your table setting and make everything look so polished! I love making wheat bundle napkin rings because they’re incredibly easy and add that perfect harvest feel to your DIY Thanksgiving decorations table. You can find dried wheat stalks at craft stores, or if you’re lucky enough to live near farmland, you might be able to gather some yourself!
To make these, simply gather 5-7 stalks of wheat and arrange them so the heads are all facing the same direction. Wrap a pretty ribbon around the middle – I love using velvet ribbon in deep burgundy, hunter green, or burnt orange for fall. Tie it in a simple knot or bow, leaving the ends long enough to look elegant. Then just slide your rolled napkin through the bundle, and you’re done!
What I love about this project is that you can make a bunch of them while watching TV after the kids go to bed – it’s actually quite relaxing! They add such a beautiful, rustic touch to each place setting, and they photograph wonderfully if you’re planning to share your Thanksgiving table on social media. My mom friends always ask me where I bought them, and they’re shocked when I tell them I made them myself!
If you can’t find wheat stalks, you can substitute with lavender bundles, dried herbs like rosemary, or even cinnamon sticks tied together. The cinnamon stick version smells amazing and adds a wonderful sensory element to your table. Plus, guests can take them home and use them in their own fall decorating or even drop them in their simmering potpourri!
Gratitude Tree Centerpiece with Family Messages
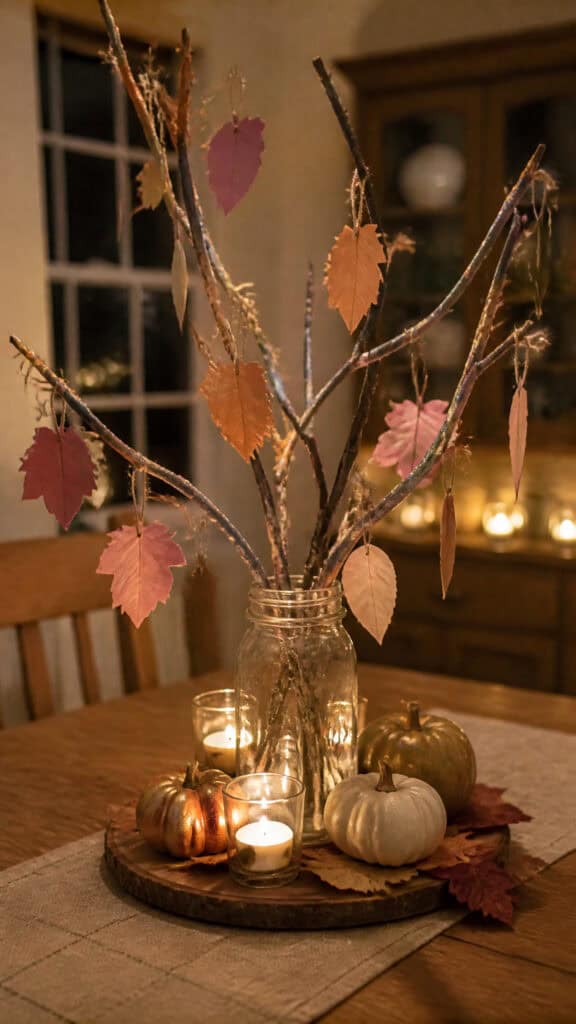
This has become our family’s favorite Thanksgiving tradition, and it’s such a meaningful addition to your DIY Thanksgiving decorations table! The gratitude tree is essentially a small branch arrangement where family members can hang tags with things they’re thankful for. It’s a beautiful way to focus on the true meaning of the holiday, and my boys actually look forward to it every year!
Start by finding a sturdy branch with several smaller branches coming off it – something with character and interesting shapes. You can spray paint it if you want (metallic gold looks stunning!), or leave it natural. Place it in a vase or jar filled with sand, small rocks, or dried beans to keep it stable. I use a mason jar filled with popcorn kernels because it’s cheap and works perfectly!
Cut out leaf shapes or simple tags from cardstock in fall colors – oranges, reds, yellows, and browns. Punch a small hole in each one and thread it with twine or thin ribbon. Place these tags in a pretty bowl next to your tree along with some markers. Throughout Thanksgiving dinner or during the days leading up to it, have family members write what they’re grateful for and hang the tags on the branches.
By the time Thanksgiving dinner rolls around, your tree will be full of beautiful, heartfelt messages! We read them aloud before dinner, and I’m not going to lie, it gets pretty emotional. Last year, my middle son wrote that he was thankful for “Mom’s hugs and pizza,” and I about died from the sweetness! This centerpiece becomes a conversation starter and really brings everyone together in the spirit of gratitude. Plus, you can save the tags each year and look back on them – it’s like a time capsule of blessings!
Fabric Scrap Garland for Table Edge Decoration
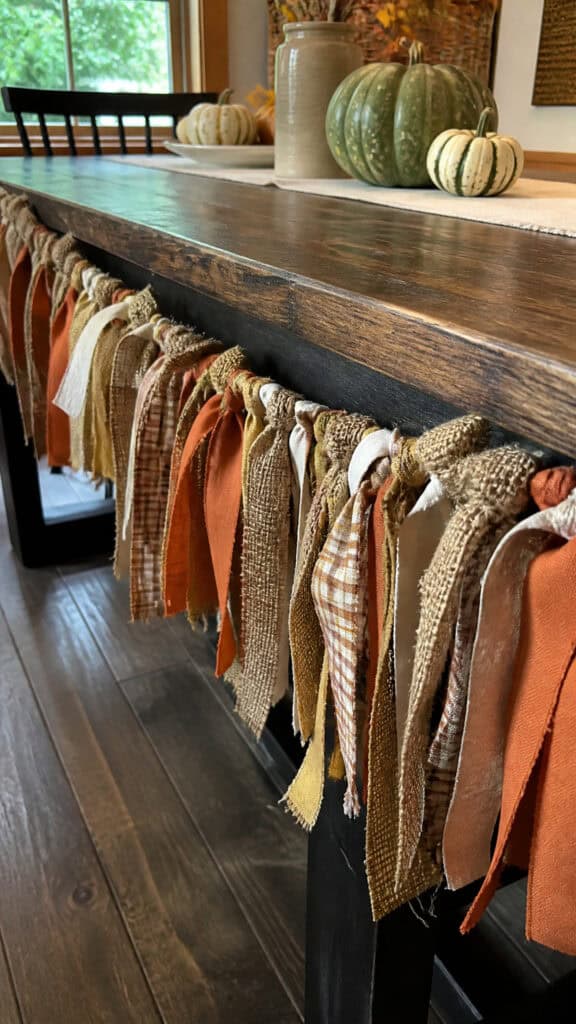
If you have a stash of fabric scraps like I do (I swear they multiply in my craft closet!), this garland project is perfect for adding color and texture to your DIY Thanksgiving decorations table. It’s also a fantastic project to do with kids because there’s no wrong way to do it, and little hands can help with almost every step!
Gather fabric scraps in fall colors and patterns – think plaids, burlaps, oranges, browns, and creams. Cut them into strips about 1-2 inches wide and 8-10 inches long. You don’t need to be precise here; in fact, the more varied the lengths, the better it looks! Then simply tie each strip onto a long piece of twine or ribbon, spacing them about an inch apart. My boys love this part and can tie knots like little pros now!
Once you’ve filled your twine with fabric strips, you can drape the garland along the edge of your table, weave it through your centerpiece, or even hang it from the front of your table so it cascades down. The texture and movement it adds are just beautiful! I made one that’s about 10 feet long, and I use it every year. It’s held up perfectly, and I just store it in a bag with my other Thanksgiving decorations.
You can also add other elements to your garland like felt leaves, paper cutouts, or small pinecones tied on with twine. Get creative and let your kids’ personalities shine through! This is one of those projects where imperfection actually makes it more charming. My youngest’s section always looks a bit chaotic with strips going every which way, but it’s absolutely adorable and makes me smile every time I look at it!
Bringing It All Together for Your Perfect Thanksgiving Table
Creating a beautiful DIY Thanksgiving decorations table doesn’t have to be stressful or expensive, mama! With these simple projects, you can transform your dining space into a warm, inviting gathering place that reflects your family’s personality and style. The best part is that many of these decorations can be made with items you already have at home or can find on a quick trip to the craft store or even your own backyard!
Remember, the goal isn’t perfection – it’s creating a space where your family and friends feel loved and welcomed. Some of my favorite Thanksgiving memories aren’t about having the fanciest decorations, but about the time spent crafting with my boys and seeing their proud faces when guests admire their handiwork. So grab those little helpers, put on some fall music, and start creating your own handmade holiday magic. Your Thanksgiving table is going to be absolutely beautiful, and more importantly, it’ll be filled with love and gratitude. Happy crafting and happy Thanksgiving!
This post may contain affiliate links. Read the full disclosure here.