Transform Your Space With DIY Dining Table Centerpiece Ideas
Isn’t it amazing how a simple centerpiece can completely change the vibe of your dining table?! As a mom of three wild (but wonderful!) boys, I know firsthand how chaotic life can get, but trust me, creating beautiful, DIY dining table centerpiece ideas doesn’t have to be complicated!
These ideas are not only easy and budget-friendly, but they’re also a fun way to get the kids involved and make your space feel extra special!
Whether you’re hosting guests or just sprucing up your table for everyday meals, you’ll be amazed at how these small touches can make a big impact!
Let’s make your dining table the heart of your home again!

Why Your Dining Table Deserves a Makeover
Let’s face it, the dining table tends to become a catch-all in many busy homes. I’ll admit, mine has seen everything from crayon marks to stacks of school papers (and yes, the occasional sticky syrup spill). But your dining table isn’t just another piece of furniture – it’s where conversations unfold, where quick breakfasts turn into cozy dinners, and where family memories are made. Giving it a little refresh can completely transform not just the look of your space, but how you feel about it too! Plus, with a few DIY dining table centerpiece ideas, you can make it uniquely yours without breaking the bank. Here’s why it’s worth the effort.
It’s the Heart of the Home

Think about all the action that happens at your dining table. From birthday breakfasts with pancakes piled high to family game nights filled with laughter (and maybe a little sibling rivalry), this table isn’t just furniture… It’s a part of your family’s daily life. So why not let it shine a little? A thoughtfully decorated table can instantly warm up the space and make it even more inviting, turning it into the true heart of your home.
When you give your dining table a bit of love, it shows. You’ll find that even the simplest meal feels a little more special, like you’re having a mini celebration every time you sit down. Who wouldn’t want that?
Fresh Decor Can Lift Your Mood
I don’t know about you, but I feel so much better when my home feels put together. A fresh, updated dining table can work wonders, especially on those chaotic days when everything else feels like a tornado. Just imagine walking into your dining room and being greeted by a cheerful, seasonal centerpiece or a collection of little touches that make you smile. It creates such a positive vibe that your whole family will notice. Even the kids might feel a little inspired to keep their milk cups on a coaster (a mom can dream, right?).
And let’s not forget, sprucing up your table doesn’t have to mean elaborate or pricey. A vase of fresh flowers from the grocery store or handmade decorations with the kids can do the trick beautifully.
It Makes Your Space Guest-Ready (Without the Overwhelm)
If you’ve ever done the last-minute “shove everything into a closet before guests arrive” routine, you’re not alone! The beauty of keeping your dining table looking intentional with a centerpiece is that it can instantly make your space feel pulled together, even when you haven’t had time to, well… tackle everything else. Guests tend to gravitate toward the dining table, whether it’s for a cup of coffee or to catch up on life. A simple but eye-catching centerpiece can steal the show and make them feel like you really put thought into your space. Bonus: it gives you one less thing to stress about when entertaining!
It’s an Opportunity to Get Creative (and Include the Kids!)
One of my favorite things about updating our dining table is getting the boys involved. Whether it’s painting little pumpkins for fall or arranging pinecones in a bowl for winter, they love adding their own touch. And honestly, it helps them feel like they’re contributing to our home — which is so sweet to see. Plus, DIY dining table centerpiece ideas are the perfect chance to try new things without a huge commitment. You can experiment with colors, textures, and themes for each season or holiday. And if it doesn’t work out, no biggie — you can always switch it up!
Decorating together isn’t just fun; it’s a great family bonding activity. Plus, those imperfect crafts the kids make? They’re what make your home personal and full of character.
A Makeover Doesn’t Have to Be Expensive
I get it — when you hear “makeover,” you might automatically think “too pricey.” But that’s where DIY ideas truly shine! There’s no need to splurge on designer pieces when you can create something just as stunning (or more meaningful!) for a fraction of the cost. Think about items you already have around the house — mason jars, candles, twine, or even fresh-cut flowers from your backyard. Upcycling is your best friend here, and it’s so satisfying to bring new life to things you might have otherwise tossed aside.
And let’s talk about thrift stores — they’re a treasure trove for unique finds. You can repurpose old dishware into a centerpiece, or grab a table runner that just needs a quick wash. Trust me, with a little creativity, the possibilities are endless. Your table can look like it stepped out of a home decor magazine without the eye-popping price tag.
Easy DIY Centerpiece Ideas for Everyday Use

Sometimes, it’s those small, thoughtful touches that make a house feel like a home – and your dining table is no different. With just a little creativity, you can transform your table into a cozy, welcoming centerpiece for your family to gather around throughout the week. I’ve discovered a handful of simple, DIY dining table centerpiece ideas that are so easy, you’ll wonder why you didn’t try them sooner! Here are some of my favorite ways to keep things fresh, creative, and absolutely charming, all while sticking to a mom-friendly budget.
The Charm of Mason Jars
Mason jars have to be one of the most versatile items in the DIY world. I always seem to have a few lying around, and they can be turned into so many cute centerpieces with minimal effort. Whether you leave them clear and classic or play around with paint and texture, mason jars are full of possibilities.
Here’s what I like to do:
- Fill them with fresh flowers (even ones your kiddos pick from the yard – dandelions have charm too!). A little water in the base keeps the blooms fresh, and they instantly add a pop of color to your table.
- Add fairy lights for a magical, evening vibe. Battery-operated lights work best, and they create such a soft, warm glow that’s perfect for dinner parties or quiet nights with family.
- Customize them with paint. I let my boys help out with this part! Chalk paint gives a matte, rustic look, while acrylic paints let you go bold with color. A little twine or ribbon tied around the top finishes it off beautifully.
The best part? Mason jars are reusable, so you can swap out the contents every week if you like! One week it’s flowers, the next week, you could layer seasonal items inside, like mini pumpkins or colorful Christmas ornaments.
Candles for a Cozy Vibe
Nothing beats the simple elegance of candles on a dining table. They bring such a warm, intimate feeling to the space, especially on chilly evenings. But as a mom, I know safety is key when using candles, so here’s what works for me.
First, I always opt for unscented candles at the table – no one wants competing smells while you’re eating dinner! Second, I make sure to stabilize them in a safe holder or on a sturdy base. That way, even if little hands get curious, things stay under control.
To style candles as part of your centerpiece, try these easy combos:
- Pair candles with greenery. I like to snip a few eucalyptus branches or grab some faux greenery from a craft store. Spreading it in a loose circle around the candles creates such a chic, organic look.
- Nestle them in pebbles. Grab some smooth stones (you can even pick them up from a river or beach!) and place them in a shallow bowl with the candles. It adds depth and texture without going overboard.
- Group various candle heights. Whether you’re using pillar candles or tea lights, clustering them at different levels instantly makes the arrangement feel more dynamic.
If open flames aren’t your thing, LED candles work just as well. They’re practically foolproof… and no worries about melted wax getting everywhere!
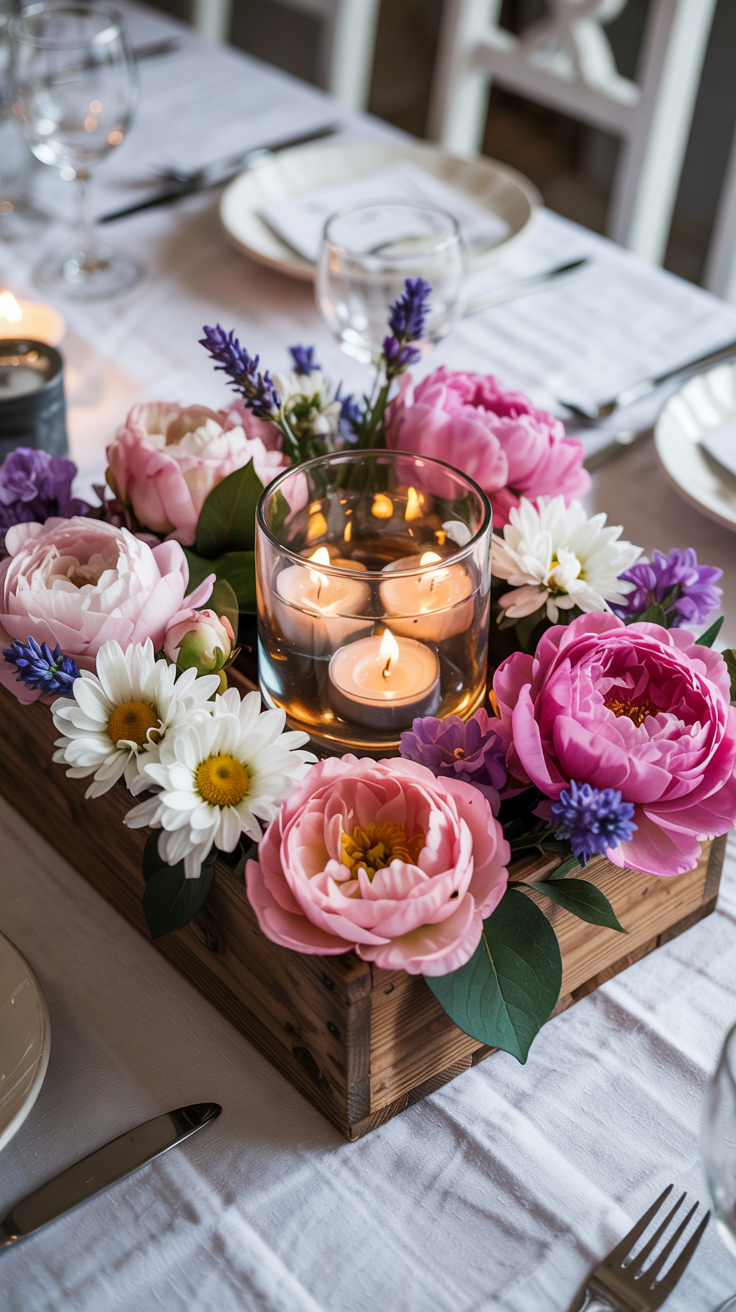
Fresh Flowers and Greenery

Nothing says “fresh and cheerful” quite like flowers. I love showcasing them on our dining table because they bring the outdoors in and brighten the whole room. The nice thing about flowers is you can use whatever’s in season (or whatever’s cheapest at the grocery store!) to keep things budget-friendly.
If you’re hesitant about arranging flowers, don’t worry – I’ve got some foolproof tips that’ll have you looking like a pro florist in no time:
- Start with odd numbers. This is a design trick that works wonders. Use three or five stems of your largest flower to act as the focal point, and then fill in with smaller blooms or greenery.
- Add height and variety. A mix of tall and short elements keeps the arrangement from looking flat. Use something like baby’s breath or snapdragons to add height, and tuck in greenery for fullness.
- Use a simple vase. You don’t need anything fancy – mason jars, pitchers, or even an old glass you already own can hold flowers beautifully. Just keep the shape of the vase proportional to the arrangement for balance.
Some days, I let my boys help “arrange” the flowers, and while the results aren’t picture-perfect, they sure are heartwarming! For an everyday table, you don’t need a huge bouquet – a small bundle placed off-center can feel just as lovely. For greenery fillers, don’t forget to look close to home! I’ve been known to snip a few fern leaves or hosta stems from the yard to round things out.
Fresh flowers don’t just look good – they have a way of making your table feel alive and welcoming. It’s like an instant mood-booster placed right in the middle of the chaos.
Festive DIY Centerpieces to Celebrate Special Occasions
When it comes to festive occasions, I’m all about the decorations! There’s just something so special about gathering around a dining table that feels thoughtfully dressed up for the moment. And the best part? You don’t need fancy store-bought centerpieces to make an impact. Some of the most charming displays are DIY projects that make use of everyday items, seasonal finds, or even a bit of creative help from the kids. Let’s dive into a few ideas that are perfect for everything from holidays to birthdays and beyond.
Seasonal Themes for Holidays

I love decorating around the seasons. It’s such a simple way to bring a cozy, festive feeling into the room. And trust me, you don’t need to go overboard. A few thoughtful touches on your DIY dining table centerpiece will do the trick.
For Christmas, I swear by pinecones and ornaments. Pinecones—whether you grab them during a nature walk or snag a bag at a craft store—are such a classic choice. You can leave them natural for a rustic vibe or paint them with a little gold or silver for added sparkle. Pair them with shiny ornaments in a display bowl or scatter them around the table for an easy, festive look. Toss in some string lights or faux (or real!) evergreen sprigs, and it feels like a winter wonderland right in your dining room.
When Thanksgiving rolls around, pumpkins are my go-to. I love using mini pumpkins and gourds right from the grocery store. You can group them in the center of the table, nestle them on a bed of greenery, or paint them in neutral tones if bright orange clashes with your decor. (Tip: let the kids help with the painting!) Add a few candles, and suddenly your table feels like it’s straight out of a fall-themed magazine.
For spring holidays like Easter, I like to lean into pastel colors and florals. A centerpiece of painted eggs (you can DIY or buy pre-decorated ones) mixed with fresh blooms or faux flowers looks fresh and joyful. Add some greenery or a playful bunny figurine, and your table is celebration-ready!
Kid-Friendly Birthday Centerpieces
When there’s a birthday in the house, I love involving my boys in the decorating process. After all, what’s a party without a personal touch? Birthday centerpieces don’t have to be elaborate to be fun—and if the kids can help make them, they’re even better.
One simple and adorable idea is candy-filled jars. Grab any clear jar or vase you have on hand, and let the kids pick out colorful candies (bonus points if they match the party theme!). Layer the candies for a rainbow effect, or group single colors for a more coordinated look. Top it off with some balloons tied to wooden skewers and stick them right into the jars for a wow moment—just watch out for sneaky candy grabs before the guests arrive!
Another favorite in our house is paper crafts. You can make anything from little paper flowers to cutout shapes like stars or hearts, depending on the theme. Tape them to sticks or straws and arrange them in a jar filled with rice, beans, or even colored sand. My boys love helping with folding or coloring, and even if things aren’t perfect, they add that “made with love” charm that you really can’t buy.
A third option is theme-specific props. For example, if your kid loves dinosaurs, you can grab some toy dinos and arrange them on the table with greenery or small rocks (bonus if you already have these lying around from playtime). For a princess-themed party, crowns and tiaras look magical paired with glittery accents or floral garlands. It’s all about working with what you have to create something fun and unique!
Mixing Colors and Textures for Parties

When it’s time to throw a party, I say, don’t be afraid to go bold with colors and textures! Mixing different elements can create a visually striking centerpiece that’s a total conversation starter. What I’ve learned over the years is that a little experimentation can go a long way toward making something truly special.
Here’s one of my favorite tricks: think layers! Start by choosing a base material like a table runner or placemat in a fun print or texture. Think burlap for a rustic feel, sequins for glam, or a bold stripe for something modern. From there, add height and dimension with items like stacked boxes wrapped in wrapping paper or tissue paper pom-poms.
In terms of color, it’s fun to mix complementary shades or go for a monochrome palette with varying textures. For example, if your party theme is blue, you can use patterned napkins, glass stones, and ribbons in different shades of blue to keep things cohesive but interesting. Adding glitter for a touch of sparkle always makes the table feel more festive too—it’s like turning up the volume on your decor!
And don’t underestimate the charm of mismatched textures. Pair soft fabrics like lace or tulle with hard materials like glass, stone, or metal for a centerpiece that feels layered and dynamic. One idea I tried recently was using glittery stones in shallow vases with rolled ribbons spilling over the side. It gave such a fun, playful look that seemed way more expensive than it actually was!
For party-specific themes, personalize your centerpiece by incorporating items that tie into the event. For example, at a summer luau, I used colorful leis as table runners and topped them with coconuts and faux tropical flowers. For a more elegant dinner, I experimented with metallic-painted branches in vases, which added drama and height to the table.
When you let yourself play with color and texture, your table becomes a canvas for creativity. It’s like giving your dining area a personality to match the celebration, and the results are always worth it!
Budget-Friendly Hacks for Stunning Centerpieces
Let me tell you something—creating stunning DIY dining table centerpiece ideas doesn’t have to eat up your entire budget! With a little creativity and a willingness to think outside the box, you can make magical, Pinterest-worthy centerpieces without overspending. Whether you’re upcycling things you already have, hunting for steals at thrift shops, or taking a shortcut with ready-to-go kits, I’ve got you covered. Let’s dive into some budget-friendly hacks that even busy moms can pull off!
Upcycling Tips for Unique Centerpieces

If there’s one thing I’ve learned as a mom, it’s how to make the most of what you already have. Upcycling is not only a fun challenge, but it’s also an incredible way to save money and create truly one-of-a-kind centerpieces. Here are some of my favorite upcycling tricks that anyone can try…
- Repurpose old jars and bottles. Those empty pasta sauce jars or wine bottles you’re about to toss? Don’t! These items can be transformed into beautiful centerpiece pieces with just a little effort. Clean them thoroughly, remove any labels, and you’ve got a blank canvas. Paint them in coordinating colors (I love soft pastels for spring or metallics for a chic look), or wrap them with twine or ribbon for rustic charm. Fill them with flowers, greenery, or even fairy lights to add that extra something!
- Turn forgotten vases into stunners. I swear, I always find random vases hiding in my cabinets that I completely forgot about. Instead of letting them collect dust, update them! You can spray paint them matte white for a minimalist vibe or coat them with textured paint to mimic high-end ceramic pieces. Add some fresh branches, eucalyptus, or a single bloom to complete the look.
- Use everyday items in surprising ways. Have an old baking pan sitting around? How about a teapot that’s lost its lid? These unexpected items can make fabulous centerpieces! Fill a baking pan with moss and candles for a woodsy feel, or turn the teapot into a quirky vase for flowers. Even mismatched cups and bowls can add a playful, collected-over-time look to your dining table.
The beauty of upcycling is that it’s eco-friendly and totally unique, which is perfect for making your centerpiece stand out. Plus, there’s something so satisfying about transforming “junk” into something beautiful!
Where to Find Affordable Supplies

When you’re sticking to a budget, finding affordable supplies is half the battle. The good news? You don’t need to scour high-end craft stores to find gorgeous decor pieces for your DIY dining table centerpiece ideas. I’ve learned to keep my eyes peeled in a few key spots…
- Dollar stores are a gold mine. Seriously, you’d be amazed at what you can find. Fake flowers, candles, glassware, and even seasonal decor can be turned into the base of a beautiful centerpiece. My boys love tagging along because we can pick things out together without worrying about overspending.
- Thrift shops have hidden gems. I’m absolutely obsessed with thrifting—it’s like a treasure hunt every single time! Look for items like old trays, glass jars, or decorative bowls. Even things that seem a little worn or outdated can be easily refreshed with some paint or minor DIY fixes. Some of my favorite centerpieces have been made using $2 finds from the thrift store!
- Shop sales strategically. Craft stores like Michaels or Hobby Lobby often have seasonal sales where you can snag supplies for a fraction of the price. I like to hit the clearance aisle and stock up on things I know I’ll use down the road—ribbons, faux greenery, and candles are great staples to pick up anytime they’re marked down.
- Go “shopping” in your own home. Sometimes the best supplies are already hiding right under your nose! Old picture frames, jewelry, or even an unused scarf can be repurposed for your centerpiece. I once used one of my boys’ wooden toy blocks as a riser to add height to a floral display… Talk about thinking outside the box!
By combining items from these affordable sources, you can create a centerpiece that looks like a million bucks (but costs way less). So keep your eyes open—you never know where the next perfect piece might pop up!
DIY Centerpiece Kits for Busy Moms

Okay, real talk: sometimes, life gets so busy that spending hours on Pinterest-worthy projects just isn’t realistic. Between school drop-offs, soccer practices, and the never-ending laundry pile, I don’t always have the time (or energy) for complicated DIYs. That’s where DIY centerpiece kits come to the rescue!
These kits are an absolute lifesaver because they come with everything you need to create a stunning centerpiece—all in one box. No last-minute Target runs, no scrambling to find the right materials in your craft drawer. You just open the kit, follow the instructions, and—boom—you’ve got a gorgeous, handmade centerpiece without the hassle.
Here are a few types of kits worth checking out:
- Floral arrangement kits. Many online retailers offer floral kits, complete with fresh or faux flowers, greenery, and a vase. They make it easy to put together a professional-looking arrangement in minutes. Some even come with video tutorials for extra guidance!
- Seasonal decor kits. If you want your centerpiece to reflect the season or a specific holiday, these are fantastic. Think fall-themed kits with pumpkins and leaves, Christmas kits with ornaments and faux pine, or spring kits bursting with pastel blooms.
- Customizable craft kits. Sites like Etsy are packed with centerpiece kits that feel fresh and personal. I’ve seen options for everything from candle-making kits to DIY lanterns that double as table decor. Many of these are so simple that even younger kids can help, which makes them a fun family activity.
I love that these kits offer the best of both worlds: the charm and fun of DIY, without the stress of finding all the pieces separately. Plus, they’re perfect for moms like me who still want to get creative but need a time-saving solution.
So if you’re feeling overwhelmed or short on time, don’t hesitate to give one of these kits a try. They’re a win for your table and your sanity!
By mixing upcycling, smart shopping, and (when needed) time-saving kits, it’s totally possible to create eye-catching centerpieces on any budget. And trust me, when you see your dining table all dressed up, knowing you made it happen? Totally worth it!
How to Keep Your Centerpieces Looking Fresh
When you’ve put time and effort into creating your DIY dining table centerpiece, there’s nothing worse than seeing it lose its charm after just a few days. Trust me, I know the frustration of wilting flowers or dusty decorations ruining an otherwise beautiful setup! The good news? There are some super simple steps you can take to keep your centerpiece fresh and fabulous, whether it’s made of real blooms or reusable seasonal items. Let’s break it down!

Preserving Fresh Flowers
If fresh flowers are the star of your centerpiece, you’ll want them to stay hydrated and perky for as long as possible. Flowers can be high-maintenance, but with just a little attention, they’ll reward you with brightness and beauty for days—sometimes even weeks!
Here are my tried-and-true tips for keeping fresh flowers looking their best:
- Trim the stems every couple of days. Did you know that flower stems seal up after sitting in water for too long? Snipping about an inch off the bottom at a slight angle helps them “drink” better! I like to grab my kitchen scissors and give them a quick cut every other morning while I have my coffee.
- Change the water daily. I know this sounds like a chore, but it makes a huge difference! Dirty water breeds bacteria, and no flower survives that for long. Fresh water keeps them hydrated and happy—plus, it’s worth it when they brighten your dining table!
- Keep them out of direct sunlight. I’ve made the mistake of putting a pretty vase right by the window, only to have the flowers droop faster than I could enjoy them. A little natural light is fine, but too much heat from the sun can dry them out quickly.
- Use flower food (or a DIY alternative). Those little packets that come with store-bought bouquets? They actually work wonders. But if you’re out of those, try adding a teaspoon of sugar and a drop of bleach to fresh water. It sounds odd, but the sugar feeds the flowers, and the bleach keeps bacteria at bay.
Taking care of fresh flowers doesn’t have to feel like a full-time job. A few quick habits here and there will keep your centerpiece blooming and bring life to your table day after day.
Prolonging the Life of Seasonal Decorations
Seasonal centerpieces are always such a hit, but they can be tricky to store for repeat use. Whether it’s mini pumpkins for fall or ornaments for Christmas, proper storage is the key to keeping your seasonal decorations in great shape. I’ve learned the hard way that tossing them into a random box after the holidays is not the way to go—hello, broken ornaments and crushed pinecones!
Here’s how I store seasonal decorations so they’re ready to impress next year:
- Clean them before storing. This step is so important! For example, if you’ve used faux greenery or pinecones, make sure to wipe off any dust or sap that might have collected. A slightly damp cloth is usually all it takes.
- Use clear storage bins. I’m all about those clear plastic bins because they make it so easy to see what’s inside. Labeling the outside with “Fall Decor” or “Winter Supplies” also saves you from digging when the seasons change.
- Wrap fragile items carefully. If you have delicate pieces like glass ornaments or ceramic figurines, take the time to wrap them in tissue paper, bubble wrap, or even old dish towels. It’s worth the effort to avoid heartbreaking breaks!
- Keep everything grouped by season. I like to store all my fall items in one bin, Christmas in another, and so on. That way, when I’m ready to set up my table, I can grab the right bin and get started without wasting time.
Seasonal decorations are such a fun way to celebrate the time of year, and taking good care of them lets you enjoy them for years to come. Trust me, you’ll thank yourself when next season rolls around, and everything is good as new!
Cleaning and Storing Centerpieces
Now, let’s talk about the reusable pieces—things like vases, jars, candle holders, or bowls. These are the true workhorses of a great centerpiece, and keeping them clean and shiny makes all the difference in how they look on your dining table. The last thing you want is to realize your gorgeous vase has water stains or leftover wax ruining its shine!
Here are some simple tips to keep these essentials looking their best:
- Cleaning glass pieces: Cloudy vases or jars are the worst. To fix this, just mix equal parts vinegar and water, pour it into the piece, and let it sit for 15 minutes before rinsing it out. If there’s stubborn residue on the bottom, I use a bottle brush or even a clean toothbrush to scrub it away.
- Tackling wax spills: Oh, candles… I love them, but they can be messy! If wax drips onto holders, soften it by rubbing a hairdryer over the spot for a few seconds. Then, gently scrape it off with a butter knife or an old credit card (just not your good one!). Rinse the holder with warm, soapy water, and it’s like new.
- Preventing scratches on wooden or metal items: If your centerpiece includes wooden bowls or metal trays, avoid harsh chemicals that could damage the finish. A damp cloth with mild soap does the trick for most surfaces. For wood, a little furniture polish adds shine and brings it back to life.
- Store thoughtfully between uses: After cleaning, wrap each item in a soft towel or place it inside a padded bin. This keeps them protected from dust and bumps while in storage. I always make sure to stack heavy items on the bottom and lighter ones on top to avoid accidental chips or cracks.
Reusable centerpiece pieces are such a great investment because they can be styled in so many different ways. A well-cared-for vase can go from holding spring flowers to housing holiday greenery in no time!
Keeping centerpieces looking fresh doesn’t have to be complicated. With just a little extra effort, your table will stay polished and put-together, making every meal feel just a little more special!

Conclusion
Transforming your space with DIY dining table centerpiece ideas doesn’t have to be overwhelming—it’s an opportunity to add a little joy to everyday life! Whether you’re arranging mason jars with flowers, lighting cozy candles, or diving into a fun craft project with the kids, it’s all about making your table a reflection of your family’s style and spirit.
Don’t stress about perfection. The real magic happens when you’re creating something personal and unique, even if it’s a bit messy (those imperfect touches make it special!). Gather your supplies, get the kids involved, and enjoy the process—it’s as much about the memories you make as the final result.
Your dining table can be so much more than just a functional piece of furniture. With a little effort and creativity, it can become a warm, beautiful centerpiece for your home that invites connection every time you sit down. Ready to get started? Pick an idea and give it a try today—you’ll be amazed at the difference it makes!
This post may contain affiliate links. Read the full disclosure here.