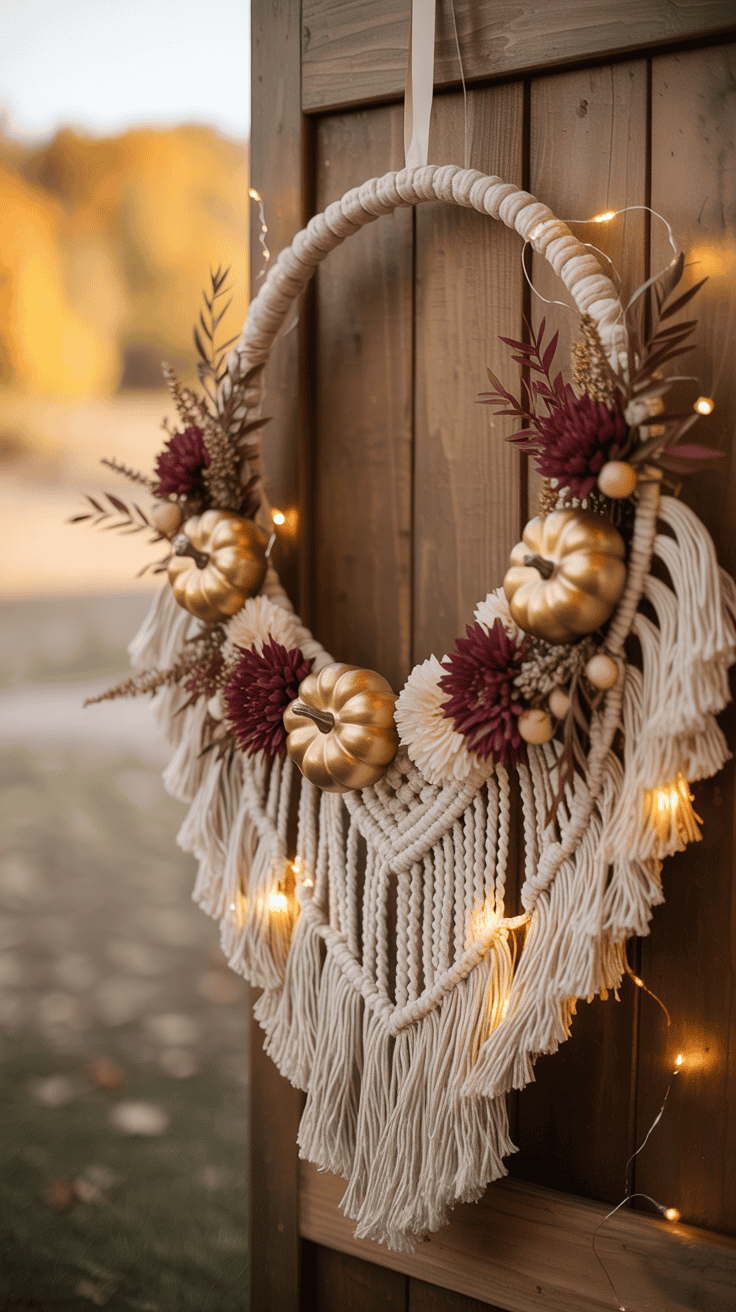
Decorating With Glass Pumpkins for an Elegant Fall Touch
Hi there! As a mom with three busy boys who keep me on my toes, I’ve found that decorating with glass pumpkins brings just the right mix of elegance and warmth to our fall home. I love the subtle shine and playful sparkle these beauties add to every corner, and yet they’re simple enough for everyday family life. There’s something timeless about glass pumpkins (especially clear glass pumpkins) on a dining table or entryway shelf, especially when I want to make autumn feel a little extra special (without a big fuss).
I found this set of glass pumpkins — they sparkle beautifully and make the whole table feel high-end.
I know how hectic fall can get when you’re juggling sports, homework, and pumpkin everything, so I’ll be sharing easy, family-friendly tips to use glass pumpkins in ways that look fancy but fit right into a real mom’s world!

Choosing the Right Glass Pumpkins


I’ve learned that decorating with glass pumpkins adds a special sparkle to fall, but picking the right ones for each spot in your home makes all the difference! If you’ve ever found yourself standing in the store (or clicking online) and feeling lost in a sea of shiny, colorful pumpkins, you’re definitely not alone. I’ve been there too! Here’s how I figure out which glass pumpkins fit best, what colors work with real-life fall clutter, and how to save money or even get creative with a little DIY spirit.
Size Matters for Different Spaces


The size of your glass pumpkin is key to making your display look polished, not cluttered or lonely. I always take a quick look around and ask, “Where am I going to put this?” before I buy anything. Large pumpkins might look perfect in big box stores, but most of us don’t live in a showroom!
Here’s how I match pumpkin sizes to the right spots in our home:
- Small Pumpkins: These are perfect for mantels, bookcases, or window sills. I place them where little hands can’t easily reach, since my boys love to “help” and sometimes that means a chip or two.
- Medium Pumpkins: These work best as centerpieces for kitchen islands and dining or coffee tables. I like to cluster a few together for a cozy, lived-in feel that still looks chic.
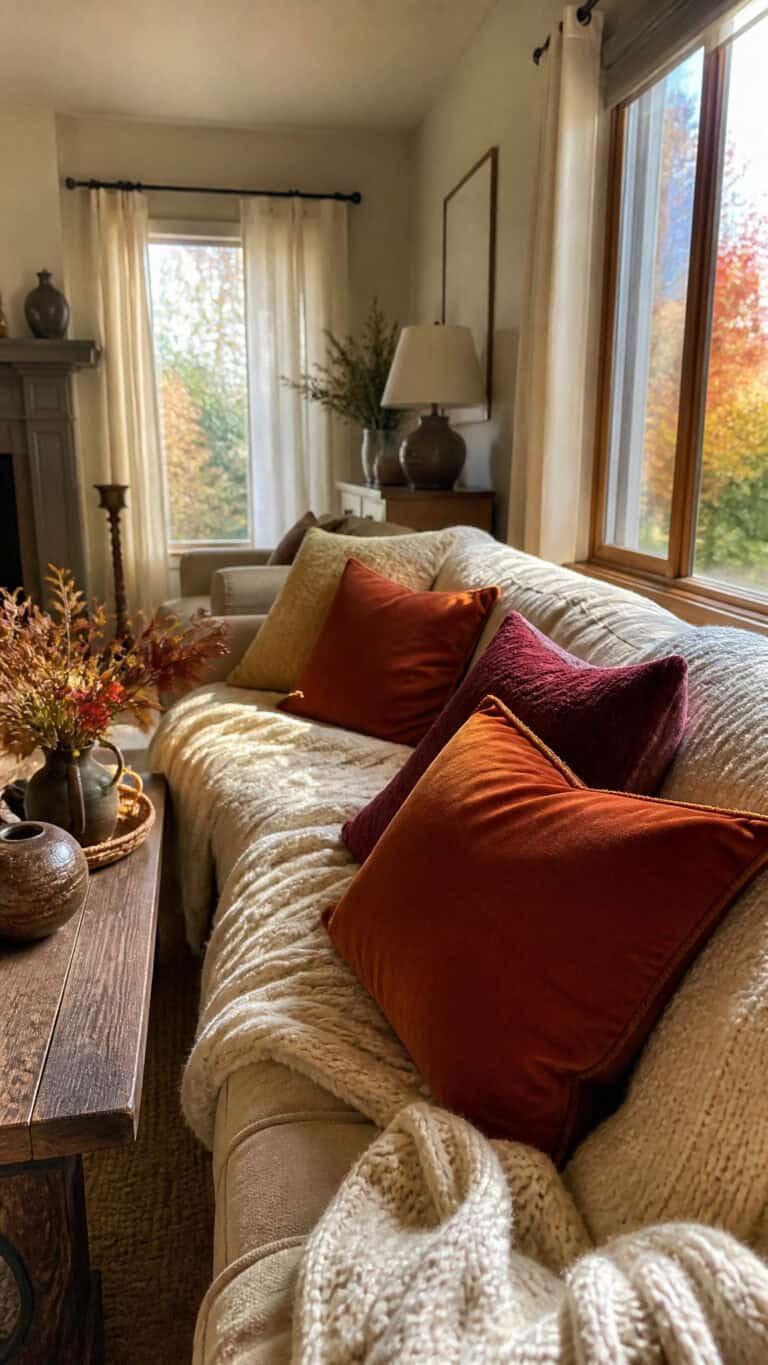
- Large Pumpkins: When you want something dramatic, go big! I like to set one or two by the fireplace or even right by the front door (as long as they’re not in the path of soccer shoes!). They also shine in a big entryway or corner where nothing else seems to work.
Before I buy, I measure my space with a tape measure—just a quick check so I don’t buy something that’s too bulky or barely shows up. Tip: Always leave extra space around each pumpkin. If it feels cramped, it’ll look more like clutter and less like a feature.
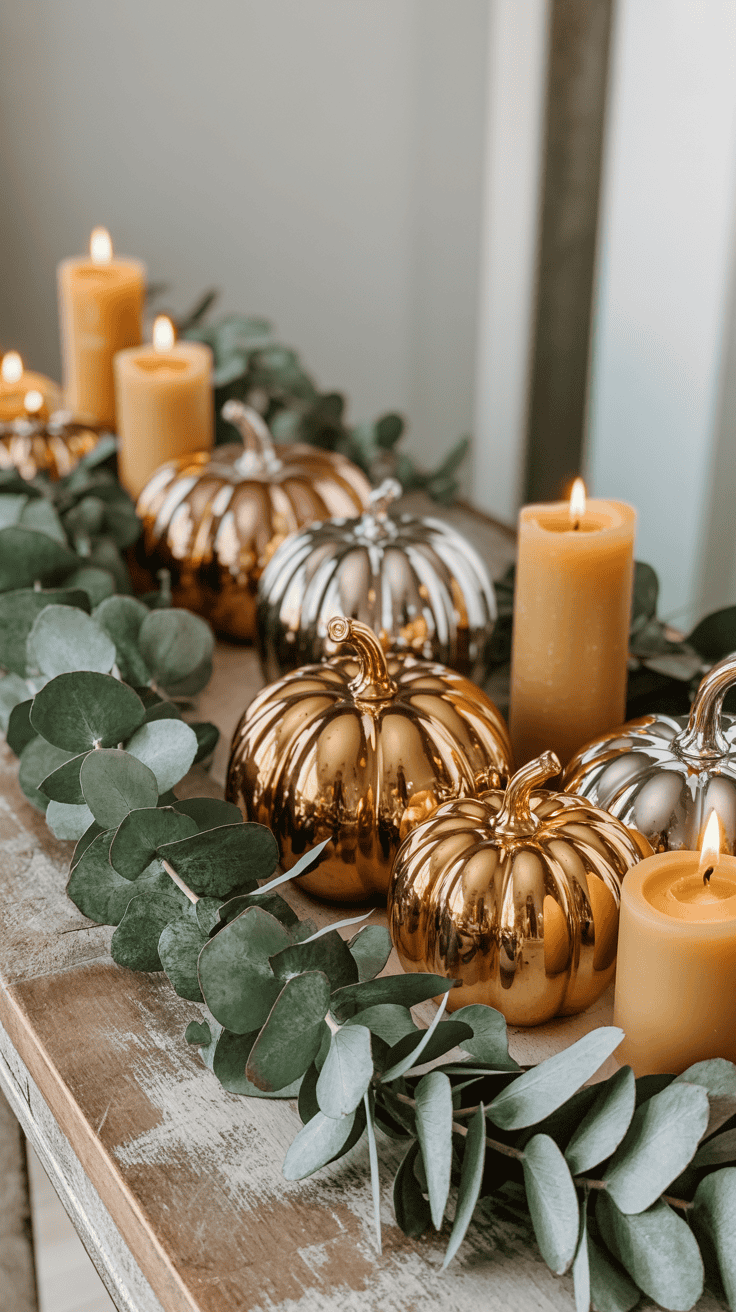
Color Palettes That Complement Autumn

When I’m decorating with glass pumpkins, color is half the magic. Classic orange is always a winner, but autumn blushes with so many rich shades! Here’s my go-to mix for that cozy, golden fall feeling:
- Classic Orange: Instantly says “fall” and works anywhere—even surrounded by little LEGO men!
- Amber: Warm, gentle, and great for blending with wood decor or neutral rooms.
- Deep Ruby: Adds a touch of drama and feels extra special mixed with candles.
- Matte Gold: Glimmers in low light and always makes everything feel a bit fancier.
I love to mix transparent pumpkins with ones in rich, tinted glass. It adds depth, sort of like how fallen leaves layer up in the yard. Here’s a fun way to mix things up:
- Pair a clear, pale orange pumpkin with a deep ruby one for contrast.
- Place matte gold in the center flanked by smaller transparent pumpkins for a table display.
- Mix in cream or smoky glass pumpkins for a softer look.
Pro Tip: Little kids love helping pick colors! I let my boys help arrange them—sometimes their wild choices look surprisingly good.
Clear vs Frosted Finishes

The finish on your glass pumpkin might be subtle, but it changes the whole mood of the display. I always check if I want a bright, sparkly look or something softer and cozy.
- Clear Glass: These pumpkins bounce around the sunlight and look magical in a window or near fairy lights. They’re great if you want a clean, sparkly vibe that’s quick to wipe and hard to mess up.
- Frosted Glass: I reach for these if I want a mellow, glowy feel. They’re beautiful in bedrooms, on side tables, or anywhere you want the light to feel soft. Bonus, fingerprints don’t show as easily—a win for busy families.
Here’s a quick comparison for choosing:
| Finish | Best For | Bonus Perk |
|---|---|---|
| Clear | Windows, well-lit rooms | Bright, shiny, easy-clean sparkle |
| Frosted | Bedrooms, cozy spaces | Soft glow, hides little smudges |
If you want a mix, pair one of each finish side-by-side. It creates a playful, layered look that feels effortlessly styled (with almost no effort at all!).
Affordable Sources and DIY Options
Let’s be real—decorating with glass pumpkins can get pricey if you’re not careful. With three boys, I’ve learned to hunt for deals and even make my own when possible. Here’s how I keep my displays fresh without draining the fall treat budget:
- End-of-Season Sales: Right after Thanksgiving, I shop for next year. Stores will often mark down glass pumpkins by 50% or more.
- Thrift Stores: I’ve found unique, vintage glass pumpkins (and even weird colors I love) on secondhand shelves. Sometimes they aren’t labeled as pumpkins but look close enough!
- Online Marketplaces: Facebook Marketplace and local swaps are goldmines. Families often post barely-used decor for less.
- DIY from Glass Jars: Get crafty! I’ve used clear jars and simple molds from the craft store to create homemade glass pumpkins with my kids. Sometimes a little orange paint and a green wine bottle cork will do the trick for a pumpkin that’s cute and kid-approved.
For a family project, try letting your little ones paint or decorate old jars. I’ve seen mason jars transform into funky, one-of-a-kind pumpkins that make everyone smile.
Saving money and making memories? That’s a win-win for fall!
Creative Placement Ideas

I’ve found that decorating with glass pumpkins really shines when you get creative about where you place them. These little beauties can fit into almost any nook or cranny, turning ordinary spots into something special for fall. Whether you want to create a sparkling mantel, a show-stopping centerpiece, or a fun display just for the kids, there’s a way to let each pumpkin sparkle safely and beautifully. Let me share a few favorite spots and tricks that have worked wonders in my busy home.
Mantel Magic: Cozy Clusters that Sparkle

The mantel is my top pick for glass pumpkins, especially since it’s above kid-level and gets so much attention. Clustering different sizes together creates a scene that feels a little magical—like pumpkins on a parade. I like to use tall and small glass pumpkins, tucking a few around a pretty candle or two. This adds a twinkle of light, especially at night.
My steps to a beautiful mantel setup:
- Start with the largest pumpkin as an anchor on one side.
- Add medium pumpkins in the middle, letting them overlap a bit for a cozy look.
- Fill in with smaller pumpkins, leaf garlands, or a few pinecones.
- Slip in a lantern or a glittery candle for sparkle (LED candles are safer with kids).
- Double-check that everything is out of reach of little climbers!
I love watching the sunlight bounce off the glass each morning while knowing my boys can admire from a safe distance.
Dining Table Centerpieces: Room for Plates and Style

A dining table usually wears many hats, so I go for a centerpiece that’s beautiful and leaves space for dinner plates, homework, or puzzle projects. Glass pumpkins pair so well with fall foliage and a few candles. The trick is to keep things low enough to talk across the table and simple enough to move for meals.
Here’s how I set it up:
- Place a runner or placemat in the center for a base.
- Arrange two or three medium glass pumpkins in the middle.
- Tuck in sprigs of fake autumn leaves, berries, or eucalyptus around the pumpkins.
- Finish with two candles in matching holders for soft light.
Tip: Keep decorations tight and low—no tall vases or spiky branches. This makes it easy for everyone to enjoy the feast and the decor at the same time.
Entryway Welcome: Sweet First Impressions

Nothing says “welcome” like glass pumpkins greeting you by the door! For our entryway, I use a low table or console that can hold a neat arrangement but still leave space for dropped backpacks. I like to include one or two pumpkins, a friendly welcome sign, and something fun for guests (or my boys when they come in).
My go-to entryway setup:
- Place a chunky glass pumpkin beside a framed “Welcome Fall” sign.
- Add a mini basket with wrapped candies or a jar of cinnamon sticks for scent.
- If there’s still space, I’ll toss in a tiny vase of real or faux fall flowers.
It’s simple and always gets smiles—from the family, friends, and even the mail carrier!
Outdoor Porch Glow: Lighting Up Fall Nights

Outdoor porches are perfect for showing off glass pumpkins, especially if you choose versions made to handle weather. Evening is my favorite time for porch pumpkins. I love to see them twinkling as neighbors stroll by.
Here’s my porch routine:
- Line up weather-proof glass pumpkins on the steps, using larger sizes at the bottom and smaller ones up top.
- Slip in battery-operated LED tea lights or fairy lights inside the pumpkins for extra glow.
- For a finishing touch, toss a fall wreath on the door and, if you want, tuck a few mums at the base.
The glow looks magical at twilight, and I never have to worry about matches or cords with battery lights.
Kid-Friendly Display with Safety Tips
Let’s be honest—kids love anything shiny! But safety comes first in my house. For a hands-on display, I use the lower shelves of our bookcase or storage bench. That way, my boys can admire the pumpkins, move them gently, and feel a little ownership in the decor.
Kid-friendly display tips:
- Pick small or medium pumpkins (avoid heavy or fragile ones).
- Set them on a soft placemat or felt to prevent rolling and chips.
- Give a quick lesson on “gentle hands” and sometimes even practice together.
- Make a “pumpkin garden” by adding felt leaves or toy acorns to play with nearby.
If I see them getting a bit too wild, I’ll swap glass for plastic pumpkins until curiosity passes. Making the display interactive keeps little hands happy and my mind at ease.
With a bit of planning and creativity, decorating with glass pumpkins brings personality and sparkle to every part of a family home. Each spot becomes a tiny showcase for fall, safe and beautiful, even in a house full of rowdy boys!
Combining Glass Pumpkins with Other Fall Décor
When I start decorating with glass pumpkins, I love seeing how much character and magic they bring to my home. The best part? They fit in beautifully with other autumn decorations! Mixing glass pumpkins with real leaves, glowing lights, and even a few plaid napkins turns any room into a cozy fall retreat. I’ve found that simple layering tricks and a little playful color make everything feel more inviting, especially with energetic kids in the house. Here’s how to get that polished, warm harvest look without extra stress.
Foliage and Berries
There is nothing that says “fall” like rich, rustling leaves scattered across the table or tucked along a mantel. I usually grab a handful of faux eucalyptus and oak leaves, then weave them gently around my glass pumpkins. The cool greens and golds make the pumpkins’ colors pop in a way that feels so fresh and lively.
Adding in cranberry or even faux berry clusters? Instant charm! That little hit of red looks amazing next to clear, orange, or amber glass. Sometimes I break out cinnamon sticks or dried orange slices, which are perfect for moms who want a little scent with their style.
Quick tips for the easiest foliage-and-glass-pumpkin combo:
- Tuck eucalyptus stems under the edges of pumpkins for a wispy, natural look.
- Mix real oak leaves with fake ones if you want more texture (easy for kids to gather on a walk!).
- Drop berry clusters between pumpkins or let them trail off the edge of a tray for a pop of color.
Mixing these together creates so much depth and is so simple that my boys even jump in to help arrange. No special skills required—just a few basic supplies and a few minutes!
Candles and Lights
Nothing beats the cozy glow from candles on a crisp fall evening. Dropping a battery-powered tealight inside a glass pumpkin is about as easy as it gets—and totally safe! The reflection shimmers and makes every room look extra special when the sun goes down.
If you have pumpkins with open bases or big enough cutouts, I slip in LED votives. For solid glass pumpkins, I loosely drape thin string lights around and between them. It sets the mood for everything from dinner to movie night.
Here’s my go-to light layering method:
- Place one LED tea light in each pumpkin for warm, flickering light.
- Wrap micro LED string lights around a group of pumpkins and tuck the battery pack behind leaves.
- Arrange pillar candles (real or faux) beside the pumpkins on top of burlap scraps or wooden trays.
The glow brings everyone together, and the best part is there are no matches or cords to worry about. Everything stays soft, warm, and super family-friendly.
Textiles and Ribbons
A little fabric goes a long way in tying together a fall display. I drape burlap ribbons over my glass pumpkins, sometimes tying a bow or just letting the edges peek out. This gives a rustic touch that feels playful and casual.
Plaid napkins and dish towels are another secret weapon—I just fold them and layer them under a pumpkin on the table or console. The woven textures and warm colors mix so beautifully with the shiny pumpkins. It’s practical, too, because I can grab and wash them anytime my kids get a little too enthusiastic at snack time!
A few tried-and-true ideas:
- Wrap a wide burlap ribbon around the base of a glass pumpkin for farmhouse style.
- Layer plaid or striped napkins under pumpkins to add pattern and color.
- Add a velvet ribbon in deep green, burgundy, or gold for a fancier feel.
Textiles make everything softer and help balance all the glassy shine with a touch of homey comfort.
Seasonal Fruits and Nuts
Bringing in some seasonal fruit and nuts is like the cherry on top for any fall set-up. I love mixing in little bowls of shiny apples, smooth pears, or crunchy chestnuts with my pumpkins. The natural shapes keep everything from feeling too stiff or staged.
Plus, fresh fruit is a snack that doubles as décor (which my boys think is the best part). I arrange a few apples or mini pears in between the pumpkins or tuck a handful of chestnuts along a runner. Sometimes, I mix in dried orange slices or even a bundle of cinnamon sticks for more cozy vibes and layers of scent.
Favorite ways to add harvest touches:
- Cluster 3 or 4 apples along the side of a pumpkin centerpiece.
- Pour chestnuts or walnuts in a pretty wooden bowl and set it next to glass pumpkins.
- Thread dried fruit slices onto string and weave them in with pumpkins for a homemade garland look.
This is such an easy, hands-on way to bring fall right into your living room! It also encourages kids to help decorate (and snack, too).
By mixing in any of these elements, every glass pumpkin display turns into a real fall celebration—colorful, textured, and wonderfully inviting for the whole family.
DIY Enhancements and Personal Touches
I absolutely love decorating with glass pumpkins, but the real fun starts when my boys and I add our own special details. These little DIY tricks turn store-bought pumpkins into true family keepsakes. Plus, it’s a great way to squeeze in some bonding time (and maybe sneak in a little mess, which they adore). Here are my favorite ways to bring more personality, sparkle, scent, and sweet memories into our fall home.
Painting Glass Pumpkins
There’s something magical about choosing your own colors and seeing them shine on your pumpkins! Customizing with paint makes each one unique. Luckily, it’s much simpler than it sounds and holds up when sealed right.
Here’s how I paint our glass pumpkins for gorgeous, durable color:
- Start with Clean Glass: I always wipe the pumpkin with a little rubbing alcohol to get rid of fingerprints and dust.
- Choose Glass Paint: Any craft store will have glass paint in fall colors. My kids like orange, gold, and sometimes even blue!
- Add Stencils for Fun Shapes: Secure a stencil to the pumpkin with painter’s tape. We use leaves, polka dots, or let the boys create their own cardboard cutouts.
- Apply the Paint: Use a small, soft brush for neat edges. Dab gently around stencils, then peel them away while the paint is still wet for crisp lines.
- Dry and Seal: Let the paint dry according to the bottle (usually a few hours). Once dry, I use a clear, non-toxic sealer made for glass. This keeps colors from chipping—even with little hands grabbing!
Painting is always a big hit in our house. Each pumpkin shows off our family’s personality and brightens up any spot.
Adding Glitter or Rhinestones
If you want magic, just add sparkle! My boys love helping with this one. It’s easy, a bit messy (make peace with the glitter), and perfect for making pumpkins shimmer under the lights.
Here’s how we turn ordinary into dazzling:
- Pick Your Pumpkin: Clear or light-colored glass shows off glitter best.
- Brush on Glue: I squeeze a little craft glue onto a plate. Then, using a paintbrush, we cover just the top, the stem, or make fun swirls.
- Add Glitter or Rhinestones: The boys sprinkle glitter or press on rhinestones while the glue is still wet. Chunky gold, classic orange, or even rainbow!
- Shake Off the Extra: Tap gently over a tray to catch loose glitter. This step saves floors!
- Let Dry and Repeat If Needed: If we missed a spot, we add a little more glue and keep going. Rhinestones can be pressed into the glue or stuck down with craft adhesive for stubborn spots.
This step turns every glass pumpkin into a festive treasure. Even if every stem ends up sparkling, I know the kids had a blast!
Using Scented Oils
Nothing says fall at our house like the sweet smell of cinnamon or vanilla drifting through the kitchen. I love using scented oils to add a cozy layer to our glass pumpkin displays—without the need for open flames.
This easy trick takes less than a minute:
- Grab a cotton ball or a small piece of felt.
- Add a couple drops of favorite oil—cinnamon, vanilla, even pumpkin spice!
- Tuck it inside the hollow part of the glass pumpkin.
No one will see the cotton tucked away, but the scent fills the room every time someone walks past. I refresh the drops every week or so to keep things smelling welcoming. It’s such a simple detail, but it makes our displays feel extra homey and warm.
Kid Art Projects with Pumpkin Jars
As a mom, the crafts that bring out their creativity are always my favorite. Using small glass or plastic pumpkin jars gives my boys free reign to create their own masterpieces that I actually want to keep and display!
Here are a few ideas we return to each fall:
- Markers and Paint Pens: Let kids draw faces, leaves, or wild doodles right onto the outside. Paint pens work best because they won’t rub off so easily.
- Stickers and Washi Tape: We grab sheets of fall stickers, letters, or fancy washi tape and let everyone go wild. Each jar turns into a mini canvas for their ever-changing moods.
- Handprint Pumpkins: A dab of washable paint on their palm, pressed right onto the jar, makes the best “signature” pumpkin art! Simply write the date with a fine-tip marker so you remember what year it was made.
I try to set out all the supplies on a tray (bath towels underneath, trust me), then let their imaginations go. Even if every pumpkin ends up plastered with dinosaurs, it makes our house feel festive and tells our unique family story.
With just a little extra time, decorating with glass pumpkins becomes a family tradition, a sensory treat, and a way to fill fall with a little more love, fun, and sparkle!
Caring for and Storing Glass Pumpkins
Taking care of glass pumpkins keeps them sparkling and safe so they last for many fall seasons. As a mom who loves decorating with glass pumpkins, I’m always looking for ways to keep mine spotless, chip-free, and ready for the next autumn. Here’s how I keep them looking their best with a house full of energetic boys (and lots of sticky fingerprints).
Gentle Cleaning Methods
I try to keep cleaning simple so it doesn’t turn into a project. For glass pumpkins, less is more. Warm soapy water and a soft cloth work wonders, even if my crew gets a little wild with their pumpkin “helpers.” I never use anything scratchy because even the tiniest bit can dull or scratch the pretty finish.
Here’s my quick cleaning routine:
- Fill the sink or a small tub with warm water and add a drop or two of mild dish soap.
- Dip a soft cloth or sponge in the water and gently wipe the pumpkins.
- Pay extra attention to grooves and spots where dust loves to hide.
- Rinse with clean, cool water and dry right away with a lint-free towel (old cotton shirts are perfect).
- Never use abrasive scrubbers, steel wool, or tough pads—they can make the glass look cloudy.
If you have little sticky fingers (like me), just tackle the spots quickly and move on. There’s no need to soak or scrub hard.
Safe Handling with Kids
Glass pumpkins attract curious hands. At my house, I want everyone to enjoy the fall decorations, but keeping things safe is always top priority. I set clear, simple ground rules so my boys learn to respect the decor and keep the pumpkins in one piece.
Our family’s glass pumpkin rules:
- Always hold pumpkins by the base (never pick them up by the stem or neck).
- Use two hands and carry them close to the body—pretend they’re a “sleepy puppy.”
- All glass pumpkins stay away from high-traffic play zones (no pumpkins near the basketball hoop or toy trains).
- Set pumpkins up high if you’re worried about little climbers.
I talk about it with the boys while we decorate, and it quickly becomes second nature. This way, everyone enjoys the sparkle without any drama or broken glass.
Seasonal Storage Tips
Once fall is over and the pumpkins need a break, I pack them up so they’re safe until next year. It doesn’t take much—just a bit of care makes all the difference. I turn packing into a little “treasure wrapping” party, which always gets big smiles from my helpers.
Here’s what works best:
- Wrap each pumpkin with soft tissue paper or bubble wrap (skip newspaper, the ink sometimes smudges).
- Place pumpkins in a padded box with dividers or layers between them. A box from a wine shop or ornaments works great.
- Make sure nothing heavy sits on top (fragile stickers help remind everyone).
- Store the box in a cool, dry closet or cabinet—never a damp basement or hot attic, which can damage the glass over time.
I label each box with a bright fall sticker so it’s easy to spot next year—my kids usually race to find it as soon as September rolls around.
Repairing Chips and Cracks
Even when we’re careful, accidents happen. A little chip or a small crack doesn’t mean your pumpkin is done for. I keep a small bottle of strong, clear-drying glue (like super glue or clear epoxy) in my junk drawer for quick fixes.
Here’s how I handle minor repairs:
- Clean the area gently and let it dry.
- Dab a tiny bit of glue on the chipped spot using a toothpick (less is more).
- Press the piece back if it’s a chip, then hold it still for the glue to set.
- Let it dry for at least an hour before moving the pumpkin.
I only try this for tiny chips or hairline cracks. If a pumpkin breaks completely, or the crack looks dangerous (sharp edges or glass dust), it’s time to say goodbye. Sometimes, I’ll keep pretty, broken pieces for crafts or turn them into a mosaic with the boys. Most importantly, I never use a glued pumpkin in a spot where little hands could get hurt.
Taking these little steps means my favorite glass pumpkins will keep brightening our home for years, no matter how wild our fall months get!

Conclusion
Decorating with glass pumpkins turned my busy house into a warm and elegant fall retreat! All the tips for picking the right pumpkins, mixing in family-friendly crafts, and adding those extra cozy textures truly make autumn shine. It proves you don’t need fancy skills or endless time to bring a little sparkle to your space.
If you’re a mom like me, I say go for it—let your kids join in, make a little mess, and enjoy every shimmering pumpkin moment. I’d love to hear your favorite ideas or see your own glass pumpkin displays! Thank you so much for spending some of your day with me. Please jump into the comments and share your own family’s fall traditions or tips. Happy decorating!
This post may contain affiliate links. Read the full disclosure here.