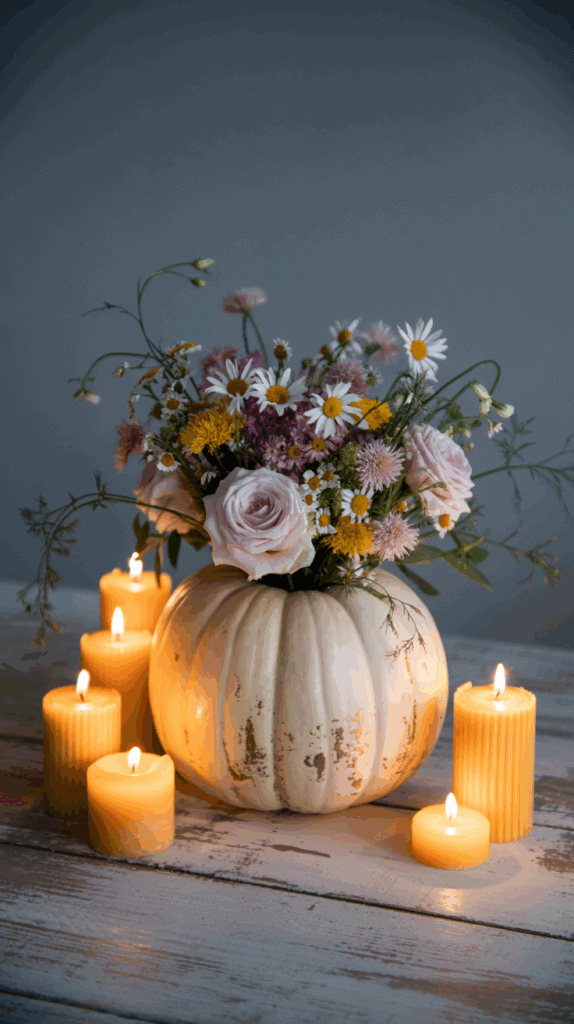
White Pumpkin Floral Centerpiece Ideas That Feel Like Fall
With three boys running around, it’s not always easy to keep my table calm and pretty! Still, I always find myself coming back to a white pumpkin floral centerpiece when we gather as a family. It just feels fresh and neutral, and I love how it brings a little peace to all the noise (which is hard to believe with all these kids, I know). There’s something so simple about soft whites and gentle greens that relaxes me and makes everyone feel welcome.
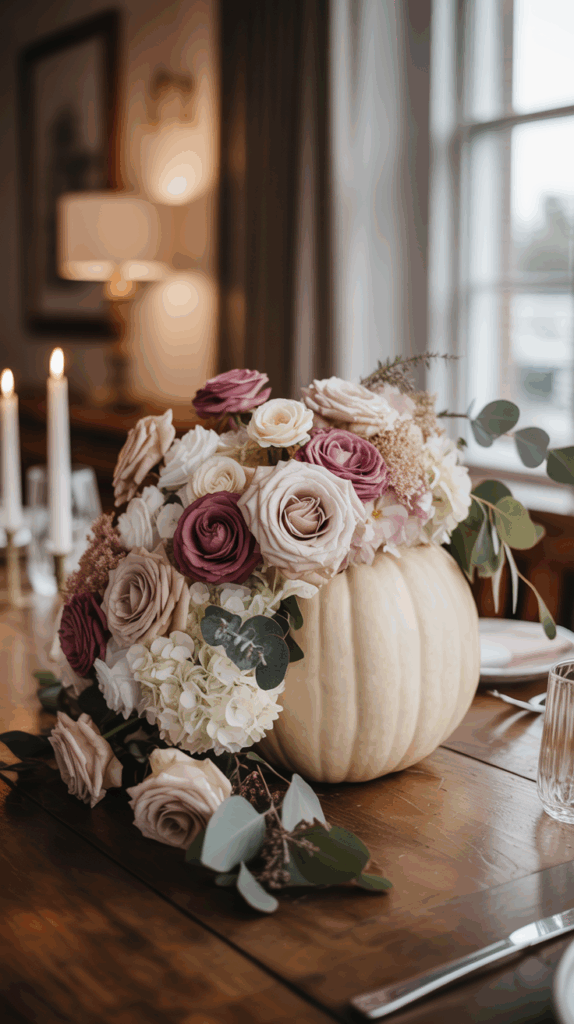
This white pumpkin floral arrangement is my go-to centerpiece — elegant, neutral, and totally fall-ready.
Fresh and neutral decor lets me set a table that feels light, cozy, and inviting, without being too fussy. I’m all about looks that work for any season or event, and I want centerpieces my boys won’t knock over in five seconds. I can’t wait to share a few of my favorite ideas with you, and maybe help you find the perfect centerpiece for your busy, happy home!

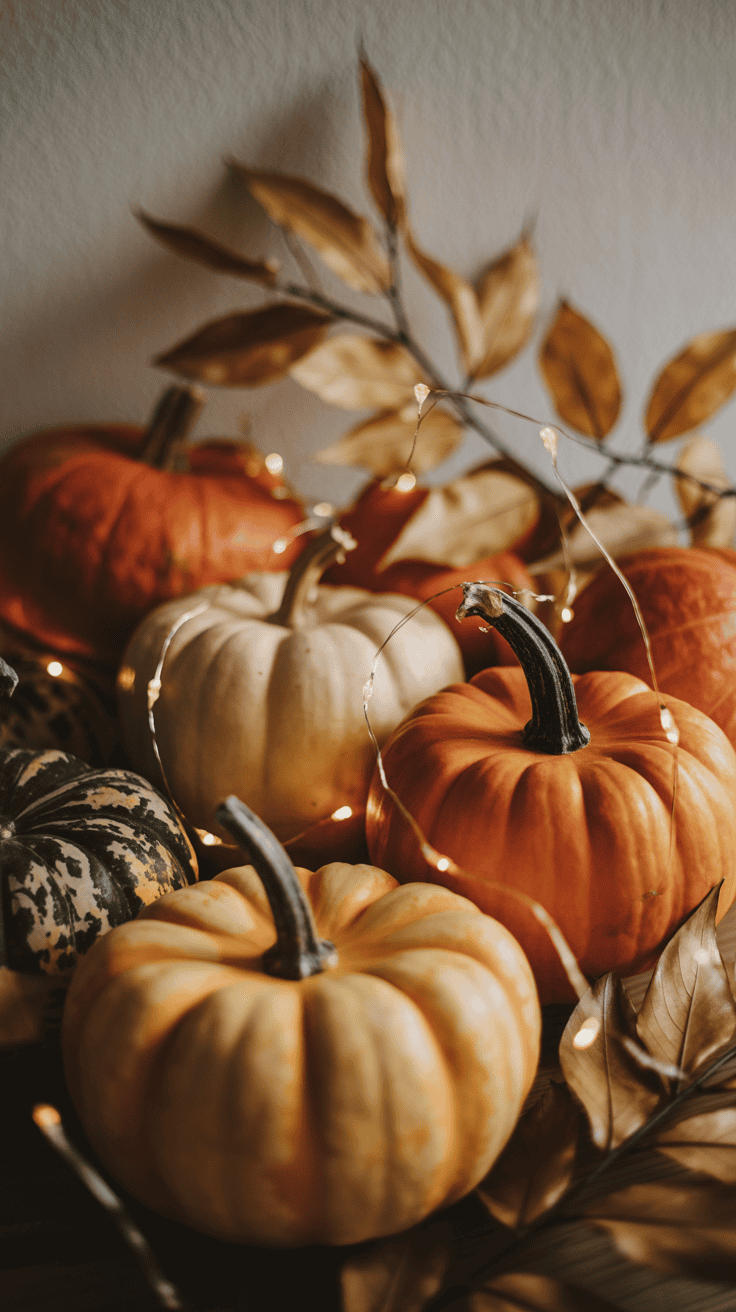
Choosing the Right White Pumpkins


The first step for any white pumpkin floral centerpiece is choosing the right pumpkins. Picking the perfect shape and size can make your whole table look balanced and welcoming (and give you so many creative choices). I always notice how my boys gravitate toward the chubby little pumpkins, while I’m aiming for something that won’t roll off the table! Let’s talk about which shapes work best, where to score the prettiest pumpkins, and how to keep them looking lovely long enough for your next family dinner.
Size and Shape Options

White pumpkins come in all shapes and sizes—each one gives your centerpiece a different personality! The size makes such a difference in how the whole thing comes together. Here’s what I’ve found works best for different looks:
- Small pumpkins (baby Boo or mini Casper):
- Great for grouping in clusters or tucking beside taller flowers.
- Work perfectly if you want a playful, scattered look. I love using three or four mini pumpkins on either side of a longer tray. With their petite size, I can get creative and add a few tall eucalyptus stems to balance out the round shapes.
- These are also super kid-friendly. My boys love helping arrange them, and I don’t worry about anything getting knocked over.
- Medium pumpkins (Snowball or Moonshine):
- Ideal as a base for floral arrangements. Their size is just right for hollowing out and filling with fresh blooms, especially if you’re aiming for that “effortless, farmhouse” feel.
- They work well in the middle of the table without overpowering smaller dishes or décor.
- Large pumpkins (Polar Bear or Lumina):
- Perfect as a bold main centerpiece! When I want the table to feel extra special, I pick one big, round white pumpkin and let it steal the show, hollowed out and overflowing with flowers.
- A single large pumpkin anchors the entire display. I often surround it with votive candles or tiny pumpkins for extra charm.
To make it easier, here’s a quick table to show how size changes the vibe:
| Pumpkin Size | Best Use | Visual Effect |
|---|---|---|
| Small | Clustered, accent pieces | Playful, scattered, relaxed |
| Medium | Arrangement base | Balanced, farmhouse, versatile |
| Large | Main focal point | Bold, anchored, dramatic |
If you want something super lively, try mixing a few small pumpkins with tall, thin greenery or wispy dried grasses. For a calm, elegant mood, go big with just one large, perfectly round pumpkin, overflowing with your favorite white and green flowers.
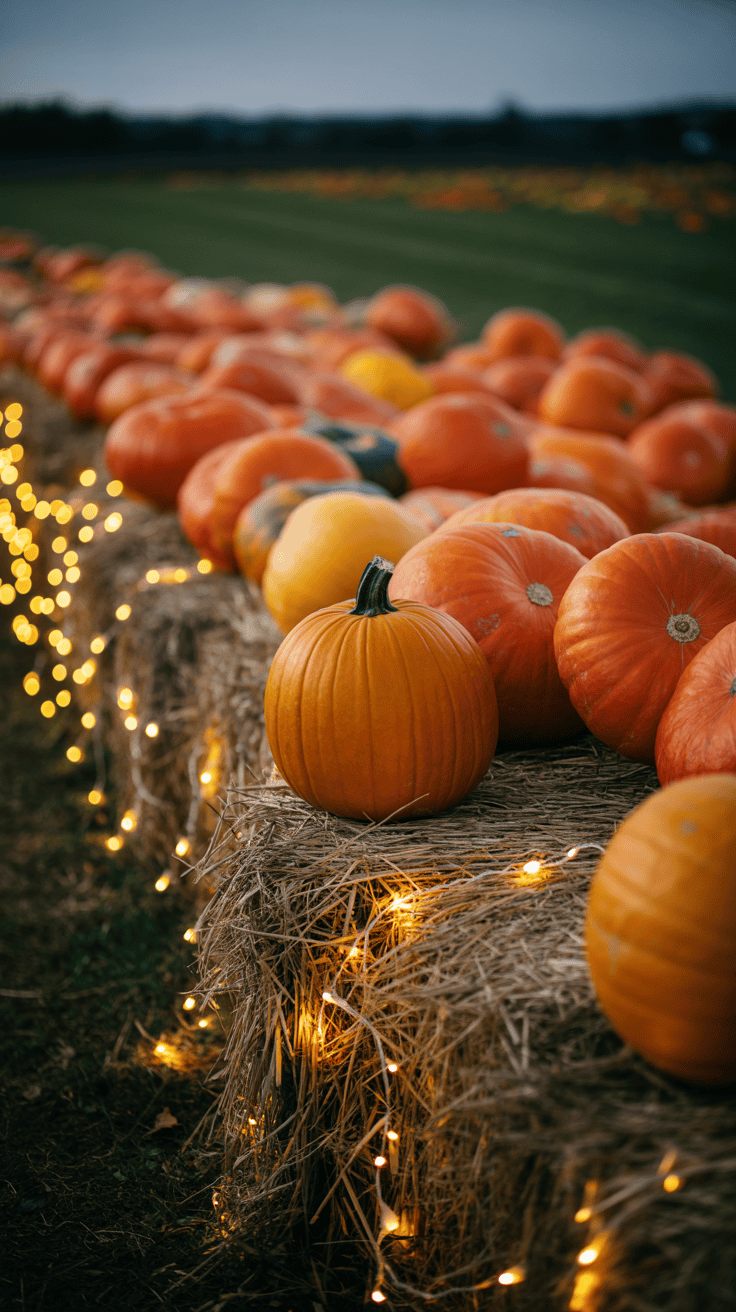
Seasonal Availability and Storage

White pumpkins seem to pop up everywhere once the weather turns cool, but not all pumpkins are created equal! Getting your hands on smooth, pretty pumpkins makes all the difference in your white pumpkin floral centerpiece. Here are my favorite spots to find them:
- Farmers markets: The best place for interesting shapes, fresh-picked white pumpkins, and sometimes even fun varieties you won’t spot at the big box stores.
- Grocery stores: Easiest option if you’re in a hurry. Look for pumpkins with clean skins and firm stems.
- Roadside stands or pumpkin patches: These spots are perfect for kids—my boys love running through the fields and “helping” me choose the right one. Plus, they often have bigger pumpkins and quirky shapes!
To keep your pumpkins pretty and fresh, I’ve found a few easy storage tricks:
- Store in a cool, dry spot: Too much heat or moisture makes pumpkins rot super fast. A spot in the pantry, garage, or even a shaded porch works great.
- Keep them off the floor: Sitting pumpkins on a soft towel or newspaper helps avoid any surprise soft spots on the bottom.
- Check for soft spots daily: If you catch a spot early, sometimes you can just flip the pumpkin over and extend its life for a few more days.
- Don’t wash before using: Wiping off dirt with a dry cloth keeps the pumpkin looking natural and healthy. Too much moisture can invite mold.
I always pick out my pumpkins just a few days before I plan to use them, especially if my boys are around. There’s something so sweet about seeing them carry their “special” pumpkin to the table for dinner! And when you grab the right pumpkin and keep it fresh, your centerpiece really shines.
Selecting Fresh Neutral Flowers

When I pull together a white pumpkin floral centerpiece, I always reach for fresh, neutral blooms. There’s just something so peaceful about soft whites and muted greens sitting on the table, shining against that smooth pumpkin. Every flower brings its own little touch—beauty, grace, and the feeling of a real, living arrangement that’s perfect for fall. If you’re like me (busy mom, juggling a million things), selecting flowers that last, look great, and are easy to find will make everything simpler and more joyful!
Top Neutral Blooms for Fall
Let’s be honest, some flowers just make a white pumpkin floral centerpiece feel complete! I try to keep things soft and understated, so I stick with classic neutral blooms that are sturdy but elegant. Here are my go-to picks, complete with size, vase life, and sourcing advice.
- White Roses: Always a favorite for their soft petals and timeless look! They come in several sizes, from petite spray roses to showy “standard” blooms (usually about 2-3 inches across). They last five to seven days if you trim the stems and change the water. I grab them at the grocery store or order from local farms if I want something special.
- Cream or Ivory Ranunculus: These delicate, ruffled beauties add softness and romance. Their heads are smaller, 1.5 to 2 inches wide, with strong green stems. In a cool vase, they last four to six days. I like to check online flower farms—sometimes you’ll find gorgeous field-grown bunches!
- Lisianthus: If you want something feathery and light, lisianthus is my secret weapon. The blossoms look rose-like but with extra ruffles, and they often come with unopened buds for a wildflower vibe. Each stem has multiple blooms, and the flowers last seven to ten days in water. Farmers markets and local floral shops are good places to look.
- Hydrangeas (White or Green): Hydrangeas fill up space, which is perfect for balancing wide pumpkins. Their blooms can be huge—anywhere from 4-8 inches across. They can last up to ten days, but they do drink a lot, so keep an eye on the water! I find the best ones at flower markets or even big-box stores with a floral department.
- Dusty Miller: More silver than white, but the soft, velvety leaves create a dreamy, frosted look. These are filler stems that mix in with blooms and have small leaves about 2-3 inches long. They last around five to seven days. Look for them at local nurseries or flower stands.
Here’s a quick cheat sheet for my favorite neutral blooms:
| Flower | Bloom Size | Vase Life (Days) | Sourcing Tips |
|---|---|---|---|
| White Rose | 2-3 inches | 5-7 | Grocer, florist, local farms |
| Ranunculus | 1.5-2 inches | 4-6 | Online flower farms, markets |
| Lisianthus | 1-2 inches (multi) | 7-10 | Florist, farmers markets |
| Hydrangea | 4-8 inches | Up to 10 | Flower market, big-box stores |
| Dusty Miller | 2-3 inch leaves | 5-7 | Nurseries, flower stands |
If you want the freshest stems, check out local growers or farmers markets. I love letting my boys help pick out bunches! Online flower farms like The Bouqs or Farmgirl Flowers are great for hard-to-find varieties and deliver straight to your door (which helps a lot when you’re juggling soccer practice and homework).
Mixing Textures and Foliage
Layering in some texture is my favorite way to keep a white pumpkin floral centerpiece from looking bland. Neutral blooms are beautiful, but mixing in interesting foliage and maybe a little wild grass makes everything feel more alive. I think of the smooth pumpkin surface as a blank canvas; adding textured greens and filler plants is like tossing in a few well-loved throw pillows—simple, casual, and welcoming.
Here are some of my favorite texture-boosters:
- Eucalyptus (seeded or silver dollar): Eucalyptus is almost always in my cart! The rounded leaves and gentle blue-green shade blend with any neutral flowers. Stems can be long (up to 24 inches), and they droop just right over the pumpkin’s edge. They last over a week if you keep the water clean.
- Ornamental Grasses: Maybe my best budget hack. Grab a handful of wispy fountain grass, foxtail, or pampas from the garden or a friend’s yard. These grasses bend softly, adding height and movement. You only need a few stems tucked here and there.
- Seed Pods (scabiosa, poppy, or even lotus): For structure, poppy or scabiosa pods work wonders. They look like little sculptures and add an earthy, natural element without changing the color scheme.
- Lamb’s Ear and Sage: Soft, fuzzy leaves with gray-green tones. These feel a bit like Dusty Miller but seem even softer close up. They don’t last as long (maybe three to five days), but I love tucking a few in for that cozy, soft look.
Why do these all work so well? Textured greenery picks up the soft light and creates highlights and shadows. It helps each neutral bloom pop without taking the spotlight from your pumpkin. Mixing textures helps balance the slick, round gourd with a “just picked” feeling that never looks stiff or try-hard.
Quick tip: Don’t overdo it. A few stands of eucalyptus or a couple of wild grass stems are enough to add life without making things busy. The goal is depth, not a wild tangle.
A white pumpkin floral centerpiece with crisp blooms and a little bit of texture feels inviting and calm, even on a chaotic family night! If you haven’t tried mixing your flowers with leafy stems or grasses, give it a go this year. You’ll love how every angle feels a bit different, and it all stays soft, fresh, and family-friendly.
Design Styles for a Fresh Look

I’m always searching for a fun new twist when I set up a white pumpkin floral centerpiece for our family table. Sometimes the boys are spinning around me in circles while I decorate, so simple and clean is best. Still, there are days when I want a hint of charm or something that feels just a bit more dressed up. That’s where playing with design styles comes in! A fresh look doesn’t have to mean all new decorations—sometimes just changing the style makes everything feel new again. Here are three ways I love to style my pumpkins and flowers at home.
Minimalist Chic

I love how calming a minimalist style feels, especially on those busy mornings when the kitchen is in full swing! Minimalist chic is all about clean lines, fewer elements, and plenty of breathing room. You don’t have to pile on the extras to get a gorgeous table—sometimes less really is more.
For this look, I use just three things:
- A single medium white pumpkin as the star
- Two stems of white lilies for simple, striking beauty
- One sprig of sage for a touch of muted green
There’s no need for extra filler. Place the pumpkin in the center of your table, tuck the lily stems into the pumpkin (cut a hole and add a small watertight cup if you’re using real flowers), and lay the sage sprig along the side. Let the white space do the talking! This feels peaceful, bright, and totally fuss-free—just what I need for mornings that start with spilled milk and hungry little ones.
Why it works:
- Simple shapes let each piece stand out.
- The white pumpkin pairs perfectly with lilies’ crisp petals.
- The soft green of sage adds just enough color without clutter.
This look is easy to put together and holds up even when sticky hands reach over to grab a pancake. Plus, there’s almost nothing to clean up!
Rustic Elegance

If you want a style with more warmth but still neutral, rustic elegance is the way to go. I love mixing natural textures like burlap or twine with my white pumpkin floral centerpiece to give things a fresh-from-the-farm touch. It’s soft, homey, and a little bit fancy all at once!
Here’s how I pull it together:
- Wrap a strip of burlap or twine around the base of your pumpkin. Even tying a little bow or knot feels special.
- Arrange a mix of cream roses inside the pumpkin (or cluster them beside it for even more texture).
- Add a few stalks of dried wheat for height and rustic charm.
- Drop in a touch of copper—maybe a small copper candle holder or even mini copper bells tucked among the stems.
Everything about this style brings warmth to the table. The copper shines against the smooth pumpkin, and the wheat bends in the pretty fall breeze if you crack a window. This is the look I turn to when family is coming over or I want our weeknight dinners to feel fancy without any stress.
Key touches for rustic elegance:
- Burlap or twine: Adds texture and a cozy vibe
- Cream roses: Soft, classic, lasts for days
- Wheat stalks: Perfect for fall, kid-safe if you snip the sharp ends
- Copper accents: Bring in just enough shine to lift the whole arrangement
This style is never fussy but always welcomes everyone with open arms.
Modern Farmhouse
There’s something so fresh about a modern farmhouse look. It’s like pulling the best from old and new! For this style, I mix the charm of farmhouse favorites with the simplicity of modern lines. The real trick is picking a trio of pumpkins—each a slightly different size for a casual, just-picked feel.
My favorite formula:
- Use three white pumpkins (small, medium, large) grouped close together
- Add a sprinkle of white peonies for softness and a little drama at the table
- Use a rustic wooden box as a base for everything if you have one
Place the pumpkins inside the box or tray—snug but not crowded—and tuck the peonies in between. Let some blooms peek out over the top for a relaxed, natural style. I like to mix in a bit of dusty green foliage (think lamb’s ear or eucalyptus) just to cozy things up. If your box is deep, use a cup or florist frog to keep the flowers upright.
What makes this style stand out:
- Mixed pumpkin sizes keep the look balanced and playful
- The wooden box grounds everything and adds rustic charm
- White peonies are big, full, and crowd-pleasing
With just a few quick steps, you can refresh your table and inspire everyone to sit down, slow down, and enjoy a meal together. This style is my go-to for busy weekends, and the boys think the pumpkin trio is extra fun—they get to pick their “favorite” pumpkin every time!
No matter which style you choose, a fresh white pumpkin floral centerpiece brightens the whole table and gives your family memories to gather around all season.
DIY Assembly Tips for Busy Moms

Putting together a white pumpkin floral centerpiece can sound overwhelming if you’re like me, juggling three wild boys, dinner, and piles of laundry. But I promise, with the right tools and a plan that fits real life, you can create something beautiful in a snap. This next part is all about making the process quick and stress-free. I’ll share my best prep tips, a step-by-step guide, and quick tricks I use every year when a stem refuses to cooperate. Let’s make it simple so you can spend less time fussing and more time enjoying your pretty table!
Tools and Prep
The biggest secret to a quick white pumpkin floral centerpiece is starting with everything you need in arm’s reach. I always lay out my tools before the boys even catch a whiff of what I’m up to! Here’s what helps the process run smooth:
Must-Have Tools:
- A pair of sharp scissors or floral shears (for stems and ribbon)
- Floral tape (helps hold stubborn flowers or cover loose spots)
- A sturdy vase, cup, or box (fits inside your pumpkin to keep flowers fresh)
- Dish soap and a scrubber (for cleaning your pumpkin)
- Paper towels (for quick cleanup)
If you want to prep super fast, here’s my five-minute routine before I even bring out the flowers:
- Wash and dry your pumpkin: Give it a quick wipe with a damp towel and let it dry. If you plan to hollow it out, scrub the outside and dry well so it won’t slip in your hands.
- Cut a hole in the top: Use a small serrated knife, and scoop out seeds if you’re making a hollow pumpkin vase. Keep the inside as dry as you can—less mess!
- Trim your stems: Cut fresh flower and foliage stems at an angle. This helps them drink up water and perk right up when you add them to your arrangement.
A little prep up front means less chaos in the middle and fewer run-ins with sticky little hands!
Step-by-Step Arrangement Process
I’ve found that breaking down any centerpiece into simple steps helps keep it stress-free. Let’s keep it easy and fun, so even with the dinner rush or the post-school scramble, it will look gorgeous every time! Here’s how I do it:
1. Base Layer: Pumpkin Placement
- Place your white pumpkin in the center of your table or inside a wooden tray for extra stability.
- If you’re using a hollowed pumpkin, slip a watertight cup or vase inside for your flowers (no water means wilting!).
- Make sure your pumpkin sits level so nothing tips when the kids fly by.
2. Floral Layer: Adding Blooms and Greenery
- Start by adding your thickest greenery—think eucalyptus or hydrangea leaves—first to create a “nest” inside your pumpkin or vase.
- Insert your largest flowers next, pressing stems into the base layer so they create a dome shape.
- Fill in gaps with smaller blooms and soft filler like ranunculus or lisianthus.
- Rotate your pumpkin as you go; check every angle to keep things balanced.
3. Finishing Touches: Sprays, Accents, and Flair
- Tuck in a few accent pieces like berry sprigs, dried wheat, or even a twist of jute or ribbon.
- Lightly mist the flowers with water to keep them fresh (especially important if little helpers set the table).
- For a personal pop, add name cards or tiny decorative picks for the kids—instant cheer!
If you use these three steps, your white pumpkin floral centerpiece will look styled and stay sturdy, even if family dinner turns into a soccer match.
Quick Fixes for Common Issues
Real life means things go sideways sometimes. Droopy flowers, wilted leaves, or a pumpkin that shows a crack—trust me, I’ve seen it all! These quick fixes keep your centerpiece looking fresh no matter what the day throws your way.
- Drooping Stems: Snip off the end at a sharp angle under water. Pop the stem back into your arrangement, then give it a spritz with cold water. If a flower still sags, use a bit of floral tape to hold it steady against sturdier stems.
- Wilted Leaves: Remove sad, soft leaves right away. Sometimes leaves wilt before the flower does—don’t be afraid to peel them away for a neater look. Mist the whole arrangement with water and move it out of direct sunlight if possible.
- Pumpkin Cracks: If a crack appears after you cut your pumpkin, reinforce the inside edge with a layer of clear packing tape. It won’t show from the outside, and your flowers will stay put.
- Flowers Not Lasting: Add a few drops of floral preservative or even a splash of lemon-lime soda to your vase water. It helps keep bacteria down and blooms happy longer.
- Leaky Pumpkin: For a hollow pumpkin, line the inside with a plastic bag or baking liner before adding your vase or cup, just in case moisture seeps through.
These hacks let you skip the panic and keep every centerpiece looking family-photo ready. With a little practice and a calm routine, any busy mom (even one wrangling three boys!) can create a white pumpkin floral centerpiece that stands up to the sweetest kind of chaos.
Keeping the Centerpiece Fresh All Week
Every mom knows the joy of seeing a white pumpkin floral centerpiece look beautiful all week long! With three boys zipping past my table at every turn, keeping those fresh blooms perky takes a bit of know-how and a few mom-approved hacks. It feels like a small victory when my flowers still look lively on Friday. The good news? With simple daily habits, even a busy family table can show off soft whites and gentle greens from Monday to Sunday.
Watering Techniques
Fresh flowers need the right care to last through a week of busy breakfasts, family dinners, and—let’s be honest—a few sticky fingers. I always start by changing the water every morning. Yes, I mean every single day! Think of it like giving your arrangement a big, splashing drink. Old water gets gunky fast, especially with a pumpkin vase, and can turn even the prettiest roses sad overnight.
Here’s my routine that keeps things cheerful and bright:
- Pour out old water and refill daily. This stops bacteria from building up and keeps everything smelling sweet.
- Snip the stems a half inch every couple of days. Trim them at an angle so each stem can drink plenty.
- Add a few drops of lemon juice with every refill. It’s my no-fuss trick to keep the water clear and cut back on icky smells. A tiny splash is all you need.
- Keep the vase or pumpkin out of direct sunlight. Bright windows might look pretty, but the heat wilts petals in a flash. I like to scoot my centerpiece toward the middle of the table or a shaded kitchen spot.
- Fish out fallen leaves or petals right away. Anything left in the water will turn slimy and speed up wilting.
My boys love to help me pour in the fresh water—sometimes things get a little soggy, but that’s part of the fun. Even the smallest daily effort stretches flower life and keeps your family table looking fresh and full of life.
Protecting Pumpkins from Heat
White pumpkins are tough, but they don’t like sitting in a hot kitchen. If your centerpiece starts drooping or you spot a soft patch, heat is often the reason. I learned this the hard way after setting mine next to the oven one busy holiday. Now, I always have a few tricks up my sleeve to keep my pumpkin centerpiece looking crisp and lovely, no matter how wild things get.
Here’s what works well for me:
- Move your arrangement away from heat sources. Ovens, stovetops, radiators, and even laptops put off enough warmth to encourage mold and soft spots. I park my centerpiece somewhere cool and away from busy kitchen spots.
- Cover with a lightweight fabric at night. After dinner, I spread a clean dish towel or a piece of muslin over the whole thing before bed. This helps keep moisture in but blocks out any extra light or wandering crumbs from little snackers.
- Check for soft spots each evening. My quick nightly routine is to feel around the base and sides of the pumpkin. If I catch a soft patch early, sometimes I just turn that side down. If it’s getting a little squishy, I’ll set a plate underneath to avoid surprise messes.
- Watch out for condensation. If you use a pumpkin as a vase, wipe any moisture from the bottom each day to stop it from sitting in a puddle.
A little prevention goes a long way. If you live in a warm climate or if your kitchen heats up during dinner time, you might need to rotate your centerpiece spot or use a small coaster under your pumpkin.
Keeping your white pumpkin floral centerpiece looking cheerful all week isn’t just possible—it’s easy with a few daily habits and tricks! Moms, with a little help from the kids and a couple of habits you can squeeze in with your morning coffee, your family table will shine with fresh, neutral beauty every day.

Conclusion
White pumpkin floral centerpiece ideas bring a breath of fresh air to the family table and offer a peaceful, neutral look that blends with any decor. I love how simple it feels, yet it makes every meal together feel just a bit more special! Whether you lean toward minimalist, rustic, or a playful modern farmhouse style, there’s an idea here you can try (even if you’re juggling busy kids like I am).
Give yourself permission to start small and have fun with it. Grab a white pumpkin, pick your favorite flowers, and enjoy a project you can actually finish before dinner. Don’t forget to share photos of your own white pumpkin floral centerpiece creations—I’d really love to see what you come up with! Thank you so much for reading and letting me be a part of your family traditions.
This post may contain affiliate links. Read the full disclosure here.