How to Make Fairy Light Bedroom Ideas Feel Magical and Cozy
Fairy light bedroom ideas are my secret weapon when I want my boys’ rooms to feel cozy and magical! I have three little guys who love anything that sparkles or glows, and I’ll admit, I love it just as much. There’s something about the soft twinkle of fairy lights that makes bedtime a little more special and every night feel like an adventure (even on those wild, messy days when I just want everyone to relax)!
This warm fairy light set brings that dreamy twinkle that makes every bedroom feel calm and inviting!
If you’re hoping to bring some magic and comfort into your kids’ rooms, I’m here to share the simple tricks that work in our house. Get ready for easy ideas that warm up any space and keep the magic alive, no matter how busy life gets!
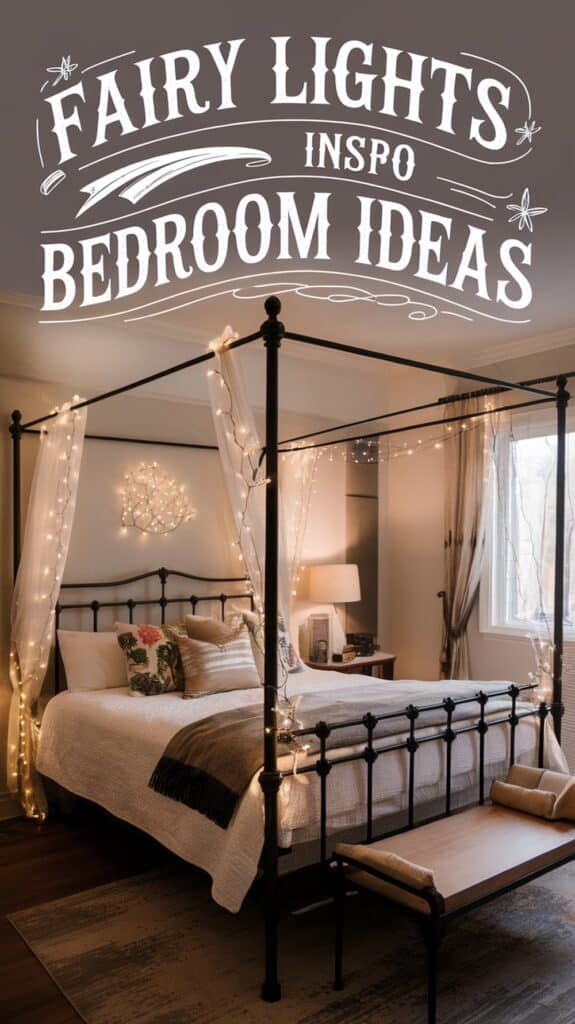
Create a Soft Glow with String Light Canopies


Here’s the thing about fairy light bedroom ideas—they work magic that ceiling lights simply can’t touch! I still remember the first time I made a string light canopy over my boys’ beds. Instantly, the whole room felt softer, warmer, and downright inviting. Watching my boys gaze up at those twinkly lights made bedtime so much easier (and a lot more special for all of us). If you want to turn your kids’ space into a gentle, glowing hideaway, a string light canopy is the coziest way to do it. Let’s talk about how to get this look right from start to finish!
Choosing the Right Lights

Light shopping can get confusing fast. There are so many sizes, colors, and types! I’ve tried just about everything, and here’s what I look for now:
- LED lights are my go-to. They stay cool to the touch, which is a must when you have curious little hands nearby. They also last longer and use less energy, so I never worry if we accidentally leave them on a little late.
- Battery-powered vs. plug-in: If the bed is far from an outlet, battery-powered string lights are a lifesaver. For bigger canopies or when you want to avoid changing batteries, plug-in versions work great (just use a cord cover or tuck the cord behind furniture for safety).
- Length matters. Measure your space before you buy. For a canopy above a twin bed, I usually need at least 20 feet of lights. If you’re working with a bigger bed, or want to drape lights on the wall and ceiling, you may want even more.
- Color temperature sets the mood. I always reach for warm white or soft yellow. Cool white can look sharp or even a little cold. Warm tones make any room feel dreamy and calm, almost like candlelight.
- Child-friendly options: I always double-check for lights with shatterproof bulbs and secure battery cases. Look for products marked as safe for kids’ rooms, and avoid anything made with glass.
Here’s a handy cheat sheet for quick shopping:
| Feature | Why Moms Love It | What to Look For |
|---|---|---|
| LED bulbs | Stay cool, energy efficient | Warm white, shatterproof |
| Battery powered | Easy setup away from outlets | Sealed battery case |
| Plug-in | No battery changes, steady power | Cord length, UL listed |
| Warm color temperature | Cozy, calming bedtime feeling | Warm white/yellow |
Mounting Techniques for a Stable Canopy
No one wants to patch holes or peel off paint in a kid’s bedroom! That’s why I always use these simple, wall-safe tricks to hang string lights without leaving any damage behind:
- Removable adhesive hooks: These little wonders can hold up a whole canopy if you plan the spacing. Stick them to the ceiling or wall where you want the lights to drape, and you’re done! When it’s time for a change, just pull them off (no sticky mess left behind).
- Tension rods: Perfect for smaller canopies, especially over a reading nook or crib. Slip a tension rod between two walls or inside a window frame, then weave or drape the lights across it. The best part? No screws, no fuss, and super easy to move.
- Curtain rods: For a more finished look, I sometimes run a curtain rod above the bed and loop lights over it. It’s sturdy, reusable, and makes swapping lights or adding curtains a breeze.
Here’s what I do when I set up a canopy over a twin bed:
- Stick removable hooks in a gentle curve on the ceiling above the pillow area.
- Drape the lights, letting them dip in soft swags between each hook.
- Secure the battery pack on a hook behind the bed or tuck the cord safely away from little grabby hands.
If your kids are like mine and love to wiggle and tug everything within reach, double-check the lights each week to make sure everything holds tight. Safety first!
Adding Fabric for Extra Warmth

The right fabric over string lights takes the magic up a notch. When I started layering in sheer curtains or bits of tulle, my kids’ beds turned into instant hideaways. Fairy tales at bedtime felt real! The glow softens, shadows dance, and the whole space feels like a gentle hug at night.
Some of my favorite fabric choices:
- Sheer curtains: Light and easy to drape, plus you can grab them for a song at most home stores. I tie knots at the corners or let them hang loose for a dreamy effect.
- Tulle: This stuff is practically weightless and so easy to twist or bunch. A strip of white or pastel tulle layered with the lights feels whimsical and playful.
- A lightweight duvet cover: If you want the look of a full canopy but don’t want to fuss with measuring and sewing, drape a thin duvet or top sheet over the lights, and secure with hooks or rods. It diffuses the glow beautifully.
A few quick tips:
- Keep fabrics clear of bulbs (especially for plug-in lights), and always double-check they’re not bunched up too close to the power source.
- Test your lights first under the fabric so you can tweak the look—move fabric around until it’s just right. Too little and you lose the glow, too much, and it feels heavy instead of magical.
If you make your own canopy, invite your kids to help pick the fabric or hand you hooks. The final result will be even more special because they’ll feel part of the magic!
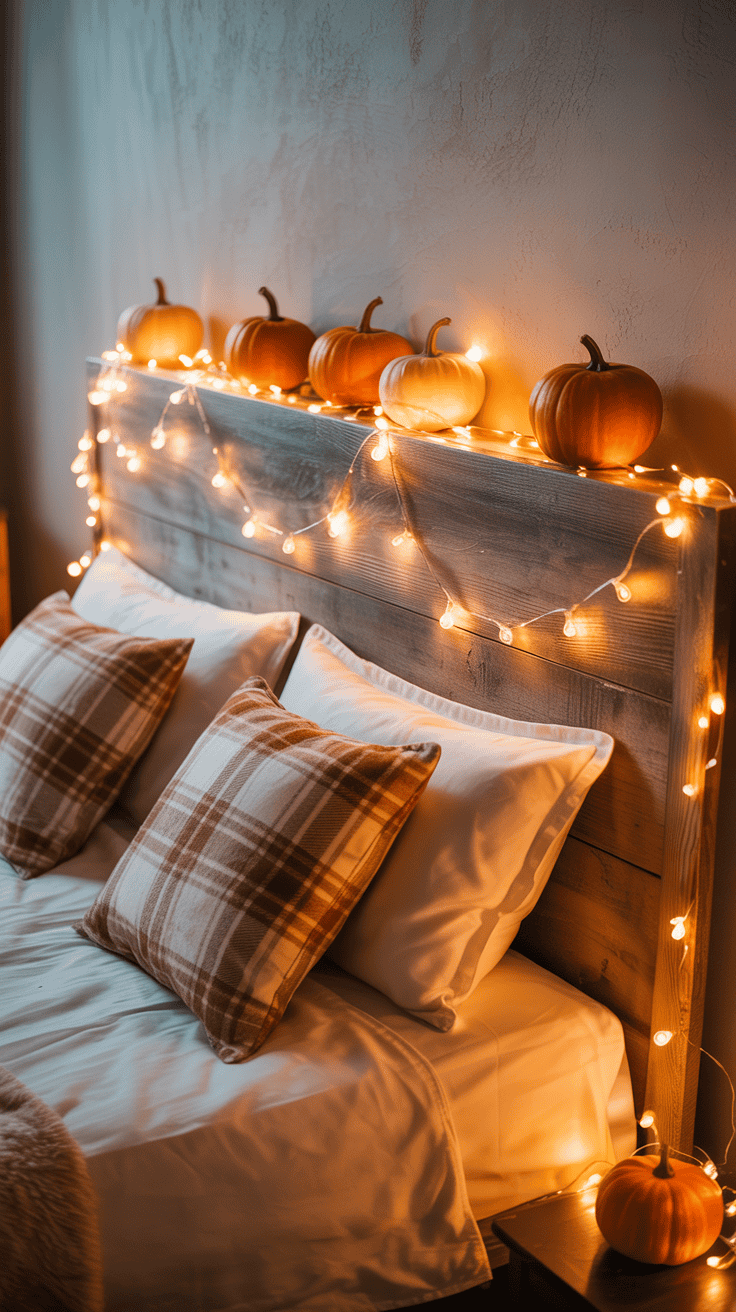
DIY Fairy Light Headboard Ideas

Let’s talk about headboards! They’re not just a place for pillows to rest, they’re a favorite spot for me to sneak in some fairy light bedroom ideas for my boys. If I can pull off a project in one afternoon with my kids cheering me on, I know it will be a winner. These DIY fairy light headboards bring instant charm, a sense of coziness, and plenty of wow-factor to any bed. They’ll make your little ones feel like they’re tucked into a storybook every night! Here are three simple headboard ideas even a busy mom can do—no fancy tools or skills needed.
Wooden Frame with Light Strips
I’ve always loved a headboard with a clean wooden frame. It’s classic, but you can make it magical with fairy lights in a snap! Here’s what brings this look together:
- Measure Twice, Cut Once: Grab a tape measure and check the width of your bed. I recommend making the frame just a few inches wider than the mattress for a cozy fit with a little wiggle room. Mark where each edge will go along the wall.
- Build or Buy the Frame: You can make a simple frame with lightweight wood. If you aren’t handy with saws, pick up four pre-cut boards at the home store and attach with brackets or screws at the corners. You can paint or stain the frame before adding lights. My boys love helping pick out a color—midnight blue is a favorite!
- Attach the Lights: Once your frame is dry, lay it flat on the ground. Wrap fairy light strips all around the outer edges. Use zip ties to keep the wires snug and hidden, especially at corners. If the lights are battery powered, make sure the pack has an easy-to-reach spot on the back.
- Mount the Frame: Use a few extra-strength removable strips or screws to attach the frame right above the bed. I like keeping it low so the boys can see the twinkle, but still high enough that little hands can’t reach the wires.
Tips for busy moms:
- Pre-sand the frame for a splinter-free finish.
- Choose soft white or golden lights for a soothing bedtime look.
- For older kids, try painting tiny stars or moons on the wood for extra fun.
Why I love this: You get a neat border of light around the bed, and it feels custom without the hefty price tag. It’s sturdy, easy to clean, and you can swap out the lights anytime.
Pegboard Headboard with Adjustable Lights

A pegboard never sounds fancy until you see what fairy lights can do! These boards have holes for pegs and hooks, which also makes them great for looping or hanging fairy lights. The real magic is that you can change the look anytime—like music for different moods.
Steps for a Pegboard Headboard:
- Pick Your Pegboard: Choose a pegboard that’s just a bit bigger than the width of your child’s bed. Hardware stores cut them down in-store if you ask. White pegboard looks bright, but I also paint them with my boys (navy, green, or even ombré stripes) for extra style.
- Mount It Securely: Use wall anchors or removable mounting strips, making sure the board sits flush against the wall. I keep it low so it feels like a real headboard, but still high enough to avoid bumps.
- Add Fairy Lights: Here’s the fun part! Weave string lights through the holes in any pattern you like—zigzags, circles, squiggles, or even spell out a name. You can move the lights around in seconds, anytime your child wants a change.
- Adjust for Mood: On a rainy day, I’ll switch to twinkles all around the edges. For bedtime stories, sometimes it’s just a little constellation in the middle. You can hang little art or photos from the pegs, too.
Bonus ideas:
- Add tiny buckets or cups to hold bedtime books or treasures.
- Let your child re-design the look every season.
Why it works: The pegboard makes it so easy to customize. My boys never get bored because every week their beds look different!
Mason Jar Light Display
Glass jars and fairy lights go together like peanut butter and jelly in our house. There’s something about that glow inside a jar that feels both magical and homey. This is my favorite above-the-bed look when I want something playful, safe, and crazy easy to pull together!
How I create a Mason Jar Light Headboard:
- Gather Your Supplies: You’ll need clean mason jars (3-5 for a twin bed is perfect), a string or two of battery-powered fairy lights, sturdy picture hangers, and some ribbon or wire.
- Fill the Jars: Gently tuck a small string of fairy lights into each jar. Leave the battery pack outside, and wrap it with washi tape or paint if you want to make it cute. I choose warm white lights for that gentle, lantern glow.
- Arrange and Attach: Decide on your layout. You can make one straight row, cluster jars at different heights, or create a gentle arc above the bed. Attach picture hangers to the wall, making sure each is snug and safe. Use ribbon, twine, or wire to hang the jars from each hook. I check every jar to be sure it’s secure and never risks falling.
- Hide the Extras: Tuck battery packs behind the jars or inside little pouches (I use small fabric bags) so the glow is the star. For an extra touch, drop in some sparkly sequins or colored glass pebbles!
Quick safety tip:
- Always use battery lights, not plug-in lights, for jars—cuts electrical risk to zero and keeps things cool to touch.
Why kids love it: The jars look like captured fireflies! Mine race to turn them on every night, and I honestly never get tired of seeing those soft sparkles shining down on bedtime stories.
All three of these fairy light bedroom ideas are instant mood boosters, and they pull double duty as night lights for kids who sometimes worry about the dark. I love knowing bedtime will feel special, even on the craziest nights, and nothing beats that warm, magical glow after a long day.
Layered Lighting: Lamps, Sconces, and Fairy Lights
Layered lighting is my not-so-secret trick to make any kids’ bedroom feel cozy, magical, and just right for bedtime stories or quiet play. Combining different lights gives the room personality! In our house, a mix of lamps, sconces, and fairy lights turns boring corners into stars of the show. It also means I can control every part of the vibe—sometimes we want soft and sleepy, other times my boys are building forts and need a little more light. I’ve learned through lots of trial and error how to get the balance right without having to remodel the whole room. These are my favorite fairy light bedroom ideas for moms who want a space that feels both practical and whimsical.
Balancing Brightness and Softness
I’m always looking for ways to keep the bedroom feeling gentle, especially as it gets closer to bedtime. Bright overhead lights can wake everyone up just when you want things to slow down! That’s why I love using dimmers, timers, and low-watt bulbs.
Here’s how I keep things cozy without making the room too dark or too bright:
- Dimmers: Swapping a regular switch for a dimmer is easy and makes a big difference. Dimmers let me set the mood, whether the boys need to wind down or just want a little glow for sleepy eyes. It’s perfect for lamps and even some plug-in sconces. I love being able to dial it up just a bit for story time, then down low right before bed.
- Timers: I use timers to set our fairy lights on a schedule. Most sets for bedrooms come with simple timer remotes, so I never forget to turn them off. Set them for 2, 4, or 6 hours—you’ll get that soft twinkle as long as you want, and it’ll shut off when you’re likely fast asleep.
- Low-watt bulbs: When picking bulbs for lamps or wall sconces, I go with 25W or less. LED bulbs are best because they don’t overheat and last forever. Even my bedside lamp glows just enough for late-night cuddles but not so much that it keeps anyone up.
- Layer and blend: I mix a main lamp for gentle room light, fairy lights for twinkle, and sometimes a small clip-on light for extra calm by the bed.
Bonus tip: If you have little ones who need a “night light” feeling, go for soft yellow or amber-toned bulbs. Anything too white can feel harsh, and I promise the soft glow is so much cozier!
Placement Strategies for Even Light
Having the right amount of light in the right places keeps the bedroom feeling welcoming. I use a simple rule: put lights where you need them most and let the little sparkles fill in the rest. Here’s how I set things up so nothing feels too dark or too busy:
Lamps:
- Place a lamp on each nightstand or a single large lamp near the bed so your kids can read, show off toys, or keep a soft glow close by.
- Try clip-on lamps for bunk beds—they give just enough light, and you can move them if you change the room.
- Lamps with fabric shades add even more warmth and keep things gentle on the eyes.
Sconces:
- Mount wall sconces at about eye level—just above the headboard or by reading corners. Wall lights free up precious tabletop space for books or water bottles.
- Plug-in sconces make life much easier—no fancy wiring and they’re easy to move if you switch up the room.
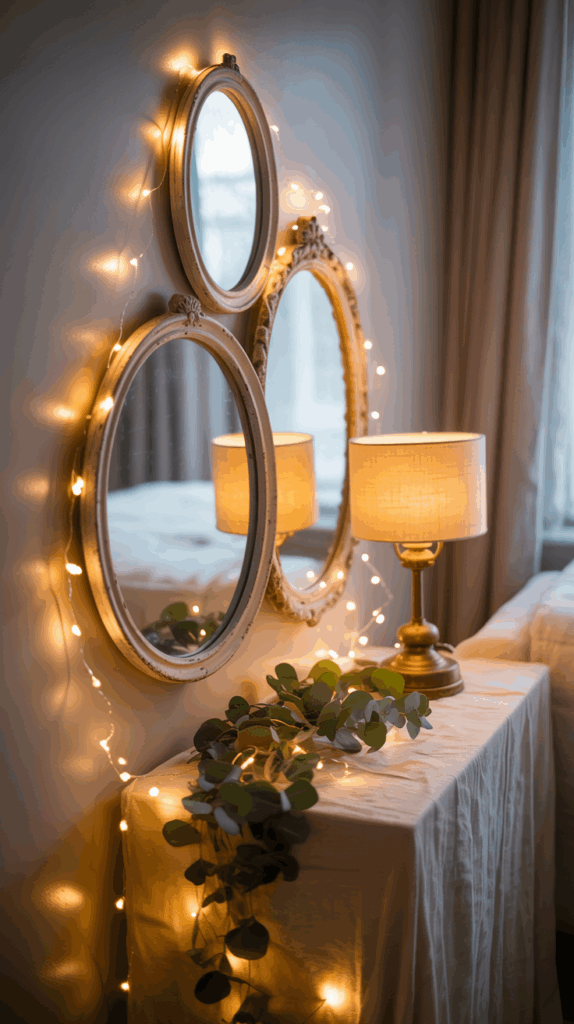
Fairy Lights:
- Run fairy lights along the top of shelves for a magical border. It softly lights up favorite toys and books, and the sparkle never gets old!
- Try draping lights around windows or across the ceiling to create a gentle twinkle overhead. This is a big hit when the lights reflect off curtains or cozy fabrics.
- For art displays or photo walls, clip fairy lights with clothespins to make a fun, glowing gallery.
I never put fairy lights where little hands can tug, especially at bedtime. I always secure cords so there are no tripping hazards. Safety comes first, but it’s still easy to make the room feel like a fairy tale!
Here’s a quick table I keep in mind when I’m planning the room:
| Light Type | Best Placement | Why I Love It |
|---|---|---|
| Table Lamps | Nightstands, desk corners | Easy to move and direct |
| Sconces | Above beds, reading nooks | Save space, add warm pools |
| Fairy Lights | Shelves, windows, ceiling | Magical glow, customizable |
Choosing Themes That Match the Fairy Light Feel
Fairy light bedroom ideas really shine when you lean into a theme! Over the years, I’ve found three looks that pair perfectly with twinkle lights. These themes are fun, flexible, and you can pull them together even if decorating isn’t your favorite thing.
Pastel Dreams
- Pick soft shades like blush pink, mint, pale blue, and sunshine yellow. Light bedding and curtains help the fairy lights really pop.
- Drape the fairy lights over a canopy or headboard, and add fluffy rugs and some big pillows for extra coziness.
- I sometimes add star or cloud-shaped wall decals to tie everything together. My boys feel like they’re sleeping on a soft little cloud!
Boho Magic
- Choose earthy tones, woven baskets, and mix-and-match fabrics. Boho style is playful and great for kids who love to collect treasures.
- Layer string lights with macramé hangers or fabric garlands. Wood bead garlands mixed with lights look amazing!
- Add a few houseplants (even faux ones) for an outdoorsy feel. My sons love the look of hanging planters twinkling with fairy lights at night.
Woodland Adventures
- Go for green, tan, and pops of forest animal print. Hang fairy lights along a tree-shaped bookshelf or use them to highlight nature-inspired wall art.
- For beds, use earthy linens with mushroom, fox, or leaf designs. I like to make a reading corner with twinkle lights and a pile of nature books.
- Toss in some plush animal toys or a leafy rug, and suddenly you have a fairy forest right inside your house!
When you pick a theme that matches the sparkle of the fairy lights, the whole room starts to feel pulled together. The best part is you only need a few touches—most of it comes alive thanks to that magical glow! I love letting my boys help pick their favorite, and by adding just a few key pieces, their room feels special and unique to them.
Seasonal and Themed Fairy Light Decor

Seasonal changes and special themes have a huge effect on how cozy and inviting my boys’ bedrooms feel. Over the years, I’ve found that fairy light bedroom ideas are even more fun when I match them to a season or special moment. These easy, themed touches are the secret sauce for making the room look new, magical, and personal each time the weather changes or a holiday comes around. With just a few tweaks, the whole space glows with fresh excitement. Here are my favorite, stick-to-your-budget ideas that keep my kids’ room feeling magical all year long!
Twinkling Stars for a Night‑Sky Theme
The first time I set up a night-sky ceiling with fairy lights, my boys gasped like it was their own mini planetarium! It’s simple and so worth it. I use strings of tiny, warm-white fairy lights, then add packs of LED star lights (the little ones that look like glowing stickers or mini bulbs).
Here’s how I make it look dreamy:
- I stick removable hooks or sticky pads all over the ceiling in a random pattern, skipping heavy tools or permanent damage.
- For the “stars,” I hang a few special LED star lights in clusters. This adds depth and makes a few twinkles stand out more.
- To connect everything, I weave two or three strings of fairy lights across the ceiling, letting them dip a little. I zigzag them between hooks for a gentle, swirling effect.
My kids love to lay back and “find constellations.” Sometimes we tell stories about the stars right before bed. If you want to turn off the room lights and let the fairies take over, this setup is a winner!
Quick tips:
- Pick warm white or soft yellow lights for a calm mood.
- Try glow-in-the-dark star stickers for even more magic (and easy daytime charm).
- Don’t forget to hide cords or battery packs behind shelves or curtains for a clean look.
A night-sky ceiling always feels fresh, no matter the season. It’s just pure, year-round wonder!
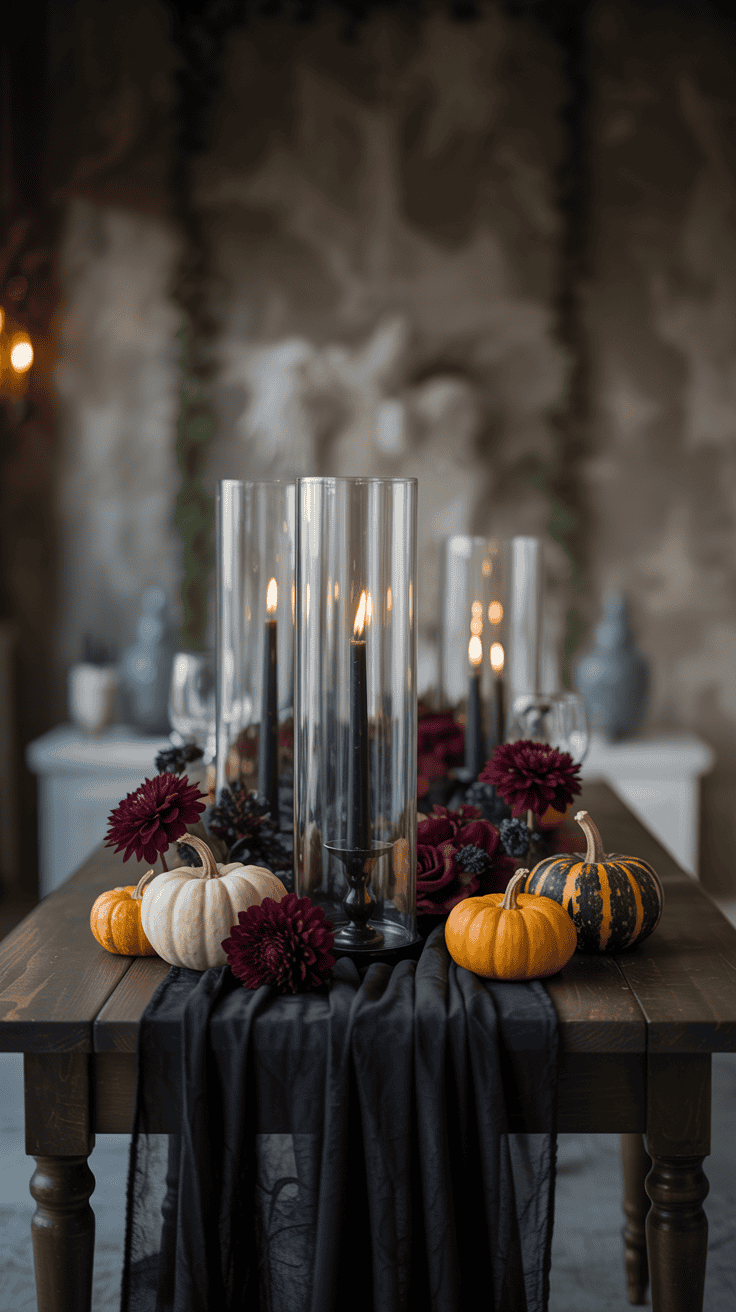
Warm Autumn Accents
When the leaves outside start changing, I get the itch to do the same inside. If you’re already gathering pumpkins and planning for crisp evenings, fairy lights in warm, amber tones are my go-to. These cozy autumn fairy light bedroom ideas add instant warmth that feels just like a pumpkin spice hug.
Here’s how I layer the autumn look:
- Drape a strand of amber or deep yellow fairy lights across the headboard or over a bookshelf.
- Weave in an artificial leaf garland right along the same path. You can find affordable garlands at the craft store that use deep reds, golds, and spicy oranges.
- For an extra touch, I’ll clip a few small fabric pumpkins or pinecones to the garland. The boys think it’s a scavenger hunt every time they notice a new detail.
Sometimes I let the boys help arrange the garland and lights. Their touch makes it feel even more special! On chilly nights, this setup glows so warm, the bedroom feels like a fort where you want to snuggle with books and a cuddly blanket.
Try these add-ons:
- Add a plaid blanket or autumn pillowcase for a quick color boost.
- Hang a paper “thankful” banner with clothespins on the lights for November.
- Use battery-powered lights if there’s no outlet nearby.
Amber fairy lights paired with leafy garland are my favorite way to bring the best of fall indoors. The whole room starts to feel like a cozy storybook!
Holiday Sparkle Made Easy
Holidays and birthdays give a perfect excuse to switch up our fairy light bedroom ideas and bring in a fresh pop of color. Changing out just one or two strands makes everything feel new—no need to redecorate the whole room!
Here’s how I do holiday sparkle without any stress:
- For Christmas, I swap in mini fairy lights in red or green, or mix classic white with a few bold colors. Sometimes I tuck little felt ornaments or snowflakes right onto the wire.
- For birthdays, I use pastel fairy lights (think soft pink, mint, lavender, or light blue) and string them along the ceiling or around the bed frame. The birthday kid gets to help pick their favorite color!
- I sometimes add paper lanterns or easy DIY banners to match the color theme, clipped right onto the light string.
If you’re pressed for time, target one part of the room, like the window or the headboard. Even a single string of themed lights changes the whole mood and makes special days feel extra sparkly. My boys beg to change up their fairy lights any time a new season or party comes along, so we keep a bin of “special occasion” strings ready.
Quick swap ideas for themed sparkle:
- Valentine’s Day: Pink and red fairy lights with cut-out hearts.
- Halloween: Orange lights with ghost or pumpkin shapes.
- Fourth of July: Blue and red lights with paper stars.
Holiday and birthday fairy light swaps keep tradition and excitement alive. The best part is watching my kids’ faces light up before the big event—sometimes they even help plan the next theme!
These themed fairy light touches make every season shine brighter. If you keep a few extra strings on hand, the next magical change is only a moment away!
Safety Tips and Practical Setup for Busy Moms
When it comes to fairy light bedroom ideas for my boys’ rooms, nothing matters more than safety and ease. Life gets busy! I always look for simple setups, quick tricks, and cleaning routines that make our magical spaces safe and easy to manage. With kids in the picture, a cozy bedroom needs to work for you, not against you. Let’s get into what really works for moms with a lot on their plates.
Electrical Safety and Battery Choices
Safety is my number one rule when I bring anything electric into my kids’ rooms. Fairy lights are fun, but if I’m not careful, little hands can find trouble fast. I always start with UL-listed lights. That UL stamp means professionals have checked for hazards and approved them for home use. I make this non-negotiable when shopping—especially for bedrooms!
Cords and Wires: I keep all cords out of reach. If I need to use plug-in lights, I tuck cords behind heavy furniture or run them up high with adhesive clips. No loose wires for my rowdy guys to tug! For bunk beds or any low spaces, I only pick battery-powered fairy lights. It’s peace of mind I can live with.
Battery Power Tips:
- Go for long-lasting batteries. Nothing is more annoying than a light show that fizzles out in a few days. I use top-quality AA or AAA batteries—cheaper ones drain fast and leave you scrambling before bedtime.
- Seal the battery case. Look for lights with screwed-in battery compartments. That way, curious hands can’t pop them open. If your lights have a simple snap case, I add a bit of tape for extra security.
- Rechargeable batteries: If you use fairy lights every single night, rechargeable batteries save you both time and money. I keep a small set charging in the kitchen and swap them out as needed.
Quick checklist for safe lights:
- UL or ETL marking on box or cord
- Sturdy, sealed battery case
- No loose or dangling cords below toddler height
- LEDs only—safer and cool to the touch
Any time I try a new setup, I sit on the floor and look from a child’s view. If it feels safe for my youngest, it’s good for everyone!
Quick Installation Tricks
After a long day, I want things to be fast and simple. Installing fairy lights doesn’t need to be a weekend project! These shortcuts have saved my sanity (and my walls) more times than I can count.
My favorite speedy tricks:
- Adhesive clips: I love these. Just peel, stick, and clip! They fit almost anywhere—around windows, behind shelves, above headboards. The best part is removing them leaves no marks (perfect for renters or bedroom makeovers).
- Pre-drilled holes: Some furniture (like bookshelves or pegboards) already comes with handy holes. I weave fairy lights through those spots for a secure, built-in look. This also keeps the lights snug so the boys don’t snag them when grabbing books.
- Use what you have: Even the busiest moms can get creative! I’ll wrap fairy lights around curtain rods, bed frames, or the tops of picture rails. No need to buy special hardware. If there’s a hook, knob, or bar, it’s fair game.
- Zip ties and twist ties: For a quick fix on thicker furniture or bed frames, zip ties hold lights in place and keep cords tight against wood or metal. Twist ties from bread bags work for lightweight jobs too!
When time is tight, I break installation into ten-minute chunks:
- Map out the path with painter’s tape.
- Attach hooks or clips at each major turn.
- Drape the lights and set the switch or battery pack in a safe spot.
It’s the small victories—like finishing before you have to make dinner—that keep me going!
Cleaning and Longevity
The sparkle is great, but only if fairy lights stay clean and bright. My boys seem to find dust and crumbs wherever they go, so I’ve learned a few tricks to keep our magical setups looking fresh.
Dusting: Fairy lights collect dust fast, especially on top of shelves or canopies. Once a week, I do a light sweep with a microfiber duster or an old, clean paintbrush. I pick something soft, so I don’t snag or loosen the wires. For stubborn gunk, a barely damp (not wet) cloth is safe for LEDs.
Checking Connections: When I dust, I also check all the connectors and bulbs. Loose or blinking bulbs go on my fix-it list so that I’m not scrambling in the dark at bedtime. If plugs look wobbly or wires are bent, I switch them out right away for safety.
Storage Tips: I keep extra fairy lights in clear bins with labels. I wrap each strand carefully, using the cardboard from paper towel rolls to prevent tangles. Battery packs get stored unplugged (with batteries removed) so nothing corrodes or drains by accident.
Here’s a quick table that helps me stay organized and keep fairy lights looking their best:
| Task | How Often | Quick Tip |
|---|---|---|
| Dust fairy lights | Weekly | Soft duster or paintbrush |
| Check connections | Monthly | Inspect plugs, bulbs, and battery cases |
| Store extras | After each season | Use labeled bins, wrap cords on cardboard rolls |
| Swap batteries | As needed | Keep a spare pack handy for bedtime emergencies |
Keeping up with these little habits makes our fairy light bedroom ideas last longer, feel safer, and stay full of magic. Every mom deserves a cozy setup that won’t be a chore to maintain!
Conclusion
Sprinkling a little magic with fairy light bedroom ideas has completely changed the way my boys see their rooms, and honestly, it has made our whole bedtime routine sweeter! Whether it’s a simple string of twinkle lights across a canopy, a themed display for each season, or just a few glowy jars on the shelf, these touches always make our space feel warm and special. Every time I try a new setup, I see their faces light up, and it reminds me how even the smallest changes can feel big to our kids.
If you’re even a little curious, I hope you’ll pick one of these fairy light bedroom ideas and give it a try! Share your favorite photos in the comments, or let me know what magical setup works best for your family. I always love seeing other moms’ creativity shine. Thank you for spending your time here and making your little ones’ worlds brighter with me!
This post may contain affiliate links. Read the full disclosure here.