Fairy Lights in Vase Ideas That Add Whimsy to Any Room
As a mom of three busy boys, I’m always searching for fairy lights in vase ideas that actually add a sprinkle of whimsy to our home! There’s just something special about a simple glass vase lit up with a warm, twinkling glow after a long day of muddy sneakers and homework. The best part is, these vases are safe, mess-free, and easy enough for little hands to help with (which my kids love).
These fairy string lights make everything feel cozy — I love tucking them inside clear vases for a soft glow.
It doesn’t matter if you want a little magic in the playroom or some calming sparkle by your bedside, these ideas fit any mood and any space. I love how these quick touches turn a plain room into something dreamy, while still being family-friendly. Get ready for fast, cheerful tips the whole family can enjoy… and trust me, you’ll want to try more than one!

Why Fairy Lights Bring Whimsy to Every Room


There’s nothing quite like the soft shimmer of fairy lights to make a space feel magical, even after a day filled with wild energy and muddy shoes. When it comes to fairy lights in vase ideas, I’ve found these little twinkles do more than just decorate. They help create calm, let me stretch my dollars, and keeping our home feeling fresh with every season. Here’s how these lights turned our routine rooms into something truly special.
Soft Glow That Calms Energetic Kids
After an afternoon of racing cars down the hall or making blanket forts in the living room, the last thing my boys want to do is wind down. I discovered that dimming the main lights and switching on vases filled with fairy lights creates the perfect mood for quiet time. The gentle glow invites everyone to slow down, like summer fireflies caught in a jar—or sleepy bedtime stars, safe and close.
One night, after a rainy-day meltdown, I told the boys we could “chase the twinkles” to bed. We piled on pillows, set our favorite fairy light vase by the headboard, and made up stories about each soft, glowing dot. The squabbling stopped. Whispers replaced shouts. A few minutes later, three boys drifted off, snuggled in, while the vase’s soft gold shimmer danced on their walls. Moments like that remind me how little changes can make a big difference.
Why it works:
- Creates a peaceful atmosphere after busy days
- Acts as a gentle nightlight without being too bright
- Gives kids a sense of calm and comfort before sleep
Cost‑Effective Décor That Grows With Your Family
Fairy lights almost feel like magic because they adapt as quickly as our kids do! I started with a single strand tucked in a mason jar for story time. That same string of lights now lives in a tall glass vase filled with pine cones in the fall, then becomes part of our “undersea treasure” centerpiece during birthday parties.
When the boys outgrow their love of dinosaurs and move on to superheroes, I don’t need to buy anything new—I just swap what goes into the vase. The fairy lights in vase ideas keep working as my boys’ tastes change (which is often). Plus, these lights last a long time, so I’m not running to the store every season.
Ways fairy lights have saved my décor budget:
- Reusable: Just change out fillers or vase style
- Affordable: Great deals at dollar stores or online
- Long-lasting: Good LED fairy lights keep glowing for years
As a mom, I love having supplies that grow with the family rather than clutter up our storage bins.
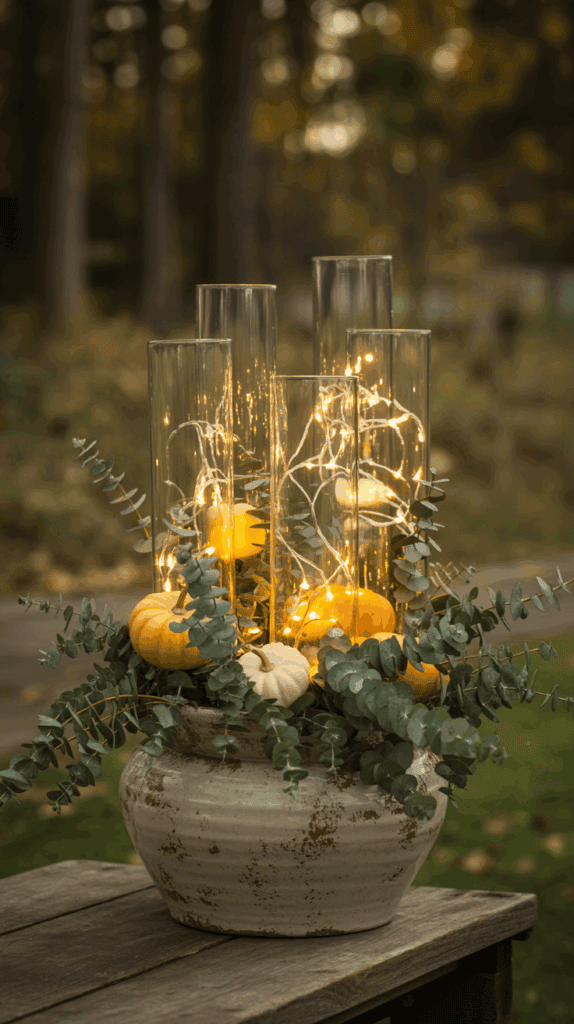
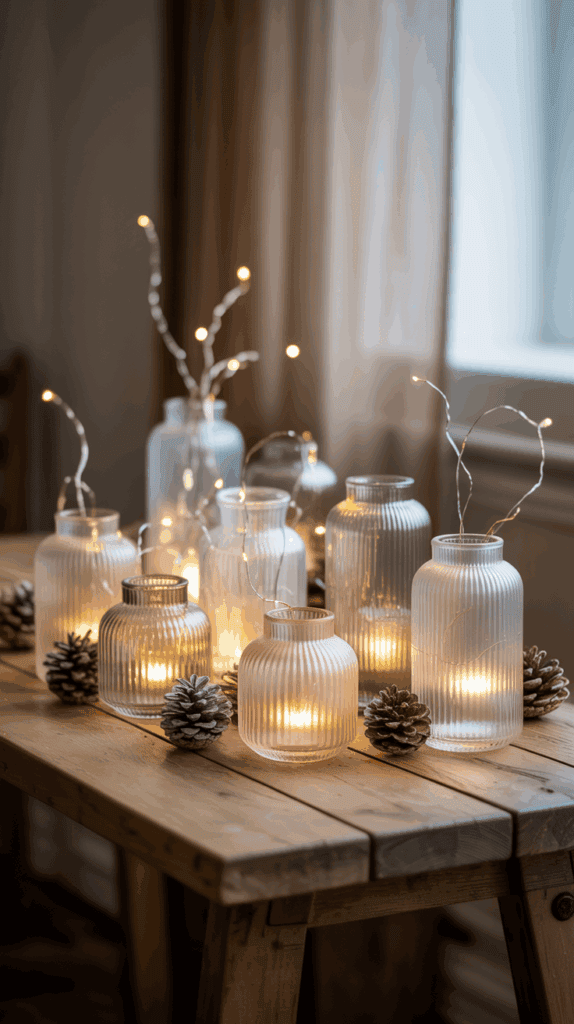
Easy to Swap for Different Seasons or Themes
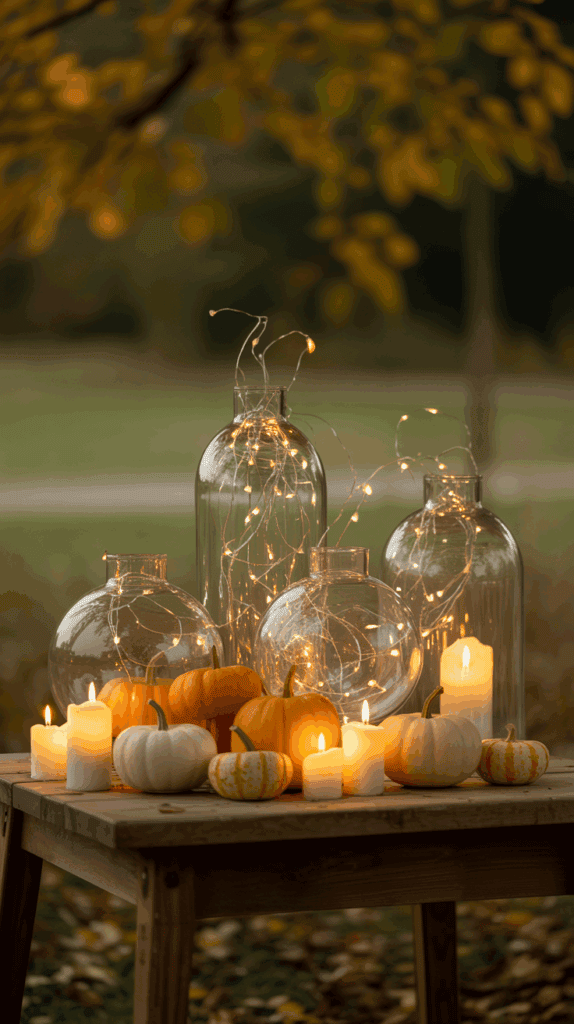
If you like to change things up as much as I do, fairy lights in a vase are your new best friend. It’s so simple to shift from one theme to another with almost no work at all. I start with a clear vase and my go-to set of warm white fairy lights. Then, I just pick accents for whatever season or party we have coming up.
Here are some quick ways I swap things up without redoing the whole setup:
- Spring: Tulips or faux blossoms, a few pastel eggs
- Summer: Seashells, sand, tiny toy boats
- Fall: Pine cones, acorns, small pumpkins, orange leaves
- Winter: Mini ornaments, pine sprigs, a handful of fake snow
For birthdays, I’ll toss in the birthday kid’s favorite figures, candy wrappers, or colorful ribbons. It all happens in just a couple of minutes, no crafting mess, and no stress. Suddenly, the whole room feels new and full of fun! This quick change-up keeps the kids interested and lets me stay creative all year.
Key perks:
- No need to buy new lights for every theme
- Kids can swap things out themselves for a sense of ownership
- Matches every season and occasion with almost no planning
That’s why fairy lights in vase ideas feel so special in our family—they glow with warmth and imagination, ready for whatever comes next!
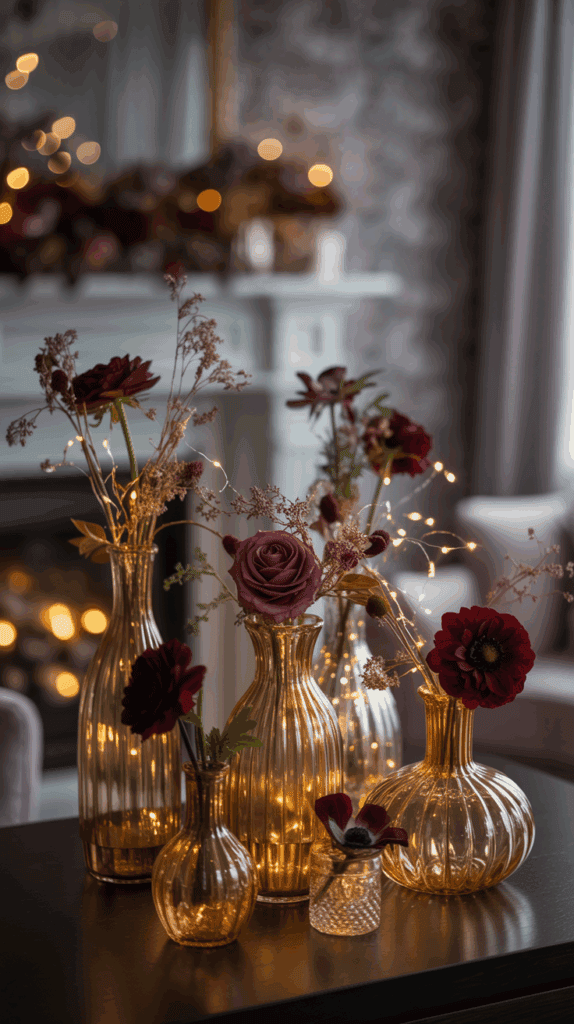
Choosing the Right Vase for Fairy Lights

When it comes to fairy lights in vase ideas, I know the vase you pick makes all the difference! The right container helps your lights dazzle, keeps everything safe for little hands, and adds a style that matches your room. Over the years, I’ve tested vases of every shape and size—all while my boys “helped” with their chubby fingers and lots of giggles. Below, I’m sharing my favorite picks for every vibe, from sparkling clear glass to cheerful upcycled bottles.
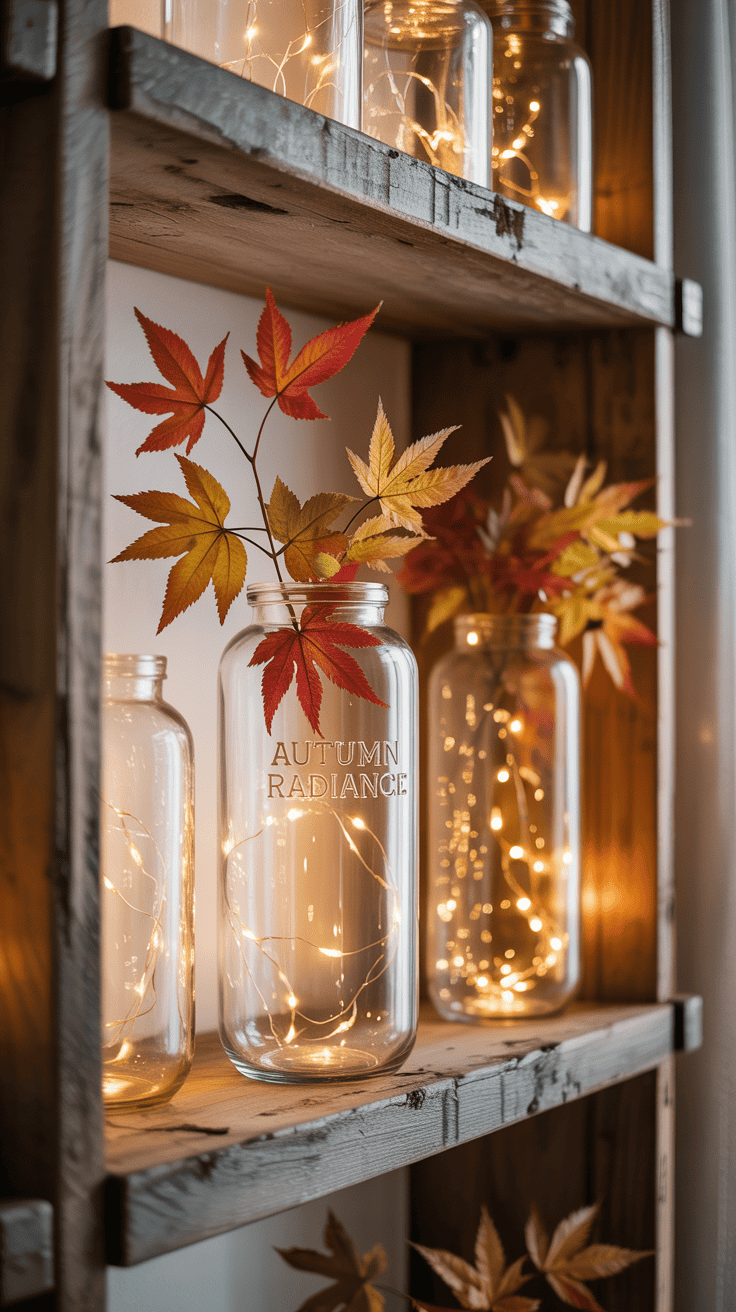
Clear Glass for Maximum Light Spread
Clear glass vases always make fairy lights look their brightest. Since there’s nothing blocking the shine, every twinkle gets to light up your whole space. This style is my go-to when I want a bright, cheerful glow on the kitchen counter or the main room. The lights tumble around inside and reflect off the smooth sides, making even a plain table look inviting!
A few details to keep in mind for clear glass vases:
- Go tall for drama: I like using taller vases for spots like bookshelves or corners. A tall cylinder can stack lights in a way that spreads the shimmer upward, perfect for bedtime stories.
- Short and wide: Wide, low vases spread the glow across the table at kid height. They’re great for art desks or story time nooks.
- Easy to clean: With sticky fingers always around, glass vases wipe clean with a quick swipe.
If you want your fairy lights to bring out a maximum glow, clear glass is always a winner.
Textured Ceramic for Added Interest
Sometimes, I want my fairy lights to feel a little more cozy or interesting, especially during winter or rainy afternoons. That’s when I reach for a textured ceramic vase. These vases have patterns—maybe fun raised bumps, carved lines, or painted shapes. When you put fairy lights inside, the light dances across the patterns and gives a soft, moody glow that feels a bit like a pottery lamp.
Tips for using textured ceramic vases:
- Patterns add depth: Choose vases with raised or stamped designs. The texture helps the glow peek through in different ways, making each vase a little work of art.
- Secure the lights: Ceramic isn’t see-through, so I wind the lights around a small bundle or anchor them with a filler (like soft cloth or felt balls) at the base. This keeps the lights in place, even when curious little hands want to peek inside.
- Use a wider neck for safety: A vase with a wider opening lets you arrange and remove lights safely, which is key for moms like me!
A textured vase adds instant personality and keeps the mood feeling warm and layered.
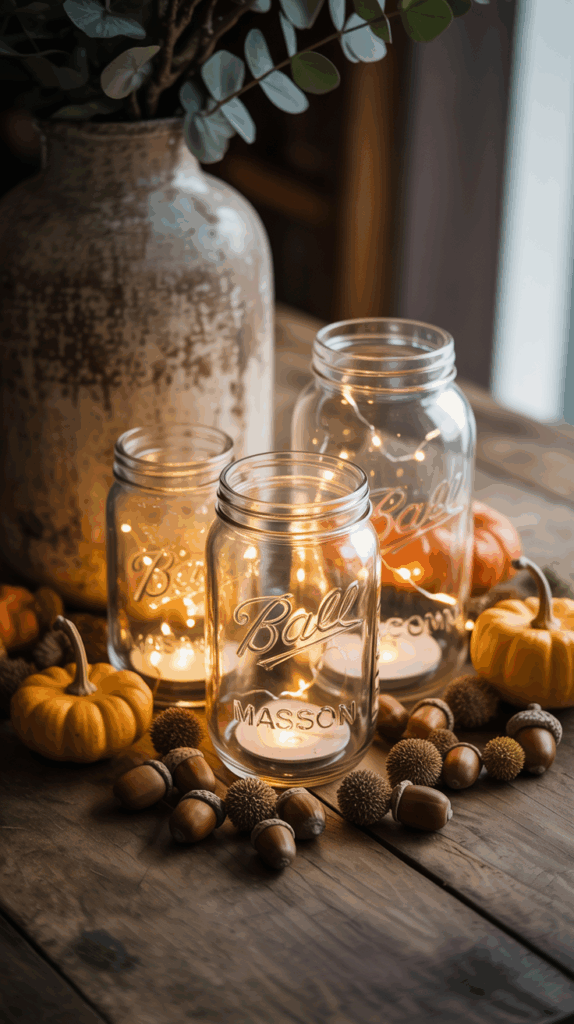
Mason Jars for Rustic Charm
I grew up with mason jars in the pantry, and now I fill them with fairy lights for the sweetest rustic touch! Mason jars make it easy to bring a farmhouse or country feel to any room without a lot of fuss. They fit snugly on shelves, look adorable lined up as a centerpiece, and are affordable at any big-box store.
Here’s how I use mason jars with fairy lights:
- Anchor in place: A little dab of sticky putty or a loop of washi tape under the jar keeps it from sliding, even when my boys bump into the table.
- Mix sizes: Small half-pint jars work for nightstands, while big quart jars shine best on mantels or windowsills.
- Personalize: Tied-on ribbons or a simple tag make the jars look personal for each season or child’s birthday.
There’s something special about the humble mason jar filled with fairy lights—simple, pretty, and right at home in a busy house.
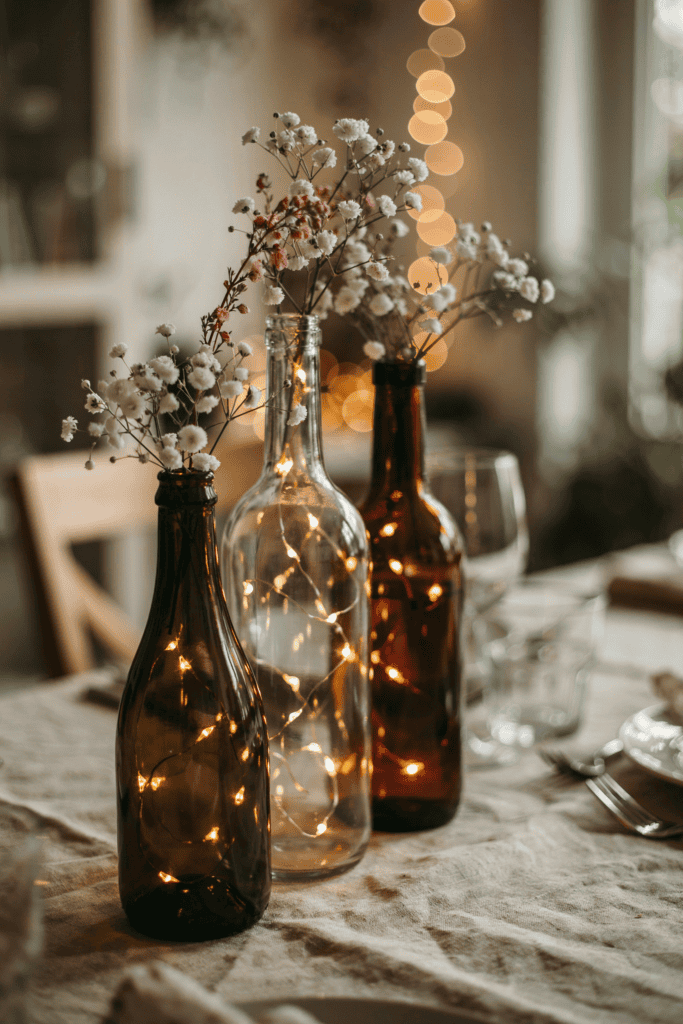
Upcycled Bottles for Eco‑Friendly Fun

Nothing beats turning old glass bottles into something beautiful! Upcycling bottles for fairy lights in vase ideas is fun, thrifty, and great for teaching the kids about using what we have. Plus, every bottle shape gives a different look—from slender wine bottles to round soda bottles or even mini milk bottles.
How I safely prep and use upcycled bottles:
- Clean well: I use lots of warm, soapy water and a bottle brush to scrub labels and any sticky spots. Let dry upside down for a squeaky-clean finish.
- Cutting for safety: If I want to thread fairy lights inside and the neck is narrow, I sometimes get my husband to help carefully cut a bigger opening on the back. We always use gloves, sand the edges smooth, and skip this step if little hands might be involved.
- Add fairy lights: I use a chopstick to gently push the lights inside. Battery packs get tucked behind the bottle, or you can use cork-shaped battery tops made for bottles.
Using upcycled bottles adds a playful, eco-friendly touch to any display. I love picking out fun shapes and showing the boys how we can turn “trash” into treasure! Fairy lights in vase ideas like this always bring a smile to our family room.
With the right vase, fairy lights can fit any style or space in your home. Each type has its own charm, and trying them out together is as fun as the end result!
Step‑by‑Step Fairy Light Vase Projects
If you’re looking for fairy lights in vase ideas that your family will love (and your kids can even help with), these step-by-step projects are my favorites! Each idea adds that perfect pop of whimsy to every corner of your home. Sometimes we keep them on our kitchen table, other times they brighten up the entryway. Below, I’ll walk you through three different looks—each one simple, fun, and so easy to change up for any season.
Simple Twine‑Wrapped Vase
You don’t need fancy supplies to make a vase look extra special. I love how twine gives any glass vase a warm, homespun touch! It’s fast, affordable, and the perfect way to frame your fairy lights for that “fresh from the farmhouse” look.
What you’ll need:
- A clear glass vase (any shape)
- Jute twine or rustic string
- Small LED fairy lights (battery pack is easiest)
- Scissors
- Double-sided tape or glue dots
How to wrap and arrange:
- Clean the vase and dry it well—smooth glass helps the twine stick.
- Choose where to start your twine: at the base, the neck, or anywhere you like.
- Attach one end of the twine with a bit of double-sided tape or glue dot.
- Gently wrap the twine tightly around the vase. Keep each row close or spaced out for different looks. Sometimes I only cover the neck, sometimes I make big chunky bands for texture!
- Snip off the end and secure it with another glue dot out of sight.
- Tuck your fairy lights inside, spreading them around the base or swirling them up along the sides.
- Hide the battery pack behind the vase or inside if the opening allows.
This project is always a hit. The twine adds a homey feel that works for any space—I even let the kids choose bright-colored string for holidays!
Layered Colorful Beads and Lights
When my boys want something extra playful, we pull out our stash of beads. Layered beads and lights turn a plain vase into a mini rainbow, with sparkly lights peeking between the colors. This is a hands-on idea that’s great for little helpers, too.
Here’s how I do it:
- Clear glass vase (tall cylinders work best)
- Assorted colorful beads (plastic, glass, or wood)
- LED fairy lights (smaller is better to fit between layers)
- Chopstick or wooden dowel (to help position things)
- Battery pack fairy lights
Step-by-step:
- Pick out a mix of beads—pastels for spring, brights for summer, or matching your room’s palette.
- Start with a layer of beads at the bottom (about an inch).
- Gently coil a section of fairy lights on top.
- Add another layer of beads, then another coil of lights. Use your chopstick to poke the lights into place if needed.
- Keep layering beads and lights until the vase is nearly full.
- Finish with a top layer of beads to hide any stray wires.
- Place the battery pack at the back, or gently nestle it in if there’s room.
I love how the beads sort of glow from within. This setup always catches the light and sparkles in the morning sun—plus, it’s easy to pour out and re-layer if your kids love to “redecorate.”
Seasonal Theme: Spring Blossoms
Nothing says spring like fresh flowers! Even when real blooms aren’t in season, you can build a spring fairy light vase that brings color and cheer to your home. This one’s my “welcome spring” go-to on the kitchen counter.
Gather these supplies:
- Glass vase (round or cylinder shapes work best)
- Faux spring florals (think cherry blossoms, tulips, or tiny daisies)
- Pastel glass beads or plastic gem vase fillers
- LED fairy lights (look for warm white or soft yellow)
- Wire cutters (for trimming flowers)
- Optional: floral moss or soft greenery
How I create the spring vibe:
- Fill the bottom third of your vase with pastel beads or gem fillers. These catch the light and feel fresh!
- Wind your fairy lights around your thumb and gently tuck the bundle on top of the beads. Let a few light strands rise up through the fillers.
- Cut faux flower stems so they just reach above the rim of the vase (not too tall, or they’ll tip over).
- Arrange the flowers among the lights. Spread them out so some blooms dip into the beads, others rest near the top.
- If your vase is large, tuck in a little greenery or floral moss for an extra-natural touch.
The end result looks like a little garden waking up after winter—soft, twinkling light, pastel shine, and pretty blossoms glowing from every angle. This vase has become our family’s spring tradition, and I hope it brightens up your home as much as ours!
Try these projects any time you need a splash of color or a dash of sparkle. With just a vase, fairy lights, and a few household extras, even an ordinary day feels a little magical.
Safety Tips and Maintenance for Busy Moms
As a mom with three boys always running around, I know safety and easy cleaning matter just as much as the whimsical glow when coming up with fairy lights in vase ideas. I want my displays to sparkle but not create extra worry or chores! With a few simple tricks, you can set up your pretty vase, keep little hands safe, and avoid any hassle when it’s time for a quick tidy-up or switch-out.
Keep Cords Out of Reach
Loose fairy light cords and curious kiddos are not a good mix. Tugging or tripping can happen in a blink if I’m not careful! To keep things neat and safe, I always tuck cords way up high or fasten them down so nobody can pull or trip.
Here’s what has worked best in my home:
- Use zip ties or twisty ties to bundle extra cord neatly behind the vase or along the edge of a shelf.
- Attach cords with small adhesive clips along the wall or shelf so nothing dangles where kids or pets can reach.
- Choose high shelves or secure ledges for your glowing vase displays, especially in play areas or bedrooms. I often pick spots above eye level for my youngest, putting the sparkle out of reach without losing the magic.
By keeping cords snug and elevated, I get peace of mind and avoid “Mom, the lights fell!” moments.
Use Low‑Heat LED Lights
Kids will touch anything that glows, which is why I only use LED fairy lights in vase ideas now. Older lights can get hot and pose a burn risk, but today’s LEDs stay cool even after hours of twinkling.
What makes LEDs safer and smarter for families?
- Low heat output: No matter how long they’re on, the bulbs and wires stay cool. My boys have poked and prodded, and I’ve never worried.
- Longer lifespan and energy savings: LEDs use less energy, so I’m not changing batteries constantly or dealing with burned-out strands.
- Safer wattage: For vases, I stick to low-wattage lights (usually labeled as 1-5 watts or “ultra-low power”). This keeps each strand safe, gentle, and perfect for enclosed spaces.
If you’re unsure, just look for LED fairy lights with “cool to the touch” or “battery operated” labels when you shop. It’s one simple step that makes a big difference for kid-friendly displays.
Cleaning the Vase Without Damaging Lights
Every vase in my house gets smudgy fingerprints or dust, especially with boys who love to peek inside! Cleaning needs to be quick but gentle so lights and wires don’t tangle or break.
Here’s my go-to cleaning routine for fairy lights in vase ideas:
- Remove the fairy lights before washing. If you can, gently slide out the lights and set aside.
- Wipe the vase with a soft, damp cloth or rinse with mild soap and warm water for glass. Avoid soaking wires or battery packs.
- For stuck-on messes, use a soft bottle brush or sponge—never anything sharp that could scratch or snag the wire.
- Let the vase dry completely before sliding the lights back in.
If you can’t remove the lights:
- Wipe inside the vase gently, working around the lights.
- Use a dry microfiber cloth for dust or a slightly damp one for spots.
- Avoid soaking the vase or getting the battery case wet.
Protecting the wires keeps your lights working for more holidays and makes each twinkle last so much longer!
Storing Lights for Future Use
Once the season changes, or you’re ready to switch to a new fairy lights in vase idea, storing the lights carefully is key. I can’t tell you how many times I pulled out a tangled mess before I made this a habit.
My easy storage routine saves frustration:
- Coil the lights gently into loose bundles, not tight balls. This keeps them from kinking or breaking.
- Place each strand in a zip-top bag to keep dust out and prevent tangling with other decorations.
- Label each bag with a sticky note or permanent marker. I write the room or project (“Playroom Spring Lights” or “Winter Table Vase”) so next year’s setup is a breeze.
For battery packs and extras, I group them by season in a clear bin or shoebox, keeping everything together and easy to spot. No more last-minute hunting!
A little care with cords, cleaning, and packing makes fairy lights in vase ideas fun, safe, and totally stress-free for the next round of memory-making.

Conclusion
Fairy lights in vase ideas bring so much joy and magic to our busy home. I love how these easy projects can change a room’s whole mood, spark kids’ creativity, and fit right into any season we’re celebrating. It doesn’t have to be fancy or complicated to feel special, and these vases always light up my boys’ faces (and sometimes even help them wind down at night, which is a huge win).
If you give one of these fairy light vase ideas a try, I’d be so happy to see how yours turns out! Add a quick photo or your own tip in the comments to help other moms find even more ways to make every day a little brighter. Thanks for reading along with me and turning the everyday into something a little more magical. Let’s keep sharing and cheering each other on—one twinkling light at a time!
This post may contain affiliate links. Read the full disclosure here.