DIY Halloween Decorations Indoor for Easy Spooky Vibes
I’m a mom of three energetic boys, so when Halloween rolls around, I’m all about making our home feel festive without spending hours or breaking the bank. That’s why I love coming up with diy halloween decorations indoor that are quick, budget-friendly, and totally fun to make with the kids!
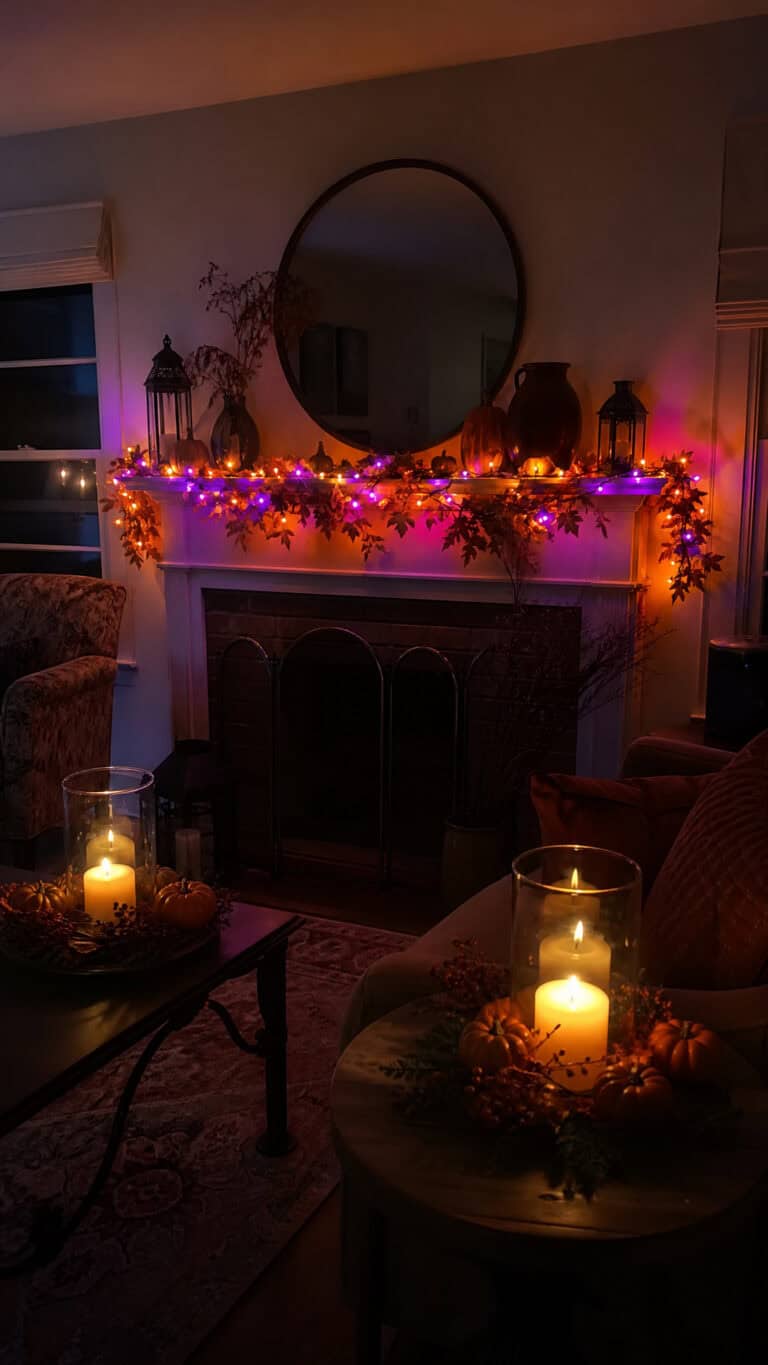
I made the cutest setup with this indoor Halloween decor set — the lights and webs totally transformed the room!
You don’t need fancy supplies or tons of time to create that spooky vibe we all want. I’ll share easy ideas that fit our busy family life and bring that charming Halloween spirit right into your living room!

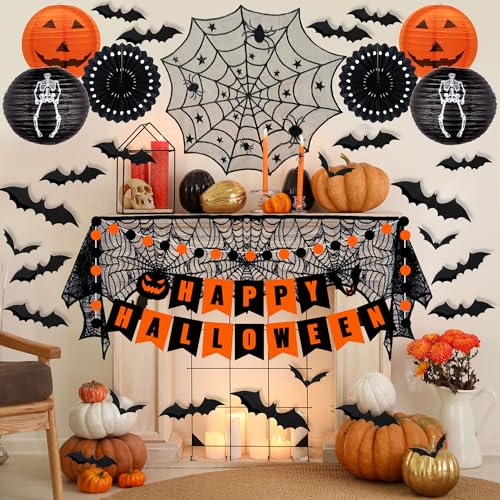
Spooky Mantel and Fireplace Makeover

When it comes to setting the mood for Halloween indoors, the mantel and fireplace are an easy spot to transform fast. With just a few simple touches, you can turn this everyday space into a spooky centerpiece that pulls the whole room together!
Since I’m always trying to keep things fun and easy for my boys while still getting that Halloween vibe, I love projects that invite their help and don’t require a long list of weird supplies. If you want some quick, kid-friendly ideas for your mantel and fireplace this year, here’s how we do it with a few classic touches!

Homemade Paper Bats and Ghost Garlands


Creating your own paper bats and ghost garlands is a fun way to decorate, and it’s always a highlight when my boys join in. You don’t need fancy paper or complicated shapes. I usually pick up some black and white construction paper from the dollar store.
For the bats:
- Fold a piece of black paper in half
- Draw a simple bat shape right on the fold — think of a rounded body with pointy wings
- Cut it out while folded so both wings are symmetrical
- Use a black marker to add little eyes or fangs if you want some personality
For the ghosts:
- Cut small squares out of white paper
- Draw goofy ghost faces with a marker, keeping them playful, not too scary
- Fold the ghosts gently to give a little 3D effect
String these up together with twine or fishing line, and you have a homemade garland that’s light, whimsical, and perfect for draping across the mantel. The boys love holding the shapes as I cut, then lining them up to hang. It’s a simple but charming way to fill the room with Halloween spirit without breaking the bank.
DIY Creepy Candle Holders

Lighting plays such a big role in making any space feel spooky, but real candles can be a hassle with little kids around. Instead, we turn plain glass jars into creepy candle holders using things I already have.
Here’s how:
- Use empty glass jars from pasta sauce or pickles
- Paint the outside with black or dark purples using acrylic paint — a thin coat is enough to let some light peek through
- While the paint is still wet, press on little craft spiders or stick on cut-out shapes from paper for a textural effect
- Once dry, pop in flameless LED candles for a flickering glow that’s safe and low-stress
This project is a big hit because it feels like upcycling, but also brings an eerie glow without the fire risk. My kids get a kick out of finding “spiders” hiding on the jars, and I like that these holders add a grown-up touch without fuss.
Simple Faux Webs and Spiders
No spooky mantel is complete without some spider webs and creepy crawlies hanging around! Instead of buying expensive fake webs, I use cotton balls or white string to create textured webbing that’s light and easy to shape.
Try this:
- Stretch cotton balls into thin wispy strands and pull gently to cover corners or drape over decorations
- Grab a ball of white string or yarn and stretch it in loose loops to mimic web strands
- For spiders, my boys love twisting black pipe cleaners into little legs and bodies — adding googly eyes finishes them off
The best part is how hands-on and playful this is. It’s almost like making Halloween toys while you decorate. The boys eagerly tuck the spiders into webs around the mantel and fireplace, making everything look creepier but totally fun. These spider webs are so versatile, you can add layers for more depth without any mess or stress.
I hope these ideas make you excited to dress up your mantel and fireplace with just a few easy, kid-friendly projects. With homemade bats, glowing candle jars, and playful webs, your indoor space will have that just-right spooky vibe in no time!
Kid-Approved Creepy Corners and Windows
When it comes to decorating for Halloween indoors, I always try to include projects my boys can help with and even take pride in. After all, creating that spooky vibe doesn’t have to mean scary that keeps them awake at night. These kid-approved ideas bring just the right amount of fun and playfulness to corners and windows, adding character without stress. Plus, they’re perfect for any busy mom like me who wants easy but memorable diy halloween decorations indoor. Here’s how we bring those spots to life with simple materials and plenty of smiles.
Monster Window Silhouettes
One of my favorite ways to turn windows into a mini Halloween show is by making monster silhouettes from black construction paper. The trick is keeping the shapes simple but bold, so the shadows pop from outside, especially when the light is on. Here’s how we do this together:
- Pick your monster shapes. Think big round eyes, pointy ears, or goofy claws. I usually sketch a couple of easy shapes on black construction paper—this keeps it quick.
- Cut out the shapes. The boys love this part even if their fingers get a little messy from handling the paper.
- Add pops of color with tissue. I cut small pieces of colorful tissue paper (red or green work well) and glue them behind the eyes or mouths to give a glowing effect when light hits through.
- Tape the silhouettes on the window. We use painter’s tape so it comes off without sticky marks.
By doing this in just a few steps, your windows become creepy scenes that are fun to look at for kids and adults alike. The boys get a kick when our neighbors ask about the spooky “monsters” staring back at them!
Googly Eye Everything
If you want quick laughs and a silly spin on your spooky decorations, adding googly eyes is where it’s at. My boys find this hilarious every year. You don’t even have to hunt for special decorations; just grab everyday items and stick a pair of googly eyes on!
- Fruit and veggies: Apples, pumpkins, and even bananas become funny faces that the kids giggle at.
- Household items: I’ve stuck eyes on lamps, chairs, even the fridge door, turning the ordinary into a Halloween character.
- Toys and books: The boys’ dolls and teddy bears get a silly makeover with a couple of eyes glued on haphazardly.
It’s fast, no mess, and always a hit. Plus, it helps keep the mood light and playful, balancing out any scarier decorations. You only need craft glue or double-sided tape, and few packs of googly eyes from the dollar store. It’s amazing how much personality a little eye can add!
DIY Hanging Ghosts and Floating Witches


Hanging decorations give rooms instant creepy movement and charm, and making floating ghosts or witches is so simple with basic supplies. Cheesecloth, tissue paper, and yarn take center stage here—no fancy tools needed. This is one of our go-to diy halloween decorations indoor for filling corners and above doorways.
- Ghosts:
Take a small balloon or crumpled paper ball for the head
Drape cheesecloth or softened tissue over it for that wispy effect
Tie off the neck with yarn, then shape the fabric to create billowy arms or a flowing body
Draw or glue on a face with markers or paper cutouts
Hang with invisible thread or fishing line for that floating vibe - Witches:
Use crumpled tissue for the head and wrap with black cheesecloth for a ragged cloak
Shape yarn into braids or wild hair
Add a paper cone hat or a foam witch hat from craft stores
Suspend them from the ceiling where a little breeze can make them gently sway
These decorations almost look like they’re hovering midair, adding motion and a magical touch to any room. My boys love watching them twitch and dance when a door creaks or the air moves. It’s simple, spooky fun that gets everyone’s imagination going.
With just a handful of supplies and a little teamwork, these kid-friendly spooky corners and creepy windows bring your home alive in the best way. They’re easy, playful, and perfect for busy moms looking for diy halloween decorations indoor that get the kids involved and smiling. Give these a try, and your house will be full of character before you know it!
Frightful DIY Tablescapes and Dining Decor


Creating a spooky vibe doesn’t stop at creepy corners or glowing candle jars. When it comes to turning your dining table into a Halloween showstopper, I’ve got some easy tricks that make decorating fun and mess-free. With three boys eager to help but not always patient with complicated crafts, I always look for ideas that combine quick creativity and family-friendly touches. These diy halloween decorations indoor ideas let you bring a dash of spooky charm to your table with minimal fuss but plenty of impact.
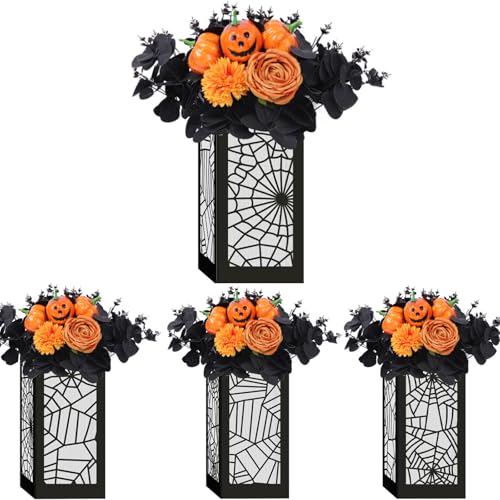
DIY Pumpkin Centerpieces (No Carving Needed!)
Carving pumpkins sounds fun until you realize how messy it can get, especially with little hands around. Instead, painting and decorating pumpkins is a great alternative, especially when you want to avoid the mess but still have that classic Halloween look on your table.
Here’s what works wonders with the kids:
- Use acrylic paints or washable paint markers to draw funny faces, patterns, or spooky designs right on the pumpkins. My boys love choosing colors and adding goofy smiles or googly eyes to pumpkins in varying sizes.
- Stickers are a complete game changer. From glittery bats and spiders to smiley ghosts and sparkly stars, stickers add instant personality without breaking a sweat.
- Mix it up with washi tape or ribbons. Wrap pumpkins with themed tape or tie a few strands of twine around the stem for a rustic, festive look. These add texture and keep things interesting.
- Try glitter or puff paint for little highlights. It’s simple and adds a fun shine or puffy effect to whatever design you want.
This approach keeps everyone happy, and best of all, cleanup is a breeze. Plus, arranging your decorated pumpkins down the center of the table instantly brings a cozy, whimsical feel without the fuss of carving tools and pumpkin guts everywhere.
Spooky Snack Displays with DIY Tiered Trays
A freaky feast isn’t complete without snacks, and I found that a tiered tray display is the perfect way to make those treats part of the decor. Building one from things around the house (or dollar store finds) means you don’t need to buy anything special.
Here’s how I put mine together:
- Grab a couple of plates (different sizes work best) and a few sturdy cups or small bowls.
- Place a cup or bowl upside down in the middle of the larger plate, then stack a smaller plate on top, gluing the pieces together with hot glue if you want it to be permanent (or just balance for temporary use).
- Add Halloween stickers or paint small faces on the cups.
- Scatter some fake cobwebs or tiny plastic spiders across the tiers.
Now, fill each level with holiday-themed treats like candy eyeballs, mini cupcakes with creepy frosting, or even some “witch’s fingers” pretzels. My boys always love helping arrange snacks on different levels, and it feels like we’re setting up a spooky buffet right in our dining room.
The best part is, this kind of display doubles as decor and party setup, so even on busy nights you get style and function in one quick go.
Ghoulish Table Runners and Placemats
Making your own table runner and placemats adds such a homey touch to Halloween dining, and you don’t have to be a sewing pro! I often use felt or fabric scraps since they’re inexpensive and easy to work with. Plus, the kids love cutting out shapes and helping lay everything out.
Here’s a simple way to make them together:
- Cut a long strip of felt or fabric for the runner — it can be as wide or narrow as your table allows.
- Cut fun shapes like bats, ghosts, pumpkins, or spiders from contrasting colors of felt or fabric. Use templates or freehand for a playful look.
- Glue the shapes onto the runner with fabric glue or a hot glue gun to keep things fast and kid-safe.
- For placemats, cut rectangles or ovals and decorate them with a few spooky shapes or stitch around the edges if you want a quick sewn look.
This project is perfect for younger kids because it’s hands-on, with minimal mess and no complicated steps. Plus, once they see their spooky designs stretching across the table and under their plates, it feels like a real Halloween feast!
Adding these homemade pieces to the table instantly makes mealtime part of the holiday magic, and I love seeing the boys notice the little details they helped create.
These easy tablescape ideas bring fun and style to your Halloween dining without extra stress or mess. Between playful pumpkin art, layered snack displays, and home-sewn fabric magic, your table will be ready for festive dinners, cozy family moments, or even a simple spooky snack break anytime!
Quick DIY Doorway and Entryway Transformations

Creating a welcoming yet spooky Halloween vibe at your front door or entryway doesn’t have to be complicated. With a few simple diy halloween decorations indoor, you can turn this often-overlooked space into a fun, festive spot that sets the tone for the whole house. I like to keep things quick and doable, especially with three busy boys eager to help but not always patient. These easy projects use everyday craft supplies and a little imagination, making it simple to pull together a look that’s cute, creepy, or somewhere in between.
Paper Plate Monster Door Wreaths
Paper plates are such an easy and cheap base for making playful Halloween wreaths that my boys and I have made more times than I can count. You can go with a cute, goofy monster or something a little more spooky depending on your mood.
To make one:
- Grab a plain paper plate and cut out the center, leaving a ring shape.
- Paint or color the ring with bold, bright colors or classic Halloween shades like green, purple, or orange.
- Use construction paper, googly eyes, and pipe cleaners to add monster features like eyes, teeth, horns, or crazy hair.
- Glue on scraps of tissue paper or felt to add texture and dimension.
- Attach a ribbon loop on the back to hang it on the door.
What I love about this is how open-ended it is. My boys get to choose their own monster “personalities,” and it’s a quick project we wrap up in under 30 minutes. Plus, paper plates mean there’s almost no cleanup and you can toss them after Halloween without guilt. These wreaths are a fun, colorful welcome that shows off your family’s spooky spirit right away!
DIY Trick-or-Treat Signage and Banners
Making your entryway festive means letting visitors know they’re welcome and setting the mood just right. I always include a handmade sign or banner that feels personal—my boys love helping with the lettering and decorating, especially when the message is playful or silly.
Try these ideas for signage and banners:
- Cut out triangle or flag shapes from cardstock or sturdy paper. My boys are big fans of orange and black for this.
- Use markers or paint to write phrases like “Trick or Treat,” “Welcome Little Ghouls,” or “Creep it Real” in big, bold letters.
- Add fun details like spider doodles, stars, or dripping slime effects using a white gel pen or glitter glue.
- String the flags together on twine or ribbon, then drape them across the doorway or hang just above the door frame.
The best part is how easy it is to switch up your message every year or even for different moods—the boys can get creative with what they want to say. The banners also make the whole entryway feel special and festive without blocking the door or taking up much space. It’s a quick, kid-friendly way to spread Halloween cheer.
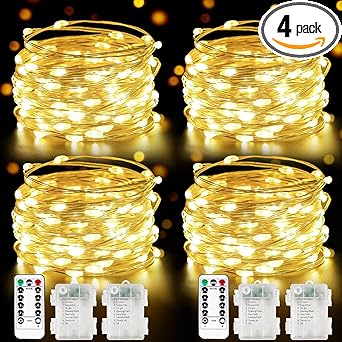
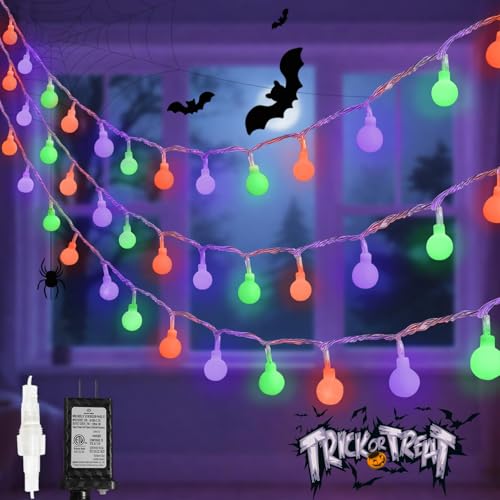
Spooky Light Effects with String Lights
Nothing sets the mood quite like lighting. I love using string lights to add a subtle spooky glow that immediately changes the feel of the space but without needing real flames or tricky lamps. Colored string lights, small lanterns, or battery-operated candles are my go-tos for safe indoor lighting that still looks great.
Here’s how to get that creepy glow going:
- Pick string lights in colors like orange, purple, or even green to instantly add a Halloween vibe.
- Wrap them around the door frame, drape along the top of the entryway, or coil them inside glass jars to make little glowing lanterns.
- Use battery-operated LED candles placed in small decorated jars or containers to add flickering light without any safety worries.
- For a spooky effect, hide some small objects like plastic spiders or skulls near the lights to catch the glow and create eerie shadows.
I appreciate that these lights don’t take up any room and you can put them up in less than 10 minutes. Plus, they add a cozy, mysterious ambiance that makes coming inside feel special on chilly October evenings. The boys think the glowing lights are magical and always ask if we can keep them up year-round!
These quick doorway and entryway ideas are perfect when you want to add that festive touch without a big time commitment. From silly paper plate monsters to glowing string lights, these diy halloween decorations indoor brighten up your home’s welcome and bring instant fun for the whole family!

Conclusion
These diy halloween decorations indoor ideas have made Halloween so much more fun and manageable in our busy house. The boys love pitching in, and I love how simple it is to bring that spooky vibe to every corner without stress.
Getting the whole family involved not only sparks creativity but also creates new traditions we look forward to each year. If you try any of these ideas, you’ll see how quickly easy projects can turn your home into a cozy Halloween haven.
Thanks for reading! I’d love to hear how you bring your own spooky charm to life indoors this season. Let’s make this Halloween fun, simple, and full of family magic!
This post may contain affiliate links. Read the full disclosure here.