Halloween Tablescape Styling That’s Festive and Fun
Every year when October rolls around, our house turns into a little hub of Halloween excitement! With three energetic boys, keeping things simple, festive, and fun is at the top of my list. Putting together a Halloween tablescape brings all of us together and makes our kitchen the place where memories get made (and lots of treats get eaten). A tablescape is just a fancied-up way to say I set the table with a theme and some playful touches, turning a regular family meal into something special.
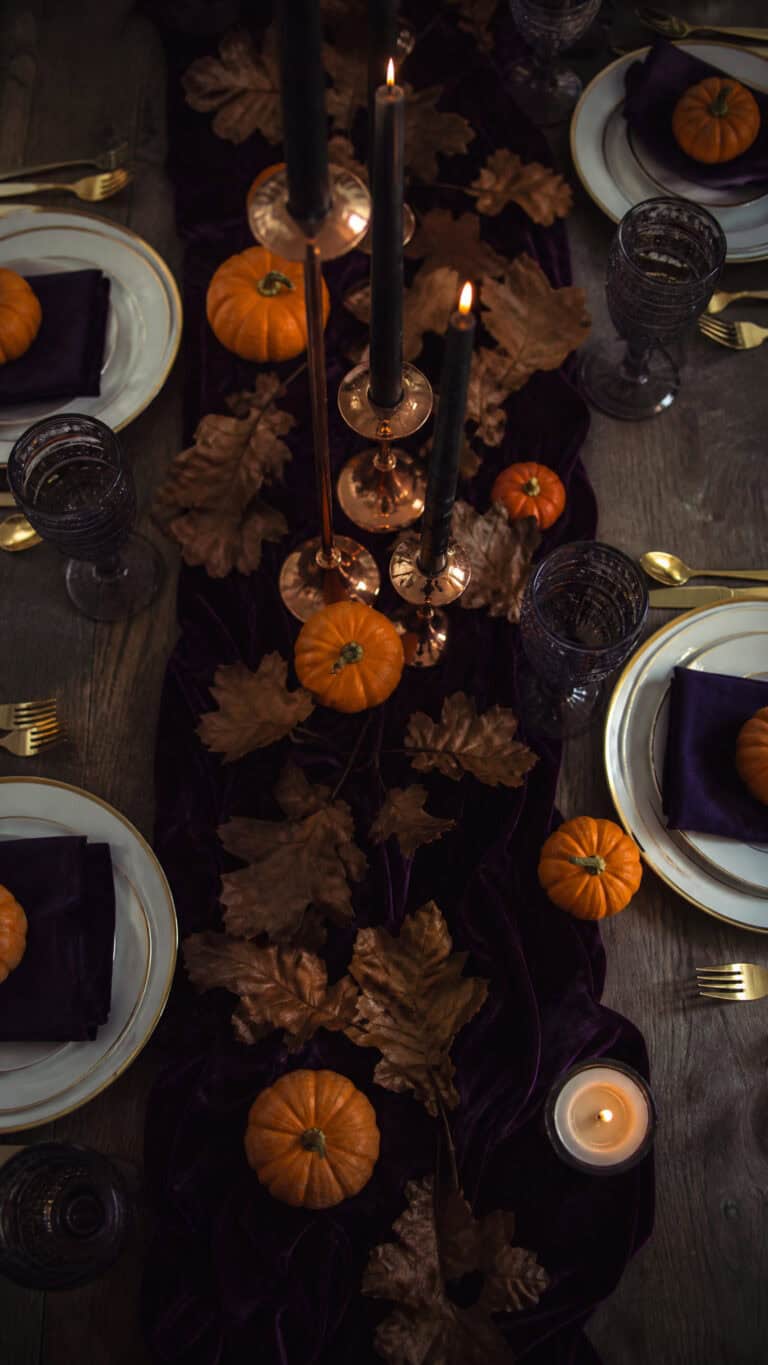
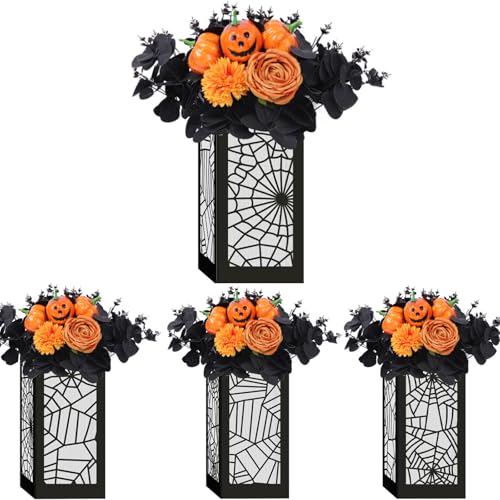
This Halloween tablescape kit made my dining table look like a Pinterest dream in under ten minutes.
For us, Halloween is about tradition, laughter, and a pinch of spooky magic. My boys love helping pick out pumpkins, scatter fake spiders, and set up the silly napkins and plates. It’s not just about a pretty table, it’s about seeing their eyes light up and knowing the whole family feels a little more connected.
Whether you go big or keep it simple, a Halloween tablescape is a sweet way to celebrate the season and make your kitchen feel like the heart of Halloween!

Choosing a Spooky Theme That Kids Love


When I start planning a Halloween tablescape, the first thing I think about is the overall theme. I know my boys will give me their honest opinions (sometimes a little too honest!), so I always try to pick something spooky but not too scary. I want the table to feel playful and fun, especially for younger kids. So, finding a theme that makes everyone excited is step one, and it can make the whole setup process so much smoother! Choosing the right theme helps bring all the little details together, makes shopping easier, and gives kids a sense of ownership when they help set the table.
Fun and Friendly Spooky Themes


Not every Halloween tablescape needs to be full of witches or ghouls. Some themes get the kids giggling, not shrieking! Here are a few kid-tested favorites that always work for us:
- Silly Spiders: Add plastic spiders, web-shaped placemats, and some wide-eyed spider napkin rings. Kids love arranging the spiders in silly “families” or making up funny spider names.
- Happy Pumpkins: Carve out or paint goofy faces on mini pumpkins. Stack them in the center or turn them into little candy holders at each plate.
- Bats and Ghosts: Paper bats flying across the table or cute ghost place cards give a little bit of spook without any real scares.
- Monster Mash: Use bright colors and silly monster faces for cups, plates, or even napkin folds. Bonus points for monster googly eyes!
Picking a Theme Kids Will Actually Love

When my boys help pick the theme, I know it’ll be a hit. I keep them involved by letting them toss around ideas or vote for their top pick. If you’ve got more than one opinionated kid, a simple family vote keeps things fair (and stops any arguing before it starts).
- I ask which characters or creatures are their favorites this year.
- Sometimes I bring out a bin of Halloween stuff from last year and let them “shop” for inspiration.
- If something new caught their attention (like a movie or a story), I look up easy DIY decorations that match.
Remember, for a Halloween tablescape, the real goal is to spark their excitement! Picking a theme the kids love pretty much guarantees they’ll be excited to help with every step.
How to Keep It Playful, Not Scary

I always check in with the boys to make sure nothing looks too spooky. We’re talking goofy faces, bright colors, and friendly ghosts. Here’s a quick cheat sheet I follow when I want the tablescape to feel festive but not frightening:
| Safe Bet Themes | Decorations to Avoid |
|---|---|
| Smiling Pumpkins | Bloody or gory props |
| Cartoon Ghosts | Extra-realistic spiders or snakes |
| Cheery Bats | Severed limbs or creepy dolls |
| Candy Corn Colors | Anything that gives them nightmares (trust me, I ask) |
If my kids look unsure about something, I swap it for a friendlier version. Halloween can be magical without any tears at the dinner table!
Letting Kids Add Their Own Twist

I’ve learned that letting the boys add their own twist is always a good idea. Last year, Charlie insisted on a row of plastic eyeballs in every cup. It looked hilarious and now it’s a must-have tradition!
Ways to get them involved:
- Let them draw faces on pumpkins or bats.
- Give them stickers or felt cutouts they can stick wherever they want.
- Ask them to pick a “signature color” for napkins or plates.
Letting kids help with the theme makes the whole process feel special and gives everyone a sense of ownership over the Halloween tablescape. Plus, it makes for some funny stories that get retold year after year.
Nothing beats seeing your table through your kids’ eyes! Picking the right theme brings out their excitement, sets the perfect mood, and makes the whole season memorable.
Must-Have Essentials for a Festive Halloween Tablescape

Creating a Halloween tablescape that wows the kids and feels special isn’t about perfection. The magic comes from the mix of homemade touches and things that make your family smile. With the right essentials, your table can look festive and a little spooky without being hard to pull together. Here’s how I make my Halloween tablescape both fun and memorable for my boys every year!
Creative Centerpieces: From Pumpkins to Cauldrons

A good centerpiece makes the table feel like the center of the party. For Halloween, I always go for something eye-catching, simple, and just a little bit silly. The best part? The kids love helping bring these ideas to life!
Here are some of our favorite centerpiece ideas:
- Painted Pumpkins: Skip the carving and let the kids paint goofy faces, stripes, or even silly monsters on mini pumpkins. Set them in a group right in the middle of the table.
- Faux Spider Webs: I pick up a pack of stretchy spider webs and the boys love stretching it across the centerpiece area, tucking in plastic spiders, googly eyes, or even a few wrapped candies.
- Mini Cauldrons with Treats: I’ve found little black cauldrons at the dollar store. Fill them with wrapped treats, colorful candy corn, or even cutlery and napkins. The boys help mix and match what goes inside.
- Halloween-Themed Floral Arrangements: Pick up black, orange, and purple flowers (artificial ones work just fine). Pop them into a vase or a painted pumpkin for a splash of color right in the middle of the chaos.
If you want to make things even more special, let the kids design their own mini centerpiece and add it to the table. Last year, each of my boys made a “spooky monster jar” using recycled glass jars, paint, and battery candles. It lit up the table in the coziest way!
Letting kids join in on the centerpiece fun isn’t just cute, it also gives them a sense of pride every time they sit down to eat.
Layering Details: Place Settings and Utensil Tricks

The little touches at each place setting can make your Halloween tablescape look extra put-together. I start by layering plates, napkins, and utensils in a way that feels fancy but takes almost no time.
Here’s my go-to process:
- Base Layer: Start with a charger or big plate. If you don’t have chargers, use a placemat in a Halloween color.
- Dinner and Side Plates: Stack a smaller (brightly colored or themed) plate on top.
- Napkin Pop: Fold a napkin and place it in the middle, or tuck it between plates for a peek of color.
- Utensil Style: Wrap utensils in a napkin and tie with orange string or a thin black ribbon. The boys like adding a spider ring or tiny bat for effect.
If you want to keep things extra festive, here are a few more ideas:
- Halloween Place Cards: Make simple tent cards with the kids using orange cardstock and stickers. They love writing everyone’s name (plus adding a little doodle).
- DIY Utensil Holders: Paper cups decorated with jack-o’-lantern faces can hold forks and spoons. Or, fold felt into little ghost or bat shapes and slide the utensils inside.
- Mix Store-Bought and Homemade: I’ll buy paper plates with a fun Halloween print and pair them with a homemade placemat the kids decorated with markers. Mixing the two makes it feel thought-out but keeps things easy.
Most years, I let each child pick one element to add to their spot. Sometimes it’s a little toy, sometimes it’s a hand-drawn napkin ring. The table ends up looking mismatched in the best way—like Halloween exploded in the kitchen, but in the happiest family way possible!
Every little detail, from the centerpiece to the smallest napkin fold, comes together to make your Halloween table feel special. The goal isn’t perfection, it’s to make everyone smile when they sit down for dinner!
Fun With DIY Decorations and Crafts

Once I get a halloween tablescape started, my boys always ask if they can make some of the decorations themselves. I love this part! It turns our table into a real family project and gives them a chance to add their own style. Kids’ DIY decorations do not have to be messy or cost a fortune. The key is picking crafts that are simple, use stuff you already have, and (most important for me) are actually doable for little hands. I look for low-mess fun that keeps everyone busy and excited to see their work on display!
Easy Halloween Crafts for Little Hands

There’s something special about seeing your kids’ creations at the table. These projects work well for preschoolers and grade schoolers and are easy to adapt for different ages. Here are my top picks this year.
Paper Plate Pumpkin Faces
These pumpkins are always a hit with my kids. Every pumpkin turns out a little different, depending on who is gluing and what face they make.
Supplies:
- Plain white paper plates
- Orange paint or orange markers
- Black construction paper (or black markers)
- Glue sticks
- Green pipe cleaners or bits of green paper for stems
- Safety scissors
Instructions:
- Color or paint the paper plate orange. Let it dry for a few minutes if you use paint.
- Cut out eyes, mouths, and noses from black paper (or just color them on).
- Glue the face on.
- Add a green stem with a pipe cleaner or glued-on paper.
Tips for Parents:
- I pre-cut the face shapes for preschoolers, which saves a lot of waiting and keeps it frustration-free.
- Lay out an old tablecloth or parchment paper for easy cleanup.
- Put everyone’s finished pumpkin face along the center of the table for a big effect!
Silly Ghost Garland
Ghost garlands make everything feel festive and floaty. My kids love giving the ghosts silly faces and hanging them across the table or on light fixtures nearby.
Supplies:
- White coffee filters or tissues
- String or yarn
- Black marker
- Tape or glue
- Cotton balls or scrunched tissue for “ghost heads”
Instructions:
- Place a cotton ball or some scrunched up tissue in the center of a coffee filter.
- Gather the filter around it and tie with string to form the “head.”
- Draw faces with a black marker. Spooky or smiling—it all works.
- Tape or tie the ghosts along a string.
Tips for Parents:
- If you hang the garland low enough, little kids can help put it in place.
- Let the kids decide if they want sad, sleepy, or super silly ghosts.
- It’s easy to make a bunch fast, and it’s almost no mess!
Sticker and Marker Monster Cups
Simple plastic cups go from boring to party-ready with a few stickers and a marker. We use these to hold snacks, utensils, or treats.
Supplies:
- Plain plastic or paper cups (white, green, or purple work best)
- Googly eye stickers or regular stickers
- Black marker
- Washi tape (optional for a little extra pop)
Instructions:
- Give each kid a handful of cups.
- Let them decorate with stickers and markers any way they want. My youngest makes three-eyed monsters every time!
- Fill with popcorn, small candies, or utensils.
Tips for Parents:
- Keep wipes nearby if markers get out of hand.
- Kids love making these cups as “special” place settings for each family member.
- They double as snack holders so cleanup stays simple.
Kid-made decorations turn a halloween tablescape into a real memory-maker. With a few supplies and a lot of laughs, everyone feels part of the celebration!
Adding Spooky Snacks and Treats to the Tablescape

Nothing gets my boys more excited about a Halloween tablescape than spotting spooky snacks and sweet treats waiting for them! Food is part of the fun, and when everything matches the theme, the table feels like a party all on its own. Whether you’re hosting a crowd or just keeping it cozy with your crew, adding snacks that look adorable (and yes, a little creepy) brings an extra dose of magic. Moms know—hungry kids do not wait! That’s why I swear by the power of make-ahead treats that are easy to prep, store, and pop on the table when the kids rush in, costumes and all.
Mom-Friendly Make-Ahead Treats

Halloween night is wonderfully hectic! With the doorbell ringing, costumes to adjust, and kids bouncing off the walls, the last thing I want is to be panicking about snacks. Over the years, I’ve built a stash of recipes and tricks that let me prepare a bunch of treats ahead of time. The best part? Most of these are simple enough for the kids to help make, and they look just as festive as anything you’d see on Pinterest.
Here are some of my favorite make-ahead treats and time-saving tips:
1. Spooky Snack Mixes
Snack mixes are a lifesaver because you can toss everything together the night before or even a few days early. Pour into little cups or bowls for some instant Halloween charm.
Try these ideas:
- Monster Munch: Popcorn, chocolate candies, pretzel twists, candy corn, and Halloween sprinkles.
- Witch’s Broomsticks: Mini pretzel rods with string cheese cut into “broom bristles.”
- Pumpkin Patch Cups: Dried apricots or orange cheese balls with a green sprinkle “stem”—cute, fast, and not too sugary!
2. No-Bake Sweet Treats
No oven? No problem! Some of the cutest snacks don’t need to be cooked at all.
- Mummy Rice Krispie Bars: Make cereal bars ahead (homemade or store-bought!), drizzle with melted white chocolate “bandages,” and add candy eyes.
- Spooky Oreos: Dip Oreos in orange or white candy melts and draw silly monster faces with food markers.
- Ghost Strawberries: Coat strawberries in white chocolate and plop on two chocolate chip “eyes.” Chill until party time.
3. Chilled and Ready-to-Go
Some snacks even taste better made ahead, which is music to my busy mom ears!
- Creepy Critter Yogurt Parfaits: Layer orange yogurt and crushed chocolate cookies, top with gummy worms or Halloween sprinkles. Keep cold until ready to serve.
- Mini Jack-o’-Lantern Puddings: Pudding cups with jack-o’-lantern faces drawn on with a marker—so easy to customize!
4. Use Your Freezer and Fridge
Don’t be afraid to put your freezer to work. Almost anything that needs chilling can be prepped early.
- Store cookies, bars, and treats in airtight containers.
- Prep fruit and veggie trays in advance, cover with plastic wrap, and tuck in the fridge.
- Stack decorated cupcakes in a cupcake carrier and pop them out just before you’re ready to eat.
5. Time-Saving Serving Ideas
The trick to getting snacks on the tablescape fast is to use containers and trays that double as decorations. I grab black cauldrons, orange bowls, or even line a tray with fake cobwebs for a fun touch. Little things like cupcake wrappers in Halloween patterns or parchment paper printed with bats make even simple snacks look special.
Tip Table: Make-Ahead Snack Essentials
| Snack Type | Prep Ahead? | How to Store | Festive Twist |
|---|---|---|---|
| Snack Mixes | Yes | Zip baggies or jars | Serve in monster cups |
| Rice Krispie Treats | Yes | Airtight container | Drizzle candy “bandages” |
| Decorated Oreos | Yes | Airtight container | Use candy eyes, sprinkles |
| Yogurt Parfaits | Yes | Fridge, covered | Gummy worms on top |
| Veggie/fruit trays | Yes | Fridge, covered | Cheese “pumpkin” shapes |
Little helping hands make a big difference. When my boys help, they feel proud seeing their own spooky creations on display. It might look like a mini monster party exploded on the table, but the smiles (and full bellies) are so worth it! The truth is, a few prepared snacks and make-ahead tricks turn Halloween chaos into a treat-filled celebration with a tablescape that’s as happy as it is festive.
Tips for Making the Tablescape Stress-Free and Memorable

Whenever I think about setting up a Halloween tablescape, my goal is to keep stress as far away from my kitchen as possible. With three busy boys tossing rubber bats everywhere, I have learned some tricks to make the process painless and fun for everyone involved. When the whole family chips in and things stay easy, the table ends up filled with memories, not mess. Here’s how I pull it all together in a way that feels thoughtful, but actually lets me sit down and enjoy the evening too.
Plan and Prep in Advance

The secret to a smooth Halloween tablescape is doing little bits ahead of time. I learned this lesson after too many years of cutting out ghosts while my kids hovered hungry in the background! A few days before Halloween, I pull out decor, make a simple plan, and get the boys on board.
Here’s what helps:
- Make a short list of what you need (think napkins, centerpiece, plates, small crafty extras).
- Do a quick sweep for what’s already in your seasonal bin.
- Prep decorations the night before or even over the weekend, especially if you’re helping little ones with paint and glue.
When a few things are prepped and ready, you can focus on last-minute touches and actually enjoy seeing everyone’s faces light up at the table.
Keep Decor Simple and Kid-Friendly

Some of my favorite tablescapes are the simplest ones. When you’re styling for Halloween, let the kids drop in their own silly flair. If they want the vampire teeth napkin rings front and center, roll with it! The point is to have fun, not to create a picture-perfect magazine scene. Simple means less to clean up and less to worry about, too.
A few ideas for keeping things easy:
- Use disposable tableware with fun prints (less washing later!).
- Lay down a solid color tablecloth for a quick, festive base.
- Lean into decorations the kids make; they don’t have to match to look great together.
Let Kids Help With Set-Up

I always make the boys part of the decorating crew. It keeps their hands busy while I prep food and helps them feel invested in the whole setup. Plus, I love how proud they are pointing out the decorations they made or arranged.
Ways kids can help:
- Arrange napkins and utensils at each place.
- Place centerpieces or scatter plastic spiders and confetti.
- Add their crafts (like pumpkin faces or ghost garland) to the display.
No one expects perfect napkin folds here, and the wobbly details always become the things we remember.
Use Bins and Baskets to Contain Chaos

Over the years, I’ve started using baskets and bins for nearly everything. Snacks, decorations, or even spare utensils stay in easy reach. This keeps the tablescape looking neat and makes it simple to add or remove items as needed.
Here’s how I use them:
- Divide snacks into little Halloween treat buckets or cauldrons for each child.
- Keep a basket nearby for collecting wrappers or used napkins.
- Use a tray or bin for the “centerpiece zone,” so you can clear space fast for games or dessert.
It’s one less thing to worry about when sticky fingers start flying!
Create Quick-Grab Snack Zones
I noticed that when snacks and treats are easy to grab, kids feel a bit more independent and I cut down on repeating “wait, I’ll get it for you” a dozen times. Set snack bowls and drinks so little hands can reach, and make sure everyone knows where their goodies are.
Simple snack zone ideas:
- Place individual snack cups at each plate.
- Fill one big bowl with “monster mix” in the center for everyone to share.
- Set drinks in spill-proof cups at each spot; you’ll thank yourself later.
Set a Flexible Mood
Some days we get halfway through pizza before anyone notices the decor, and that’s okay! Letting go of the plan and enjoying whatever is happening in the moment keeps things fun for everyone. If the mood shifts or chaos breaks out, don’t stress—just adjust. Sometimes our “spooky dinner” ends with a rowdy costume contest or a spontaneous dance party in the kitchen.
Remember What Matters Most
At the end of the day, a Halloween tablescape is about making memories, not about every bat being in the perfect spot. I remind myself (often out loud) to pause, laugh at the surprises, and appreciate that these noisy, silly years fly by faster than I ever thought possible. When the kids look around and say, “This is awesome!” I know my job is done.
Pulling off a stress-free and memorable Halloween tablescape is just about making the space feel joyful, not flawless. With a little planning, some kid power, and an easygoing attitude, your table really will be the heart of Halloween fun!

Conclusion
Halloween tablescape ideas can turn an ordinary night into a special family tradition that your kids will remember for years. When I see my boys’ faces light up over silly centerpieces and their own little crafts on the table, I know it’s not about having a picture-perfect setup. It’s about laughter, surprises, and the joy we all share as we try something new together.
I hope you feel ready to jump in, try your own spin, and let your kids’ personalities shine through in every detail! If you’ve got a favorite Halloween tablescape trick or a cute photo from your kitchen, share it with us! Thank you so much for reading and spending this time with me—let’s keep building these joyful memories, one tablescape at a time!
This post may contain affiliate links. Read the full disclosure here.