How to Do Pink Pumpkin Painting Ideas for a Cute Fall Twist
If you’re like me and have a house full of busy boys, sometimes you look for something extra sweet and different when fall rolls around. Pink pumpkin painting ideas are my new favorite for adding a cute twist to our usual autumn fun. It’s easy, mess-friendly, and surprises everyone who walks through the door!
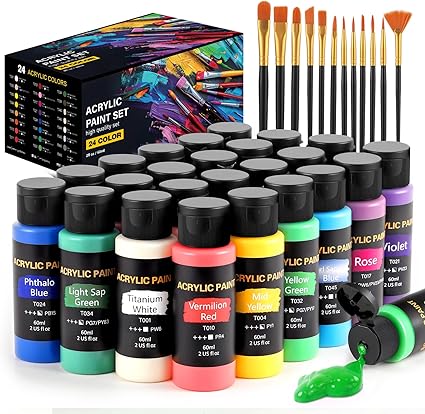
I tried this pumpkin painting kit and the pink pumpkins turned out adorable!
I love bringing my kids into the mix too (even if the paint sometimes goes everywhere), because pink pumpkins turn any family afternoon into something special and memorable.

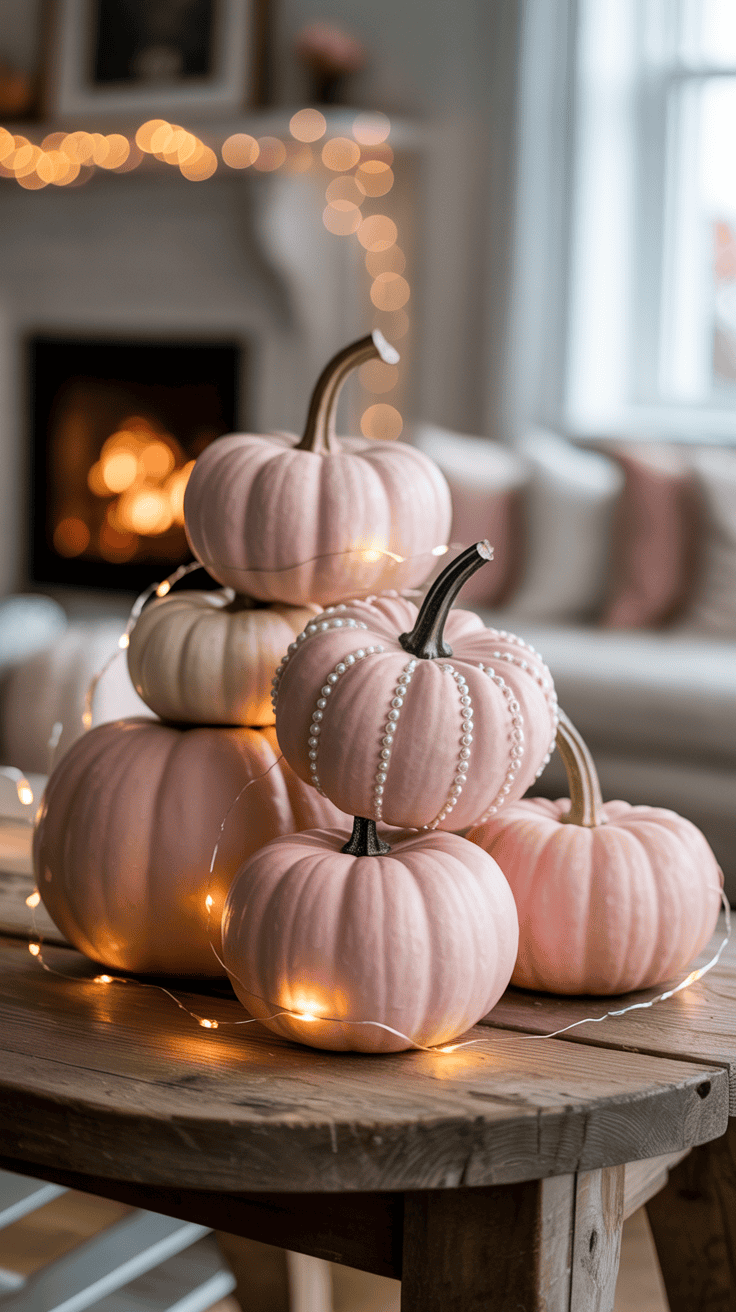
Why Pink Pumpkins? Adding a Whimsical Touch to Fall Decor

I first stumbled on pink pumpkin painting ideas while searching for something that could hold my boys’ attention through a whole afternoon (which is hard to do with three wild ones!) and still give me that sweet, whimsical feeling I love for fall. It’s wild how one simple change in color can turn the classic autumn setup into something charming, easy, and a little bit magical. I’ve been decorating for fall for years, and let me tell you, nothing invites smiles or sparks conversations more than a dash of pink among the usual oranges and browns!
The Fun of Breaking Tradition
I enjoy classic orange pumpkins as much as anyone, but sometimes I want something different. Pink pumpkins are the perfect way to shake up tradition without losing that cozy autumn vibe. They invite you to look twice, maybe even do a little double-take, and that playful surprise never gets old.
It’s fun, too, to see how much the boys love the change. They always pick out their own shades of pink and we end up with everything from soft blush to wild bubblegum. When friends come by, the pink pumpkins are always the first thing they notice!
Pink Is Instant Cheer

Let’s be honest, pink is just so happy. It brings a burst of energy to any room or porch. If the weather has you in a gloomy mood or you’re tired of pumpkin spice everything, try a few pink pumpkins. You’ll see the difference.
Some of the ways pink pumpkins brighten up our home:
- Mixing them with white and gold pumpkins for a sweet, dreamy look.
- Using different shades and patterns keeps it fresh and fun.
- Stacking them up on the porch or dinner table for a playful, eye-catching display.
It’s such an easy way to add joy to the season. Plus, it always makes my boys proud to spot their creations front and center!
Inviting Whimsy While Staying Family-Friendly
Painting pink pumpkins isn’t just about looking cute (though that’s a big part of it!). It feels downright magical to see something so simple turn into the centerpiece of your decor. It also lets the kids in on the fun in a safe, low-pressure way.
I like to keep things family-friendly and mess-light, which can be tricky with little ones. We use washable paints and cover the table with butcher paper. A handful of small brushes and foam sponges makes it easy for even tiny hands to help.
Some of our pink pumpkin painting ideas that always get a laugh:
- Polka dots or heart patterns for extra sweetness.
- Swirls of different pinks – light, dark, and everything between.
- Layering glitter on top (my boys love helping with this part).
Pink Pumpkins Make Any Theme Possible

What’s cool about painting pumpkins pink is that it works anywhere and for any style. Whether your fall vibe is farmhouse, boho, classic, or totally modern, pink pumpkins find their place. I’ve tucked them into:
- Farmhouse baskets with dried wheat.
- Mixed with teal and navy pumpkins for a modern twist.
- Displayed next to crisp white candles and gold leaves.
Plus, with pink pumpkins, you get an easy way to include all family members, boys and girls alike, in decorating. It’s equal parts tradition and new adventure.
Pink pumpkin painting ideas really open the door for creativity. The color alone brings smiles, but the memories you make together with family are the best part!
Getting Started: Supplies & Prep for Painted Pink Pumpkins
Before you jump into all those pink pumpkin painting ideas, you need the right supplies and a bit of prep. Trust me, this is where things either stay fun or turn into a cleanup nightmare. As a mom of three rowdy boys, I know that getting your table ready helps you stay sane and keeps everyone excited, not frustrated! I like to make this part quick, cheerful, and organized so we can get to the good stuff—painting and lots of laughs.
Picking the Perfect Pumpkins
Your canvases matter, but perfection isn’t the goal, fun is! You can use real pumpkins or pick up the faux kind at any craft store. Here are my go-to options:
- Mini pumpkins are great for little hands and quick decorating.
- Medium to large pumpkins give more space for detailed designs or patterns (my boys always fight over who gets the biggest one).
- Foam or plastic pumpkins let you paint days ahead and display them all season without worrying about rot.
I always let each child pick their own pumpkin. This step is part of the fun and gives everyone a little pride in their masterpiece! If you want a whole set for your porch or mantel, mixing real and faux works, too.
Must-Have Painting Supplies
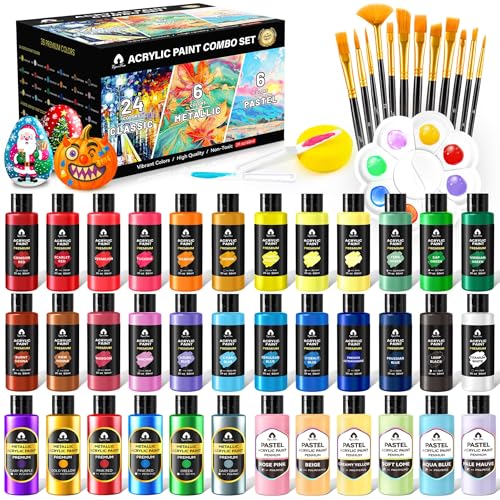
Next up, let’s talk paint! For pink pumpkin painting ideas, a few specific supplies make the process smoother and more fun. Here’s what works best for us:
- Acrylic paint — easy to find and bright on both real and faux pumpkins.
- Washable kids’ paint — perfect for toddlers or if you’re worried about messes.
- Paintbrushes of different sizes — small brushes for details, big ones for covering surfaces fast.
- Foam sponges — these help get a smooth, streak-free base coat.
- Paint palettes or paper plates for mixing different pinks.
- Water cups for rinsing brushes.
- Paper towels or old rags in case things go sideways (and with boys, they always do).
I put all our supplies in a plastic bin so it’s easy to pick up and move around the house or even take outside if the weather’s nice. No fancy materials needed!
Prepping Your Painting Space
Let’s talk about saving your table (and your nerves). A bit of prep makes paint time way less stressful for everyone. Before paint comes out, I always:
- Cover the table with butcher paper, an old sheet, or plastic tablecloth.
- Tape down the corners to keep things from sliding.
- Keep wipes or a wet washcloth close by for quick cleanups.
- Have everyone wear old t-shirts or an apron—no one cries over paint stains that way!
If we’re using glitter or sequins (and my boys ask for it every single time), I set those to the side so they don’t end up everywhere before the paint dries.
Choosing Your Shades of Pink
This is one of my favorite steps. The exact pink I use can completely change the mood—soft pastels feel sweet and cozy, while bright hot pink jumps out and catches attention right away. I’ll set out a few bottles and let the kids pick and mix until we have a whole range on the table. You can even add a drop of white to make your own perfect blush!
Some fun pink options to try:
- Bubblegum pink for cheerful, playful pumpkins.
- Blush pink for a soft, calming look.
- Fuchsia or hot pink for something bold.
- Rose or dusty pinks for a grown-up, farmhouse style.
I also love mixing a touch of gold or white in the paint to create a marbled look. Sometimes my boys want to try their own color blends, which always turns out wild but makes for a super unique pumpkin patch.
Extras to Make It Sparkle
The finishing touches matter! We like to have a basket of extras nearby so once our pink pumpkins have dried, the fun isn’t over yet. Here are some favorites that really make each pumpkin pop:
- Glitter and sequins for extra sparkle.
- Stickers or foam cutouts for quick, no-mess decorating.
- Googly eyes if your kids want silly pumpkin faces.
- Metallic paint pens for adding names or patterns.
- Ribbon, twine, or fabric scraps for tying bows around the stems.
I suggest laying these extras out in small bowls or muffin tins so everyone can reach what they want without knocking over all the supplies. This helps keep the chaos at a minimum (well, almost).
With just a little planning and some cheerful supplies, you’ll find that painting pumpkins pink is simple, special, and memory-making every time.
Creative Pink Pumpkin Painting Ideas to Try With Kids

If there’s one thing that brings out my kids’ biggest grins, it’s trying pink pumpkin painting ideas with them each fall. The look on their faces when they see their pumpkins lined up on the porch or dinner table is just the best. With a few simple supplies and a whole lot of pink paint, you can turn your family afternoon into a whirlwind of laughter and creativity. I love that there are so many ways to keep even the youngest, wiggliest kids happy and busy. Here are my favorite, mom-tested ways to keep things simple, fun, and absolutely adorable.
Easy Ombre Pink Pumpkins for Little Hands
Ombre pumpkins look fancy, but they’re actually one of the easiest pink pumpkin painting ideas for kids. My youngest always wants to try “grown-up” projects, so this is a great way to let even the littlest in on the painting fun. The best part? It’s all about happy accidents with the colors and blending, so there’s no way to mess it up.
Here’s how we do it:
- Pick two or three shades of pink. For young kids, I use washable paints in light, medium, and dark pink.
- Start with the lightest color at the top of the pumpkin. Use a big foam brush or sponge so it goes quick.
- Add the next pink shade halfway down, overlapping slightly where the two colors meet.
- Finish with the darkest pink around the bottom, again blending just a bit at each change.
- Let the kids use a clean, damp sponge to pat gently at the color lines, softening into that ombre effect.
If someone gets a little wild with their brush, just run with it! Every pumpkin comes out unique, and the process is so forgiving. I always remind the kids, there’s no wrong way when we blend colors like this.
Cute Pink Animal Faces
Turning pink pumpkins into animals wins every time at our house. It’s easy, silly, and it never fails to make my kids giggle.
Here’s how to make the cutest pink bunnies or kitties:
- Paint the entire pumpkin pink using your favorite shade.
- For bunny ears: Cut long ear shapes out of pink felt or foam, then tape or glue to the top.
- For kitty ears: Use triangles of felt or even stiff paper. Tape or hot glue is all you need.
- Add faces: Draw a cute nose and mouth with black marker or paint. Go simple—a tiny triangle nose and little whiskers do the trick.
- Add big googly eyes if you want, or glue on felt circles for a softer look.
- Stick on a pom-pom or cotton ball for a bunny tail.
These short-cut steps save time and hassle. You don’t need to master tiny brush details to land a fun animal look. My tip? Have the kids each pick their animal and help them attach the ears (hot glue for older kids, tape for the littles). Everyone loves their creature the most!
Whimsical Polka Dot and Heart Designs

Polka dots and hearts are all about joy, and kids can do them almost without help. This is my “let them go wild” option when their energy is high.
For polka dots:
- Pour pink paint onto a paper plate.
- Hand out cotton swabs, pencil erasers, or round sponges for dipping.
- Tap the tool onto the pumpkin to create dots all over. Go with one color or let them mix several shades.
To make easy hearts:
- Cut a heart shape out of paper to use as a stencil. Tape it gently to the pumpkin.
- Sponge or brush paint inside the stencil for perfect hearts.
- For freestyle hearts, just let the kids paint small hearts with a brush wherever they want.
Mix and match patterns, or stick with one for a simpler look. The pumpkins turn out happy and kid-made, and the kids are always so proud.
Glitter and Glam: Sparkly Pumpkins

Sometimes you just need sparkle! My boys vote for glitter every time, especially if we’re expecting guests to come see our decorations.
To keep it safe and manageable:
- Paint the pumpkin and let it dry slightly.
- Brush on a thin layer of white glue where you want shimmer.
- Sprinkle on glitter or sequins while the glue is still tacky. (Put a tray or plate underneath to catch excess.)
- For less mess, use shimmery or metallic pink paint instead.
Here’s my mom tip—if you cringe at loose glitter, try chunky glitter or pre-glued glitter sheets cut into shapes. It keeps cleanup sane. For the youngest kids, let them watch or stick sequins on with a toothpick and a dab of glue, instead of diving in hands-first.
Floral Fantasy Pink Pumpkins

Nothing says pretty like a pink pumpkin dotted with flowers. Floral patterns make any display look sweet and a bit grown-up, so these are my go-to for something special on the table.
Here’s how I keep it simple:
- Stencil flowers: Use a small pre-made stencil and sponge on white, yellow, or gold paint. Just tape the stencil to each spot and let the kids fill it in.
- Freehand flowers: Have older kids use a marker or thin brush to make five simple petals, then dab a dot in the center.
- Add green swirls for stems or little leaf shapes around the bottom with a paint pen or small brush.
For a fast finish, pick up floral stickers or foam flower cutouts. Let the kids stick them all over their pumpkin once the paint dries, then use them as a cheerful centerpiece.
Every year, our pink floral pumpkins get the biggest “oohs and ahhs” from family and friends, and they make even a weekday dinner feel like a celebration.
Displaying & Enjoying Your Pink Pumpkin Masterpieces
Once our pink pumpkin painting ideas come to life, the fun really begins! I laugh thinking about how my boys always race to see where their pumpkins will get placed. We turn our little creations into the stars of our fall home. Pink pumpkins give every corner a lift, and honestly, displaying them is sometimes even more exciting than the painting part.
With just a bit of cozy styling and a few quick tricks, you can show off your pink pumpkins in ways that keep the whole family beaming. Every kid is proud when their art goes front and center! Let me share my favorite ways to put those pumpkin masterpieces on full display.
Making a Welcoming Porch Display
Nothing says “fall fun lives here” quite like a collection of pink pumpkins by the front door. I love seeing our pink beauties stacked with mums and corn stalks, drawing big smiles from everyone who visits.
Some porch ideas the kids and I love:
- Cluster pumpkins of all sizes on the steps with hay bales and lanterns.
- Mix in white or gold-painted pumpkins for a layered look with extra charm.
- Add a chalkboard sign with a cheerful welcome message.
- Line the walkway with smaller pumpkins for a whimsical path right up to your doorstep.
I let the boys pick which of their pumpkins goes out front — they always choose the wildest ones covered in glitter or googly eyes. If you have room by your door, add soft fairy lights in the evenings to make your display glow. Even on chilly days, you’ll get a warm, happy vibe every time you step outside.
Creating Table Centerpieces That Pop
Kitchen and dining tables come alive with pink pumpkins. This is where I really get to tie in family style with a playful twist. There’s nothing stuffy or fussy about a centerpiece made with kid art!
Here’s how we make ours shine:
- Set painted pink pumpkins on a tray or pretty cake stand in the middle of the table.
- Scatter fake leaves or faux flowers (in soft pinks, whites, and golds) around and between the pumpkins.
- Nestle in little battery tea lights or pillar candles for a warm, cozy feeling at dinner.
- Add mini pumpkins at each place setting so every family member feels special.
Sometimes we use floral napkins or pink placemats to keep the theme going. The boys love seeing their work out during every meal, especially when grandparents come to visit. It turns even simple takeout nights into something festive.
Decorating Mantels and Shelves
Pink pumpkins fit perfectly on mantels and shelves where everyone can admire them. I change up our displays every week so new pumpkins take the spotlight.
How I keep it interesting:
- Alternate pumpkin sizes, shapes, and shades for a layered, full look.
- Mix in framed photos of the kids painting or playing in leaves to capture fall memories.
- Add garlands of felt balls, pom-poms, or fake berries for more color and texture.
- Tuck in little wood signs with happy phrases like “hello fall” or “pumpkin party.”
If you have a bookshelf or entryway table, scatter a few pink pumpkins here too. It’s sweet to spot a cheerful pumpkin when you walk by. We always send photos to distant relatives — everyone loves seeing how the display changes as we make more pink pumpkins.
Cute Gift and Party Favor Ideas
Pink pumpkins are just too sweet not to share! Every year, we end up painting more than we need, so we turn extras into thoughtful gifts for teachers, friends, or neighbors.
Some easy ideas for spreading the pink pumpkin love:
- Tie a ribbon or jute twine around the pumpkin stem. Add a handwritten tag with a kind note or the child’s name.
- Use mini painted pumpkins as party favors at a fall birthday or classroom treat.
- Deliver a little “thinking of you” pumpkin to a loved one along with a baked treat or hot cocoa packet.
It feels good for the kids to give something they made with their own hands. I’ve even snuck a few into care packages for family far away — they travel well if you use faux pumpkins and plenty of bubble wrap!
Pink Pumpkins for Play & Learning Corners
Pumpkins aren’t just for grown-up displays. Set up a basket of mini pink pumpkins in your playroom, reading nook, or homework spot for some extra fall joy.
Why this works so well:
- Kids get to admire their art every day and feel proud of their creations.
- Pumpkins double as counting tools or props for stories and games.
- It brightens up practical spaces with a bit of imagination and seasonal fun.
My youngest sometimes turns his into “pumpkin friends,” lining them up to watch while he colors or reads. It’s so simple but adds real magic to our everyday routine.
Seasonal Vignettes Your Kids Will Love
Sometimes it’s the smallest details that make a home feel extra special. I create little pumpkin groupings on side tables, windowsills, and bathroom counters.
Tips for playful pink pumpkin vignettes:
- Combine with other fall decor like acorns, mini scarecrows, or little animal figurines.
- Layer pumpkins with family heirlooms or favorite holiday trinkets.
- Change up the arrangement each week to keep things fresh and let every child’s pumpkins shine.
Kids love spotting their creations in new spots around the house. It makes them feel seen and appreciated—and honestly, it gives me little bursts of happiness to spot a pink pumpkin while brushing my teeth or making coffee in the morning.
Capturing the Memories
Last but not least, don’t forget to capture your pink pumpkin painting ideas with photos! I always snap some quick pictures of the boys with their pumpkins. Over time, this turns into a sweet record of how their skills (and personalities) grow, one pumpkin at a time.
Some fun ways to save the memories:
- Make a quick fall photo collage of each year’s creations.
- Frame a favorite shot for your mantel or gallery wall.
- Create a “pumpkin painting” scrapbook page with photos, paint swatches, and funny quotes from the kids.
Years from now, you’ll look back and smile at the wild patterns and glitter explosions. Pink pumpkin masterpieces are more than just decorations—they’re memories you’ll all treasure.
Let your family’s creativity brighten every little corner. The smiles (and giggles) are always worth it!
Tips for Hosting a Pink Pumpkin Painting Party

If you’re ready to turn your pink pumpkin painting ideas into a family event, there’s nothing sweeter than inviting friends or neighbors over for a painting party! I’ve hosted a few of these with my three boys (plus half the neighborhood) and let me tell you, it’s wild but so much fun. Keeping things simple but special is the key. With a little planning and a lot of excitement, you can turn your home into a hub of laughter, paint splatters, and pink pumpkins for everyone to take home.
Picking the Perfect Date and Guest List
Choose a weekend or after-school slot when the kids are full of energy and everyone has time to stay awhile. Keep your list small if you want a more relaxed vibe, or invite the class if you’re feeling brave! I like to stick to about six to eight kids so things stay somewhat under control, but you know your crew best. Invite other moms to help or join in for coffee and chatting while the kids create.
Setting Up a Mess-Friendly Space
Every good pink pumpkin painting party starts with damage control! I always move our kitchen table toward the center of the room or set up folding tables outdoors. Cover every surface with a plastic tablecloth or butcher paper, and don’t forget the floor if you’ve got little ones who love to fling their brushes.
- Set up a paint station for each child with their own pumpkin, a few brushes, and a paper plate palette.
- Keep baby wipes or damp washcloths within reach for quick cleanup.
- Have aprons or old shirts ready for every guest (this keeps everyone smiling, not worrying about stained clothes).
If you’re short on space, consider using the garage or patio. Fresh air helps with both paint fumes and wild laughter!
Organizing Your Supplies for Easy Sharing
I rely on bins, trays, and muffin tins to keep the pink paint party running smoothly. Place all the paint bottles in the middle of the table so kids can grab what they need. Share extras like glitter, stickers, and googly eyes by sorting them into muffin tins or little bowls—easy to pass and less likely to tip over.
Here’s what works best for parties:
- Mini pumpkins so every child finishes at least one.
- Variety of paints: Have three to five shades of pink (bubblegum, blush, hot pink, etc.) to let the kids pick their favorites.
- Assorted brushes and sponges
- Accessories: Stickers, glitter, felt pieces, sequins, markers, and more
- Disposable aprons: Especially helpful if you want to save your laundry pile!
- Plenty of cups for rinsing brushes
If a child doesn’t want pink, let them branch out. Sometimes my boys will sneak blue or green into their pumpkin just because. The more choices, the more creative everyone feels.
Keeping the Little Artists Entertained
Painting parties can get rowdy, so plan a few go-to ideas to keep the fun rolling. I like to start by showing off a finished pink pumpkin or two, then talk the group through one easy project (like ombre pumpkins or hearts and dots). It sets the stage and makes kids less nervous about getting started.
Rotate these kid-friendly activities:
- Painting contest or parade (no prizes needed, just lots of cheering)
- Photo booth with pumpkin props
- Story time: Read a silly pumpkin book while pumpkins dry
Let kids mingle and watch each other’s process. You’ll be amazed by how much they learn just by comparing pumpkins! Parents often end up jumping in, too.
Snack Time and Drinks
A great pink pumpkin painting party needs snacks! Keep it simple. I like to fill a tray with mini sandwiches, fruit, pretzels, and a few cookies. Add pink lemonade or strawberry milk for that perfect extra touch.
Some favorites from our parties:
- Shaped sugar cookies with pink frosting or edible glitter
- Cheese cubes and crackers (kids always come back for seconds)
- Sliced apples with caramel dip
- Pink-themed paper plates and napkins
Make a special snack station apart from the painting area so sticky fingers don’t end up on pumpkins. Trust me, it saves you a lot of “oops!”
Show Off Everyone’s Creations
When everyone is done painting (usually after about 30 minutes to an hour), set up a “gallery” by lining the pumpkins up on the porch or kitchen counter. Snap photos of each kid holding their masterpiece. If you have instant film, pictures make a special take-home. Let the kids choose their favorite spot to display their pumpkins before heading home.
- Offer small bags for extras like stickers or treats to go along with the pumpkin
- Send guests home with their pumpkins wrapped in brown paper or nestled in a reusable tote
These little party touches make the day unforgettable for both the kids and their grownups.
Easy Cleanup for Maximum Fun
Once the party winds down, round up paint cups, brushes, and palettes for fast rinsing. Roll up the tablecloth, toss it (if disposable), and wipe down any remaining colorful splatters. I like to put on fun music during cleanup so even picking up feels like part of the party.
With bright smiles, new pink pumpkins, and memories for days, your painting party is sure to be a hit! Pink pumpkin painting ideas feel extra special when shared with friends—and I promise, your kids will ask to do it again every fall.

Conclusion
Pink pumpkin painting ideas bring so much fun and warmth to our fall days. There’s nothing like sitting with my boys, sharing giggles, and making a big, happy mess with shades of pink. Every pumpkin we finish holds a memory, a proud smile, and a little piece of our family’s story.
It’s easy to get caught up in busy schedules, but these tiny traditions fill our home with laughter and cheer. Moms, I encourage you to grab some pumpkins, invite the kids, and just go for it! No matter how the paint ends up (and it will end up everywhere), you’ll make something sweet and lasting together.
Thank you for stopping by and spending part of your fall with my family’s favorite project. I’d love to see your pink pumpkin creations or hear about your own pink pumpkin traditions in the comments below! Let’s share the joy, one pink pumpkin at a time!
This post may contain affiliate links. Read the full disclosure here.